Sciberia Loader
0. About the Product
Sciberia Loader - software designed to store, retrieve, and transmit medical images in DICOM format from various medical equipment manufacturers. Sciberia Loader operates using the DICOM protocol, supports Query/Retrieve service operations, and functions as both a DICOM server (SCP) and client (SCU) in DICOM networks.
0.1. Functionality
Functionality:
The software allows viewing DICOM medical study data.
The software functions as a DICOM network server (SCP).
The software acts as a DICOM client (SCU).
The software facilitates migration of medical images between any DICOM nodes.
The software enables searching the study database based on selected criteria.
The software allows filtering studies based on selected criteria.
The software supports loading local archives.
The software supports synchronization of medical images between any DICOM nodes.
Note
DICOM Node - any PACS servers, diagnostic equipment from various manufacturers, DICOM viewers.
0.2. System Requirements
Minimum Requirements |
Recommended Requirements |
|
|---|---|---|
Processor |
4 cores, 2.0 GHz clock speed |
8 cores, 2.0 GHz clock speed or higher |
RAM |
DDR4 8 GB |
DDR4 16 GB or more |
Operating System |
|
|
0.3. Installation
To install the program on Windows 8+ and Linux operating systems, follow these steps:
Unzip the program file;
Navigate to the “app” folder and run the file named “Loader.exe”.
To install the program on macOS, follow these steps:
Open the ‘Loader.dmg’ file and move ‘Loader.app’ to the ‘Applications’ folder;
Carefully read the license agreement. If you accept the terms of the license agreement, select ‘Accept’.
0.3. License Activation
When launching the program without a license, the activation window appears first.
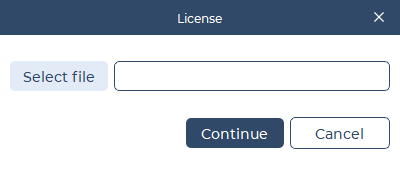
To activate, you need to upload the license file by clicking on the ‘Choose File’ button.
At the bottom, there are 2 buttons:
«Cancel» button - quits the program.
«Continue» button - activates the selected license.
The license is activated once for the entire duration.
1. Main Window
The main window consists of data input fields and tables in a dual-panel mode:
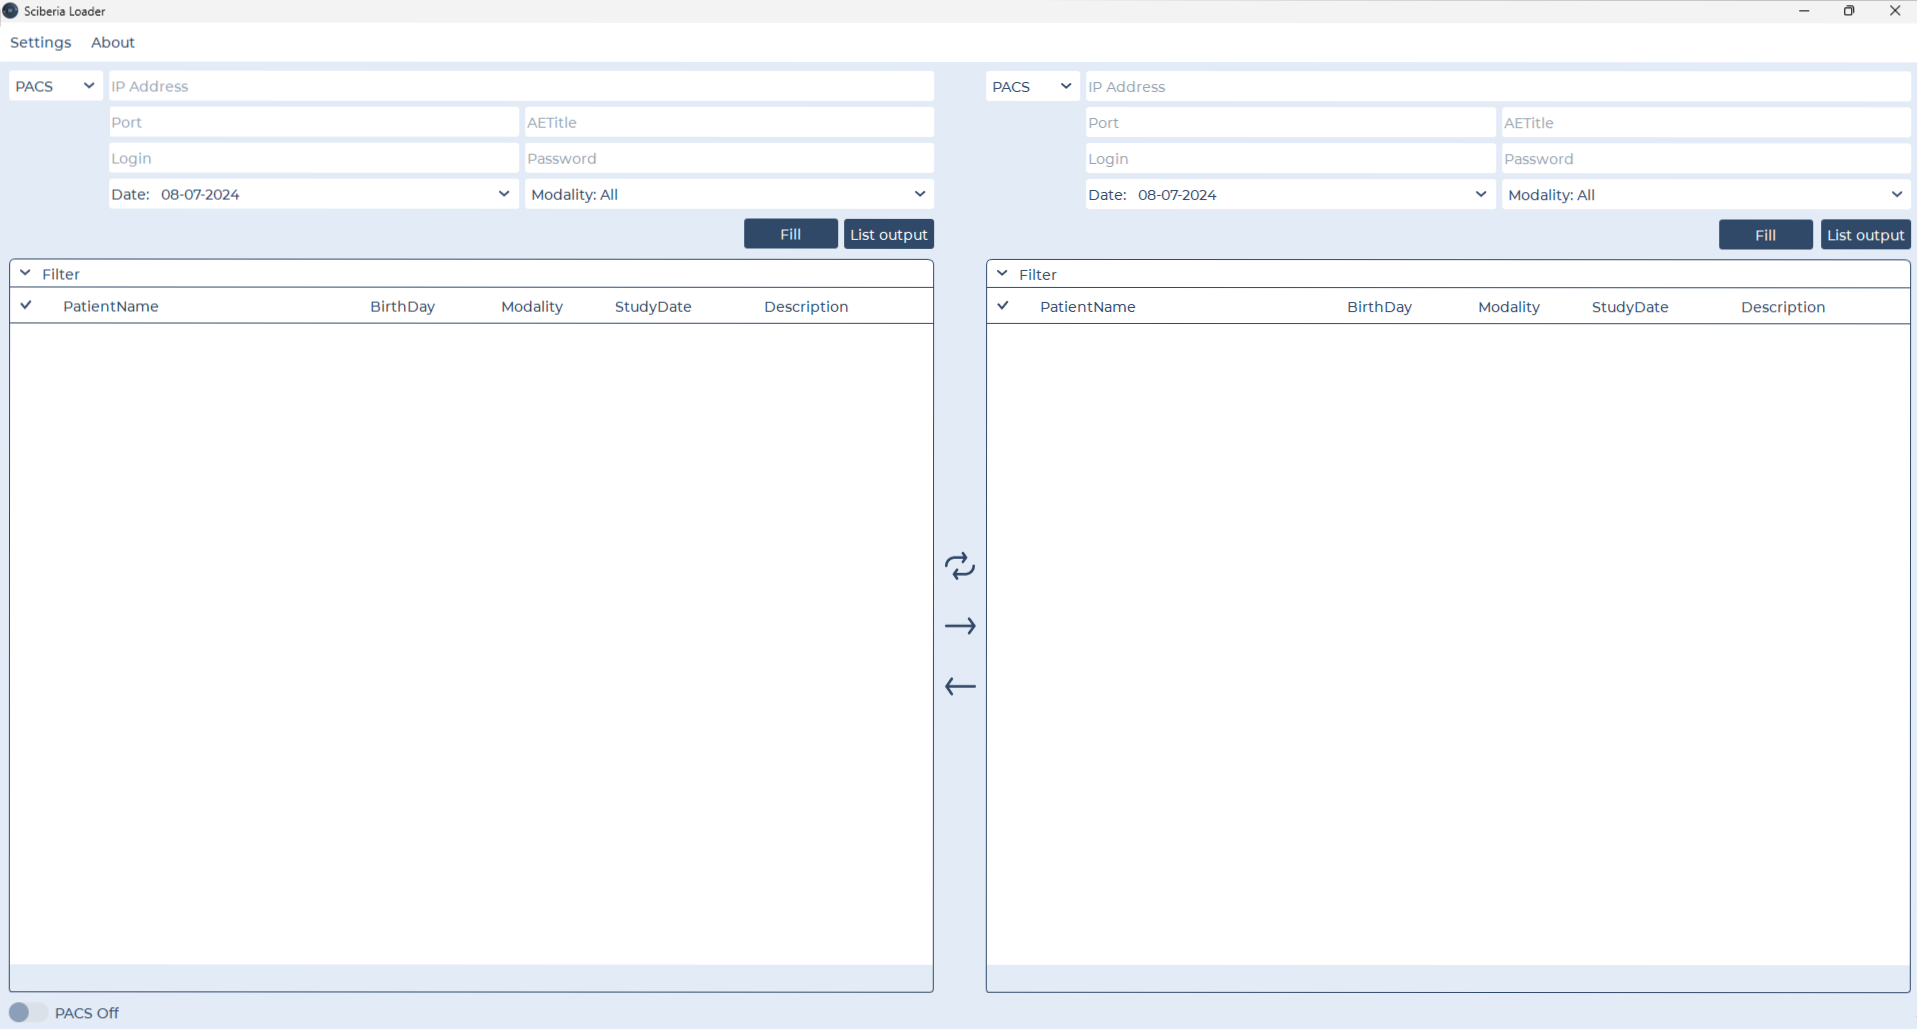
Input fields vary depending on each connection.
The Filter allows filtering studies by patient name. To filter studies, click on Filter, enter the patient’s name or study name in the search field, then click Search. To clear entered data, simply click Clear and then Filter to collapse the search field.
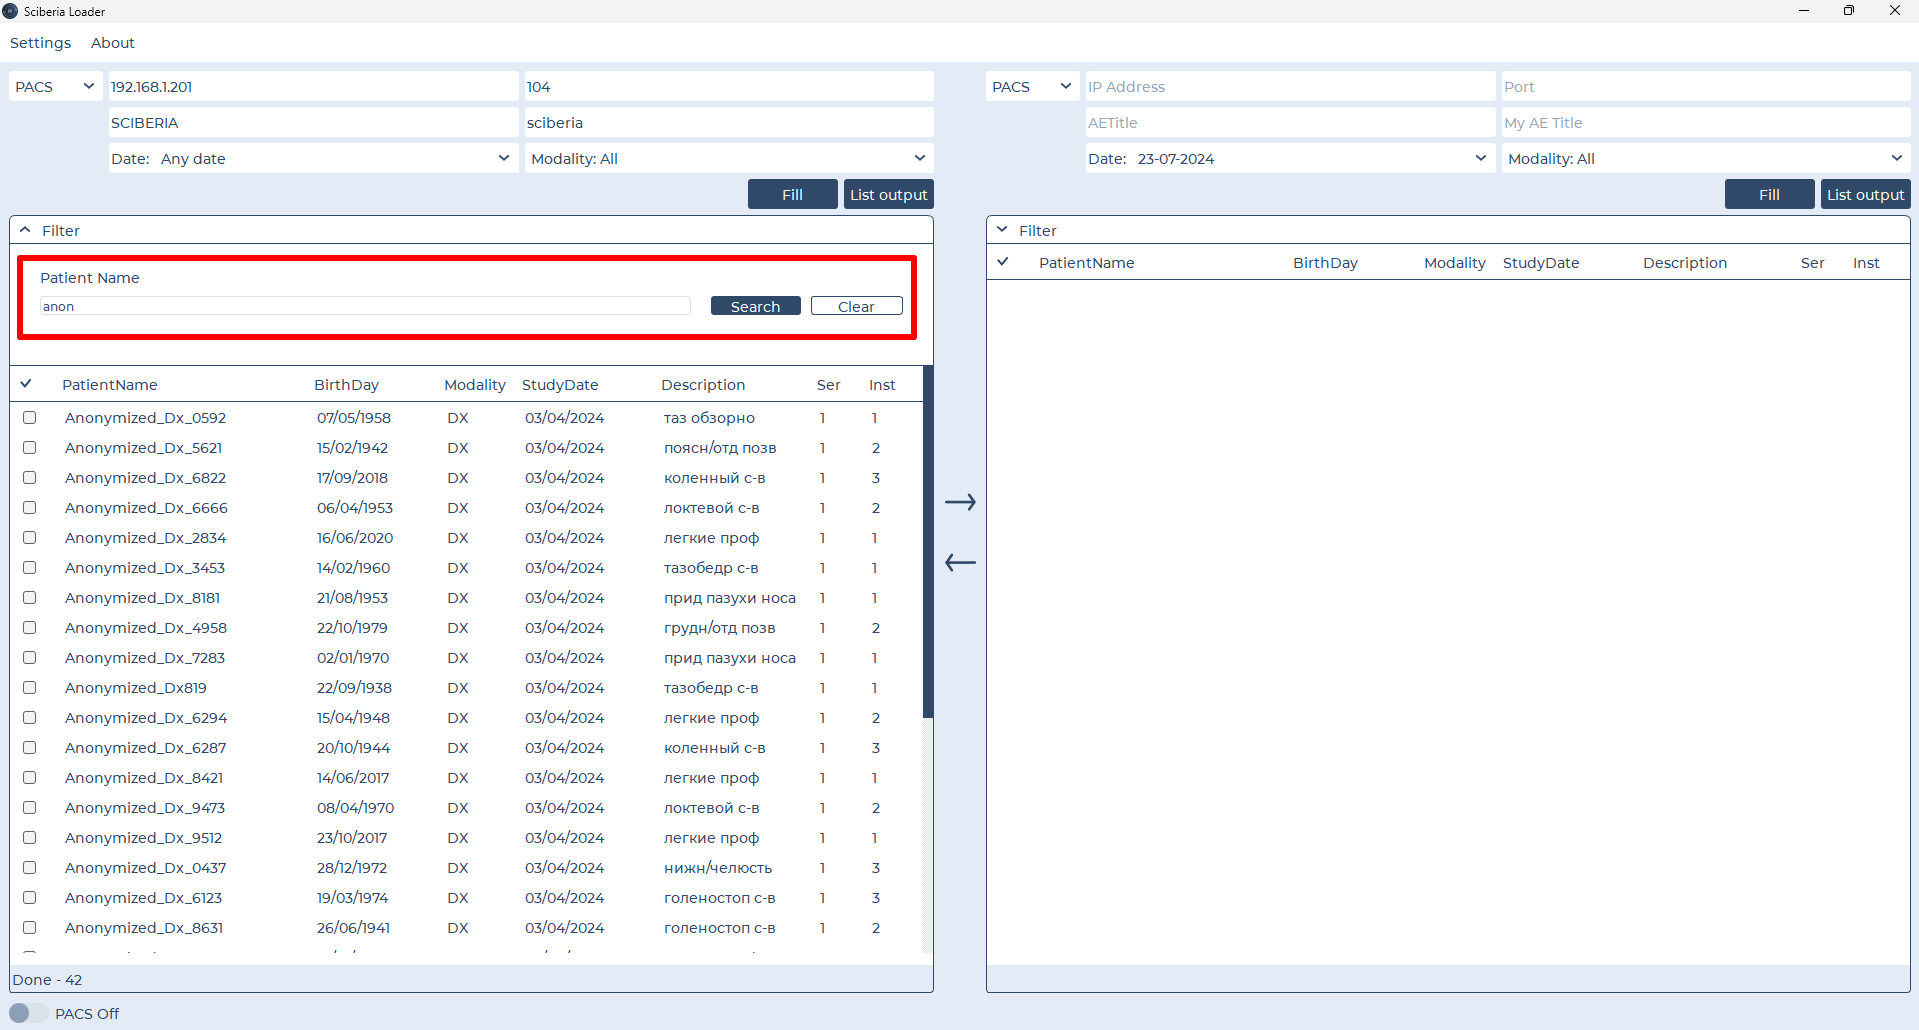
Table offers several display options for each connection:
When connected to a PACS server (PACS connection), the table includes the following default fields:
Patient Name |
Date of Birth |
Modality |
Study Date |
Description |
|---|---|---|---|---|
Patient’s full name |
Patient’s date of birth |
Study modality |
Date of study |
Study description |
When connected to a remote physician’s workstation (SSH connection), the table includes the following default fields:
Name |
Size |
Date |
|---|---|---|
File Name |
File Size |
File Creation or Last Modified Date |
The «Number of Studies» displays the amount of studies in the connected session. There is also a status showing the current loader activity: number of studies sent - «Slices Sent» and progress status - «Done».
1.1. System Tray
The system tray, also known as the notification area, is one of the elements in the taskbar where running programs that are not used constantly are displayed.
In the software settings, there is an option to enable/disable the system tray in the notification area on the taskbar.
Example of display for macOS:

Example of display for Windows:

2. Connection
There is an option to connect to a PACS server or a remote physician’s workstation (Automated Workplace) from a selectable list.

Connection |
Description |
|---|---|
PACS |
Connect to a remote PACS server or medical equipment. |
SSH |
Connect to a remote physician’s Automated Workplace. |
Local |
Workstation where the loader is installed, local Automated Workplace. |
In addition to manually entering parameters, there is automatic parameter filling (button ![]() ).
).
When you click the ![]() button, a window with previously registered connections will appear. Choose the necessary source and click OK, or click Cancel. Connection registration is available in the Location settings.
button, a window with previously registered connections will appear. Choose the necessary source and click OK, or click Cancel. Connection registration is available in the Location settings.
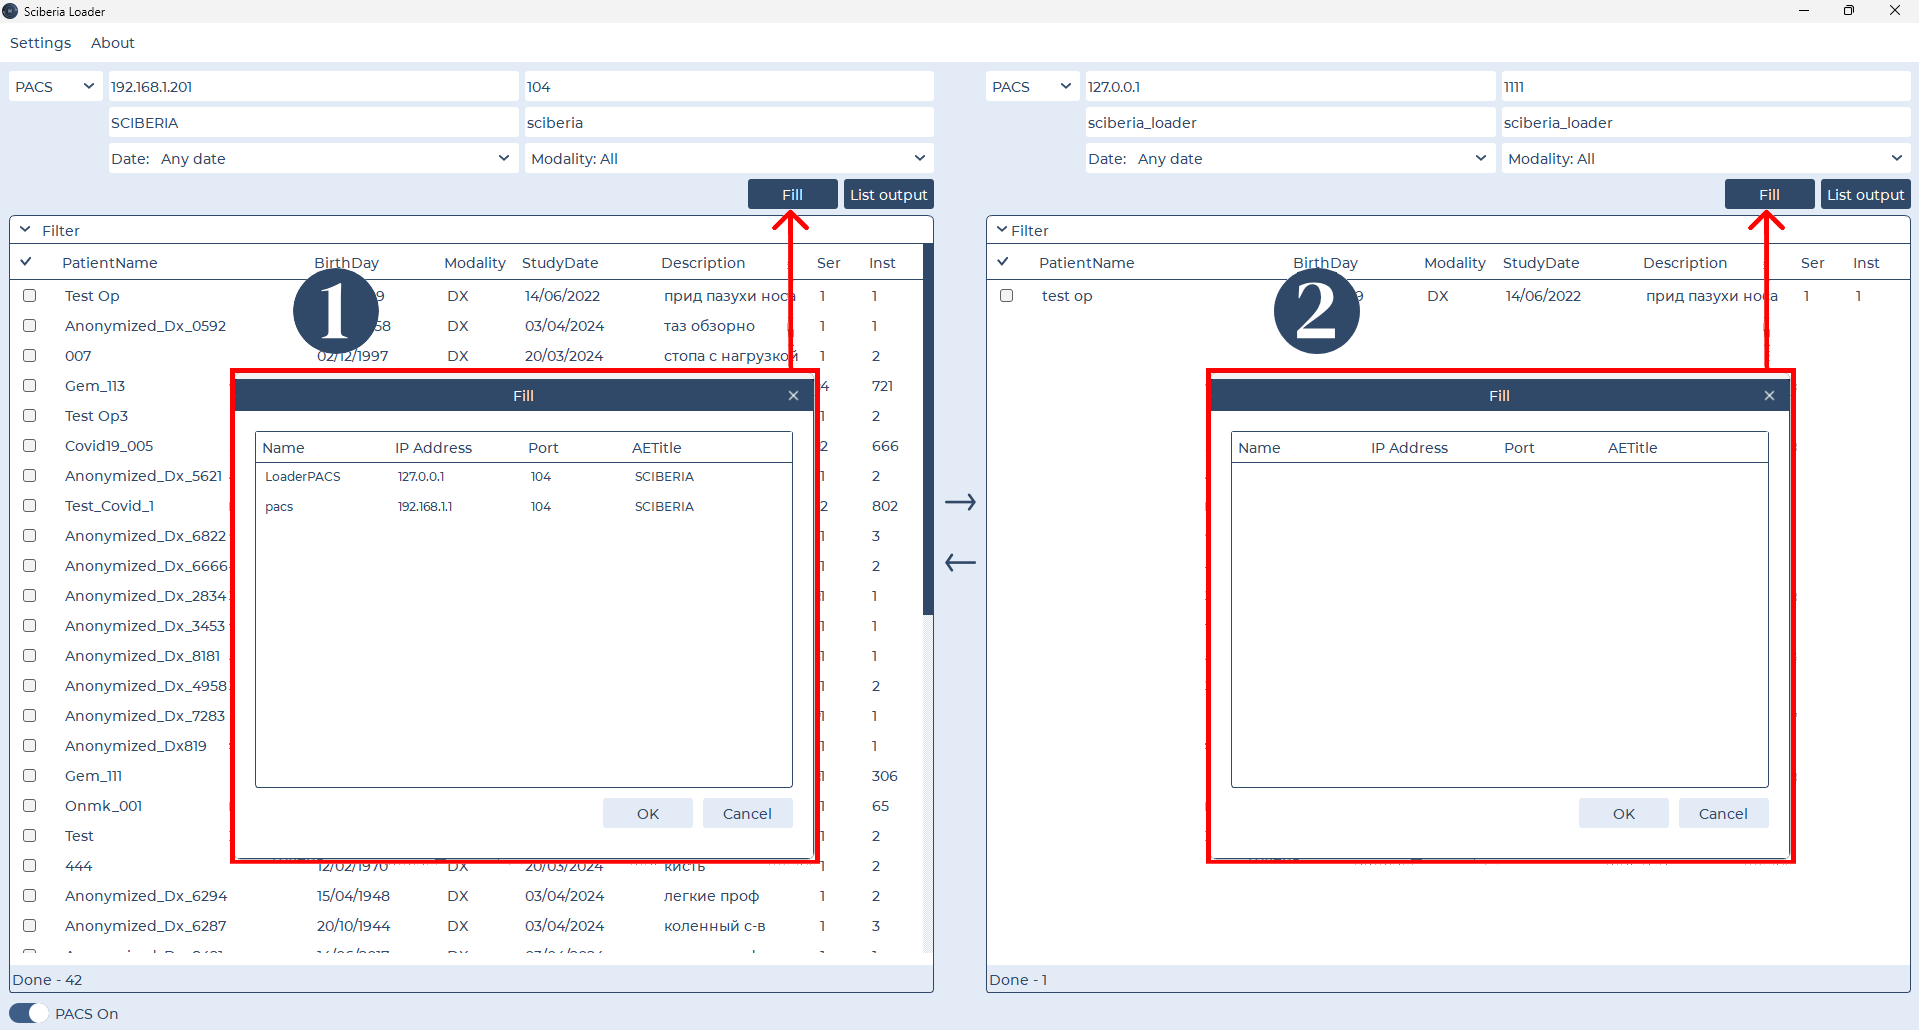
To connect to the selected connection source and display the list of studies, click the ![]() button.
button.
When a successful connection is established, the loader receives studies from the remote source (PACS servers, physician’s workplaces), saves them to the local Automated Workplace, or transfers them to the registered source.
2.1. PACS Connection
To connect to a PACS server, select ![]() from the list and enter the connection parameters in the input fields. You can also set filters for studies based on date and modality.
from the list and enter the connection parameters in the input fields. You can also set filters for studies based on date and modality.
Field |
Description |
|---|---|
IP Address |
IP Address of the PACS server/medical equipment. |
Port |
Port of the PACS server/medical equipment. |
AE Title |
AE Title of the PACS server/medical equipment. |
Login |
Login. |
Password |
Password for the connection. |
To automatically fill in parameters, click the ![]() button.
button.
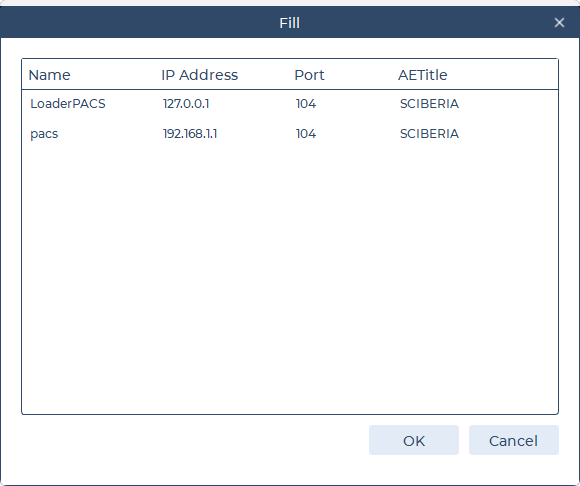
In the window that appears, select the registered source you need and click OK, or click Cancel.
Then click the ![]() button.
button.
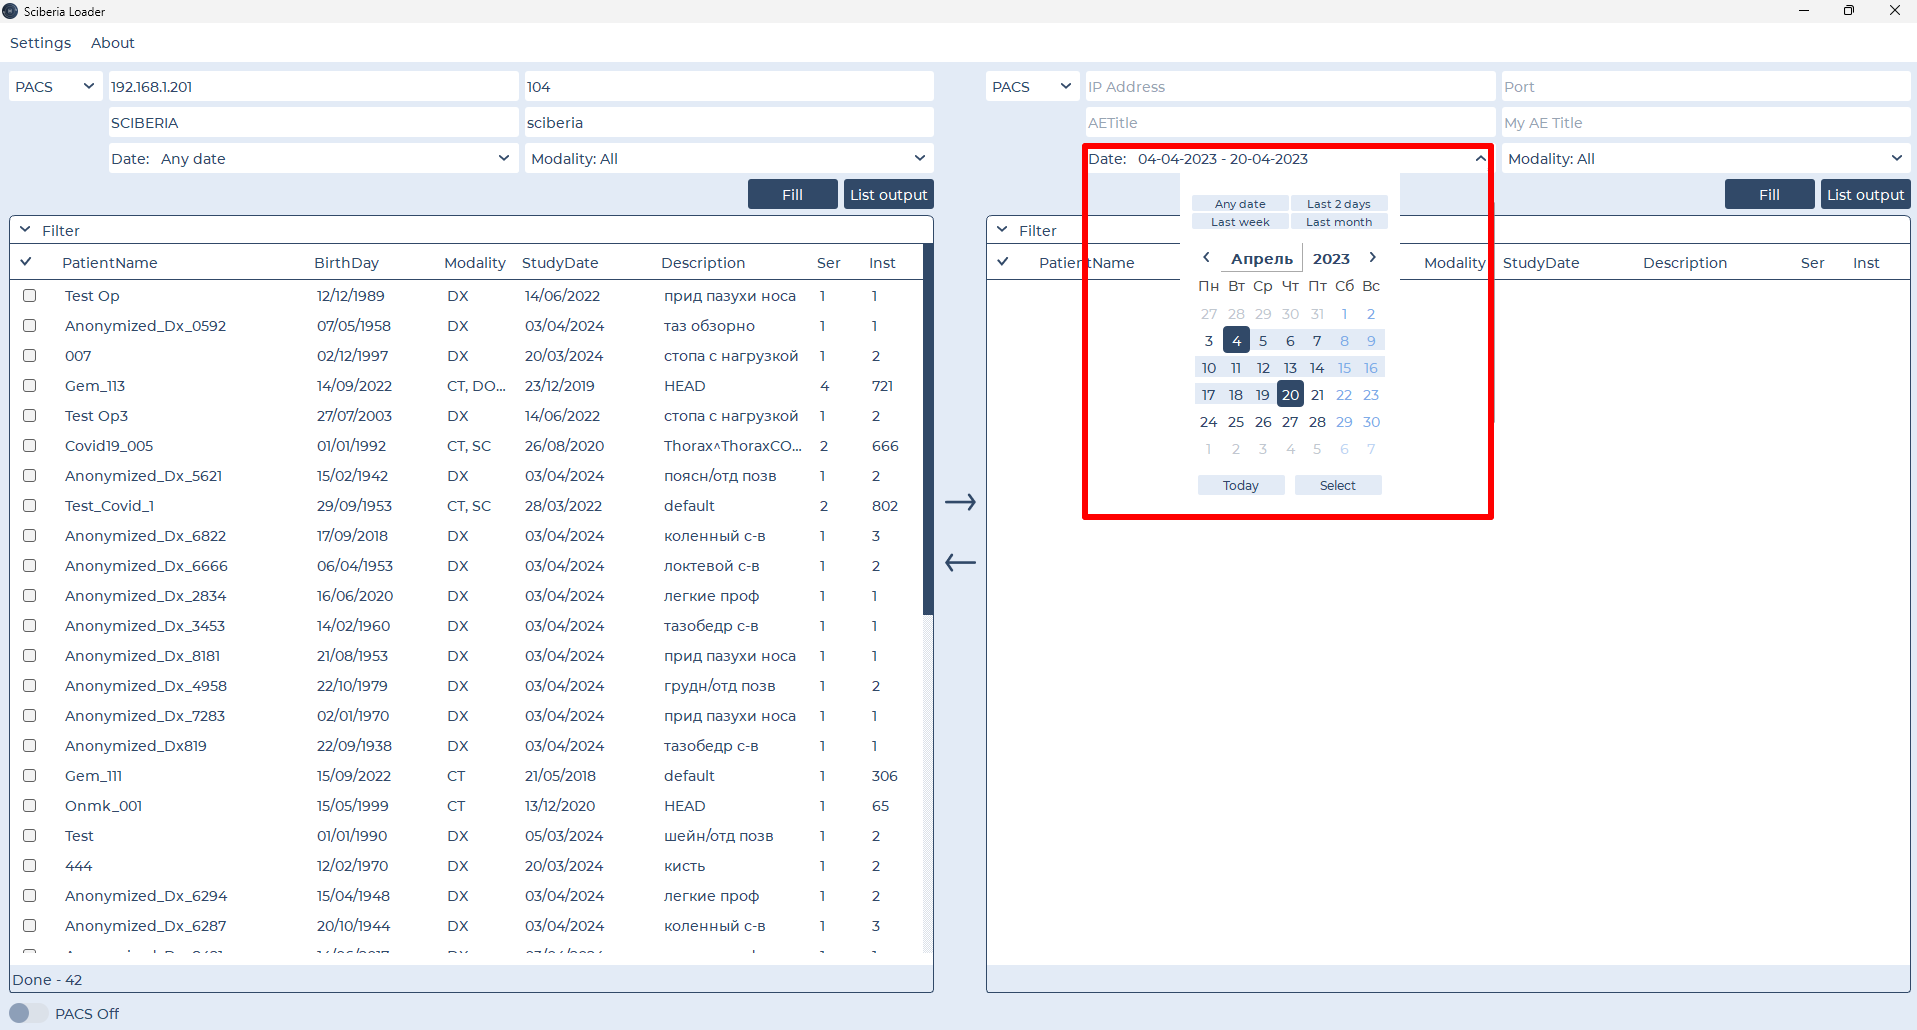
To filter studies by date, click ![]() and in the calendar that appears, select the month, date, or specify a range of days (start and end). You can also use predefined templates. After making your selection, click Select in the calendar.
and in the calendar that appears, select the month, date, or specify a range of days (start and end). You can also use predefined templates. After making your selection, click Select in the calendar.
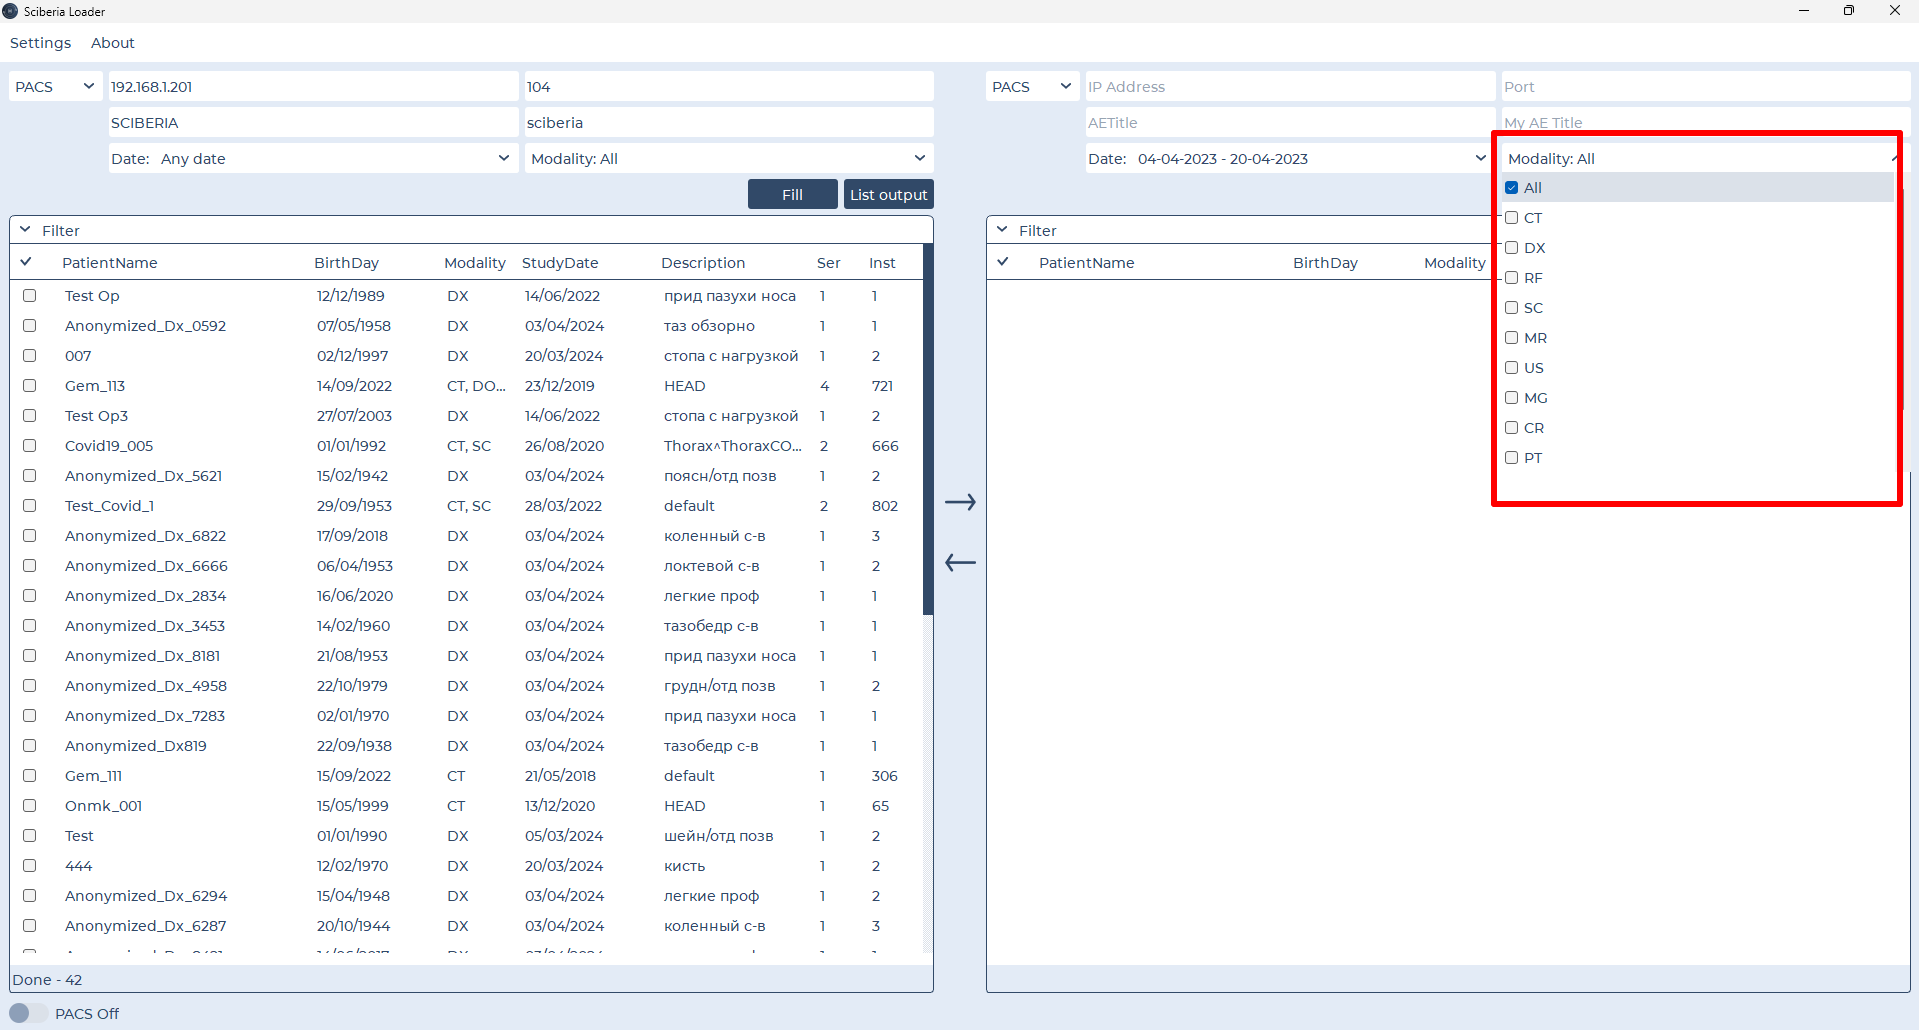
To filter studies by modality, click ![]() and in the list that appears, select the desired modality or multiple modalities.
and in the list that appears, select the desired modality or multiple modalities.
2.2. Physician’s Workstation Connection
Connect to a remote physician’s Automated Workplace via SSH protocol.
Note
SSH (Secure Shell) is a network protocol that allows connecting to a remote server and executing commands on it, transferring files.
To connect to a remote Automated Workplace, select ![]() from the list and enter the connection parameters in the input fields.
from the list and enter the connection parameters in the input fields.
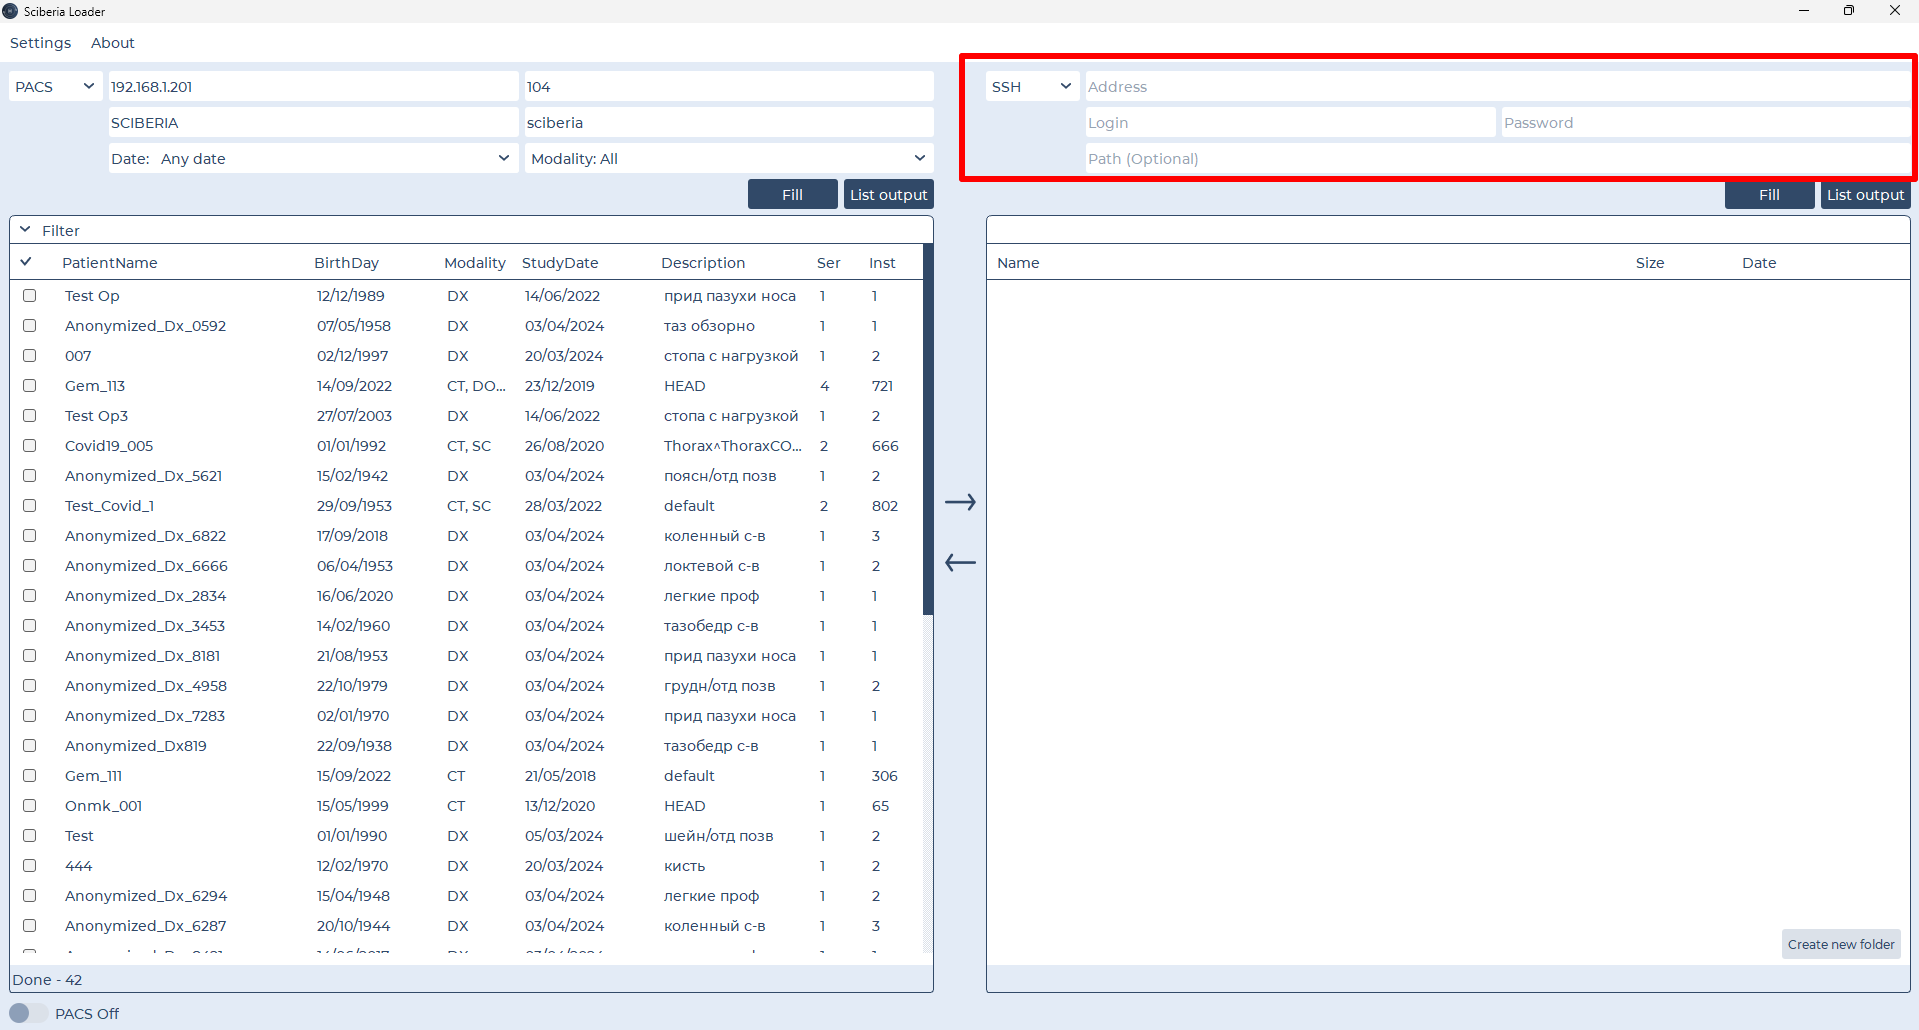
Field |
Description |
|---|---|
Name |
Name of the remote physician’s Automated Workplace. |
IP Address |
IP Address of the remote physician’s Automated Workplace. |
Login |
Login for connecting to remote doctor’s workstation (ARM). |
Password |
Password for connecting to remote doctor’s workstation (ARM). |
Folder path |
Path to the folder where the necessary studies are located. Optional field. |
To automatically fill in parameters, click the ![]() button.
button.
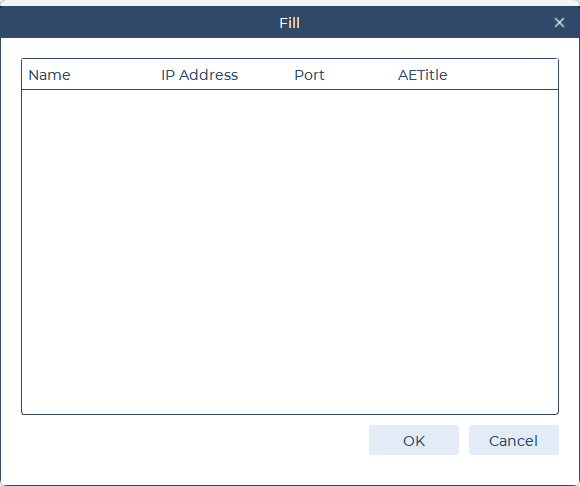
In the window that appears, select the registered source you need and click OK, or click Cancel.
Then click the ![]() button.
button.
2.3. Local ARM
Local (local ARM) - stationary ARM used for work.
To enable software access to the local ARM, select ![]() from the list.
from the list.
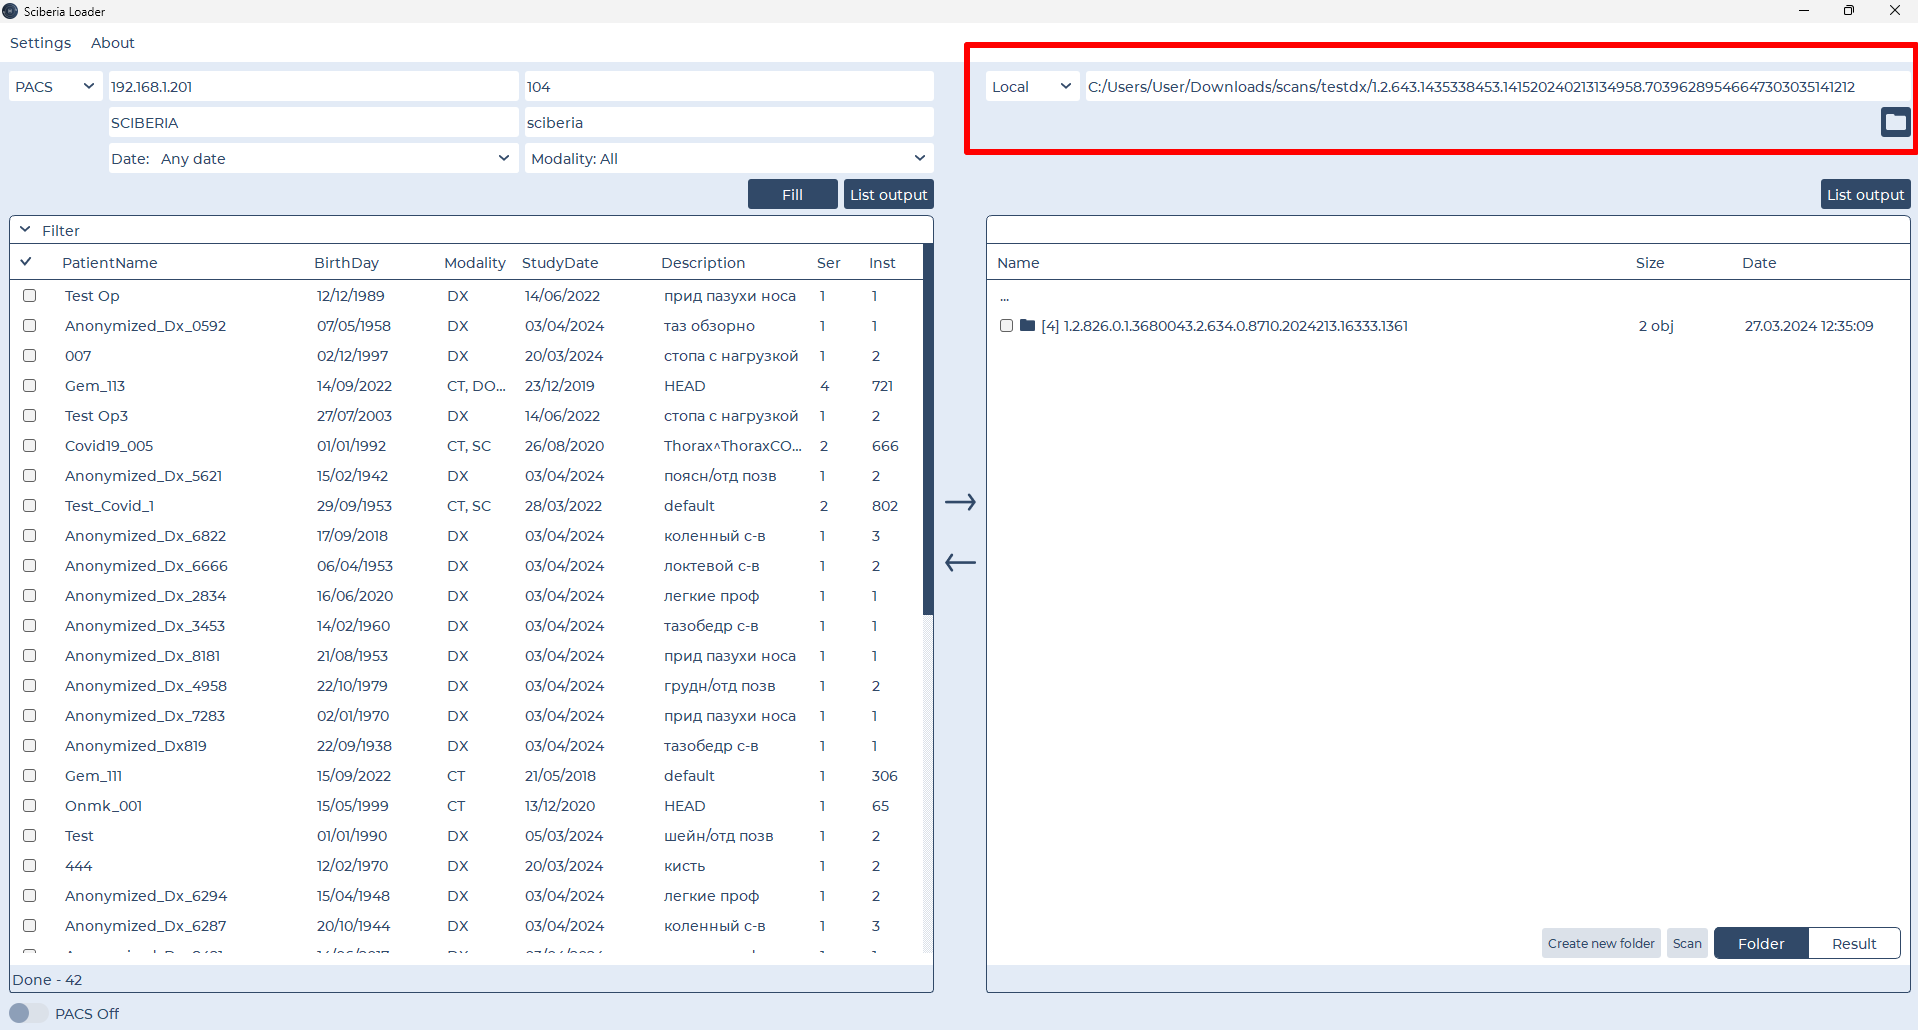
There are two ways to access studies:
In the Path field, specify the path to the folder with studies.
Click on
 and in the opened file browser, select the folder with studies.
Then click the ![]() button.
button.
2.3.1. Creating a new folder
There is an option to create a new folder in the local ARM using the loader. To do this, click on the New folder button and specify the folder name in the pop-up window, then click OK, otherwise Cancel.

2.3.2. Folder scanning
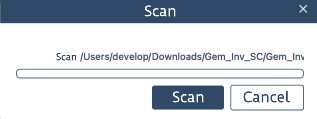
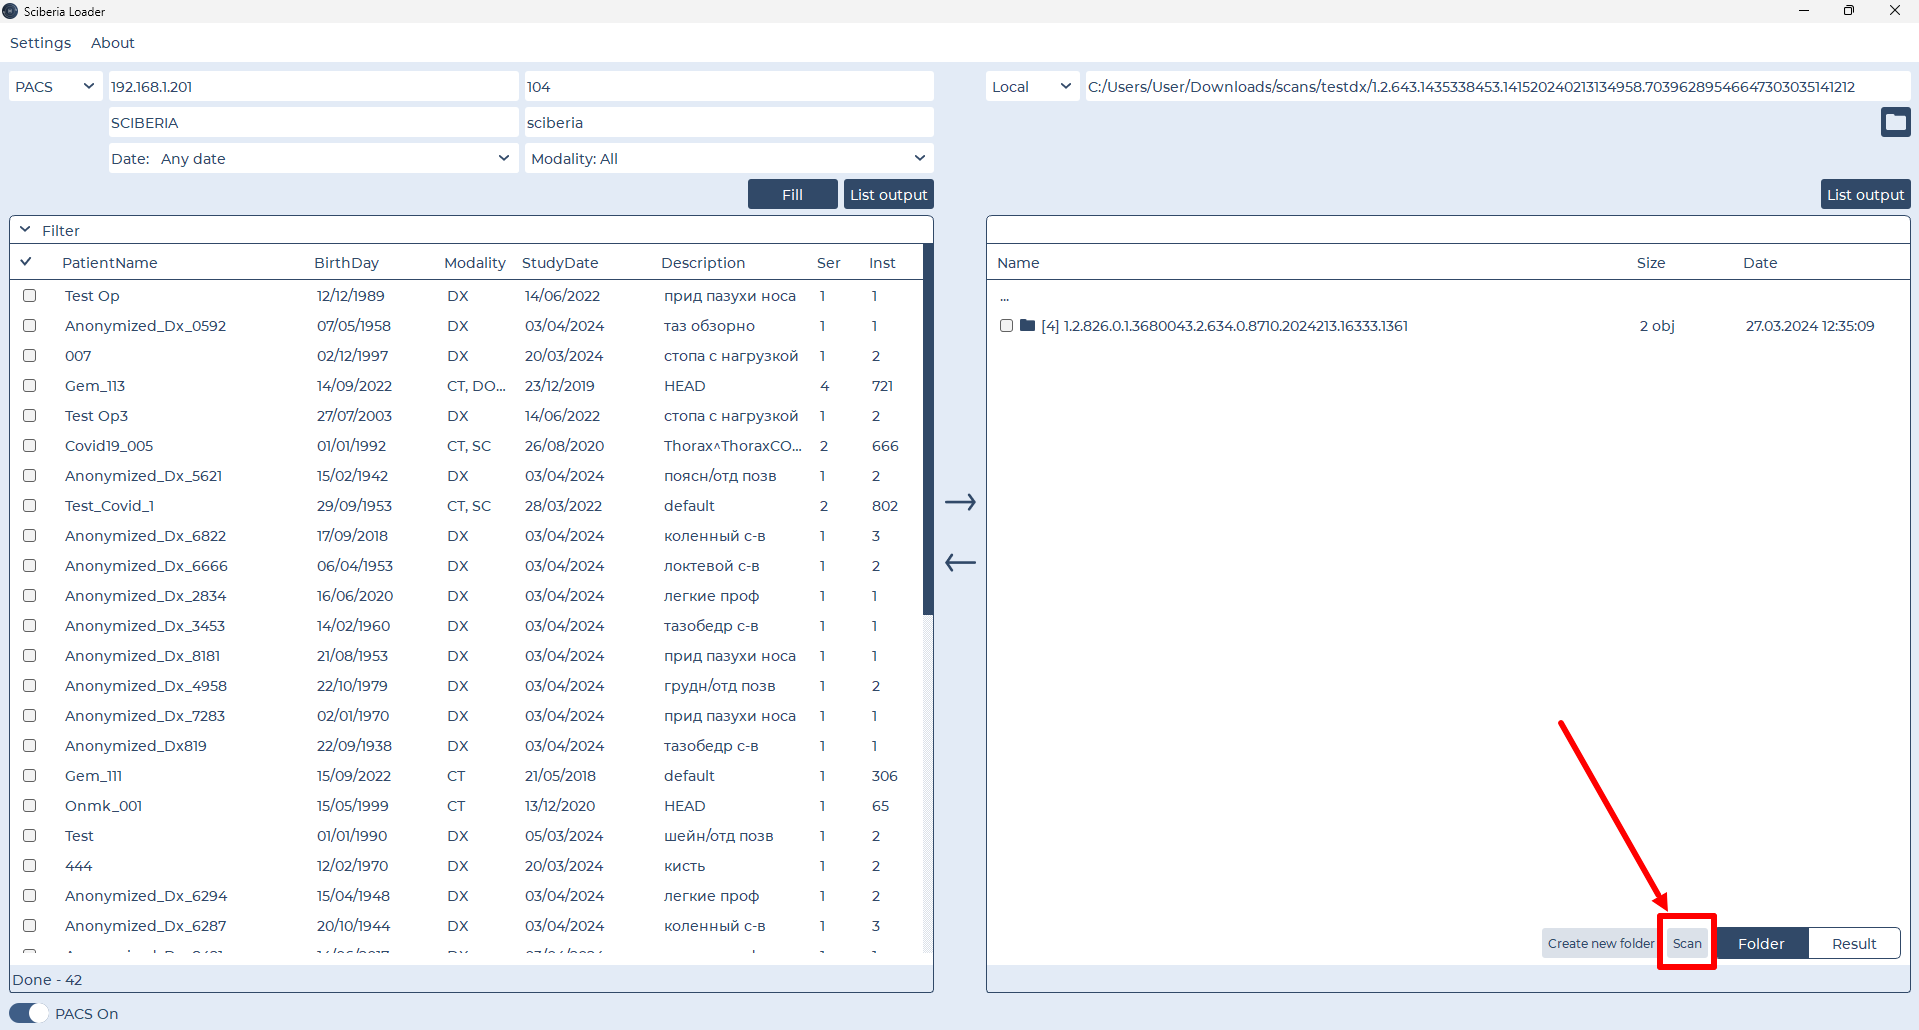
To scan the folder for existing studies, select the desired folder (or multiple at once) and click Scan. Then, in the pop-up window, click Scan, otherwise Cancel.
The scanning results will be automatically displayed in the software window:
To switch between scanning results and the local ARM, use the switch ![]() .
.
The active button in the switch ![]() means that the local ARM folder is open.
means that the local ARM folder is open.
The active button in the switch ![]() means that the scanning results (found studies) are displayed in the window. By default, the latest (recently performed) scan result is available.
means that the scanning results (found studies) are displayed in the window. By default, the latest (recently performed) scan result is available.
3. Starting Loader’s PACS Server
To enable the loader to receive requests for study transfers, click the slider ![]() in the bottom left corner:
in the bottom left corner:
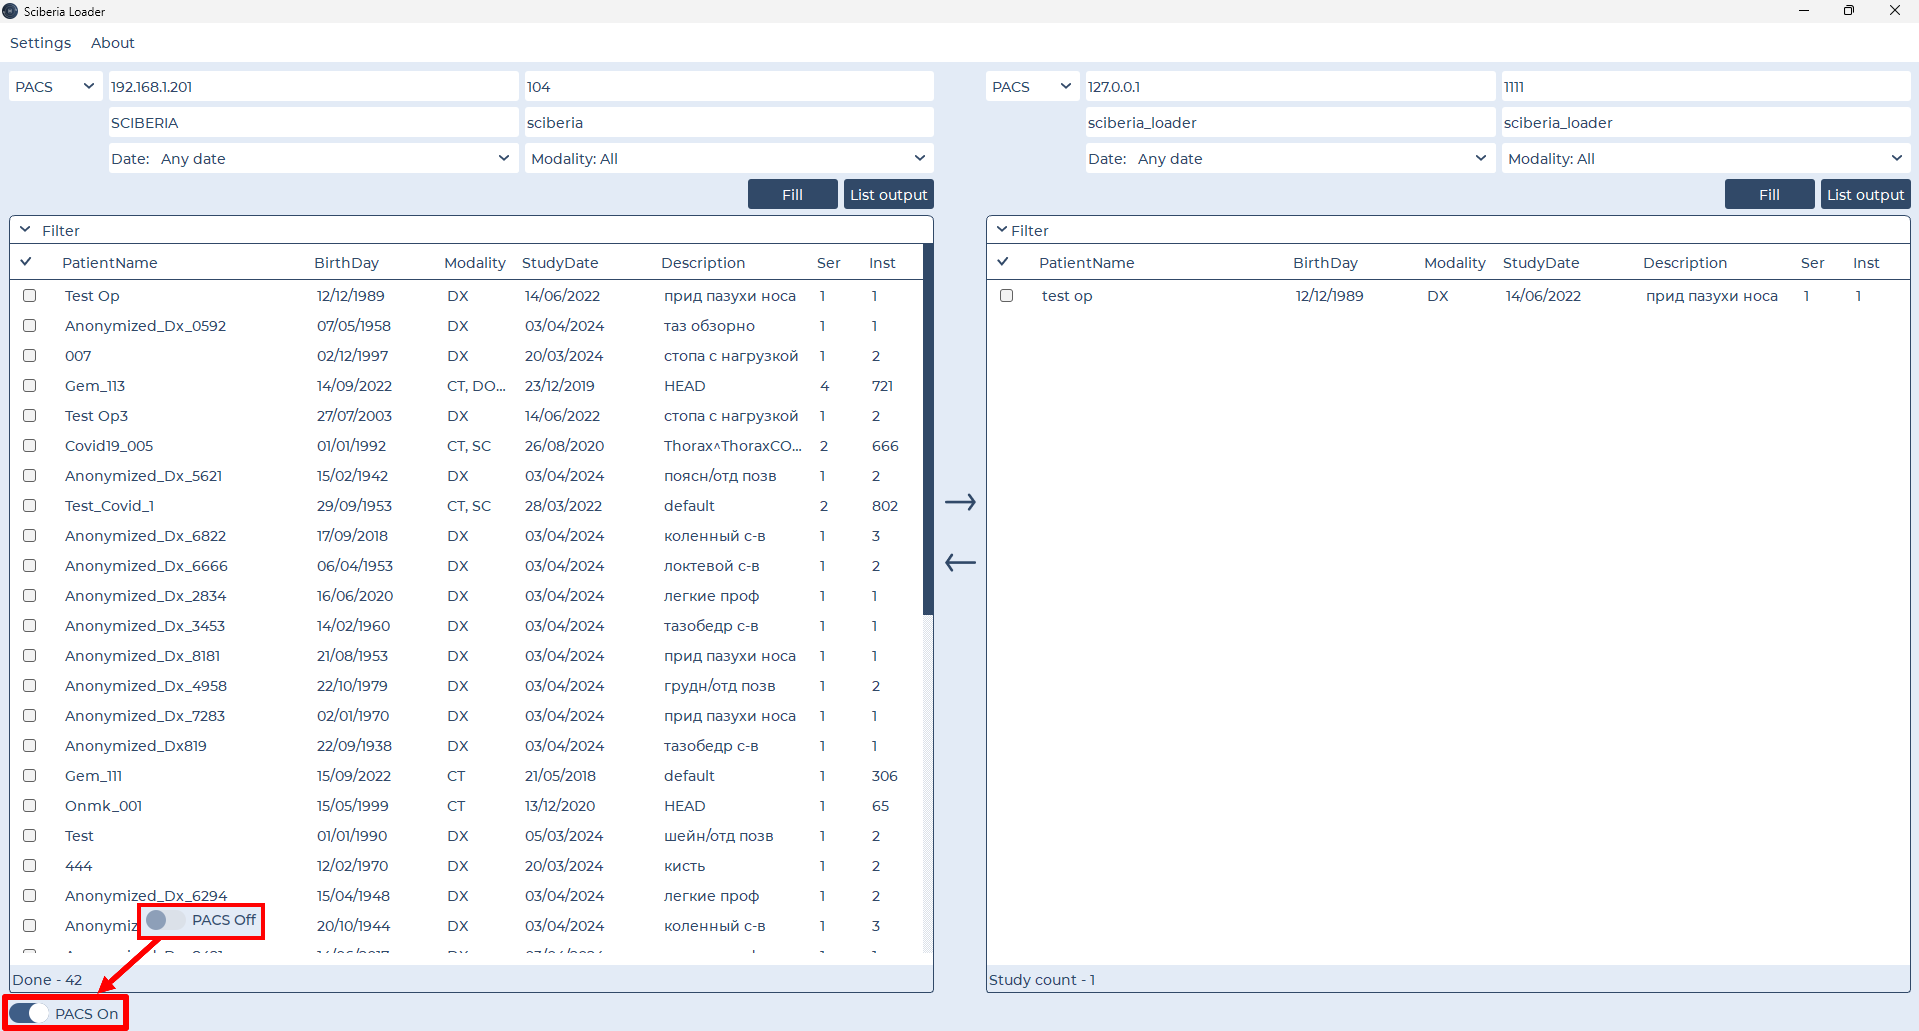
This activates the loader’s PACS server role in the DICOM network (SCP).
PACS On - indicates that the loader’s PACS server is running.
When connected, the loader’s PACS is identified as a working space for receiving requests and transferring studies.
To disable the loader’s PACS server, simply click the slider ![]() .
.
4. Study Migration
To move a study, select the desired study (or multiple at once) and click ![]() or
or ![]() depending on the direction of movement.
depending on the direction of movement.
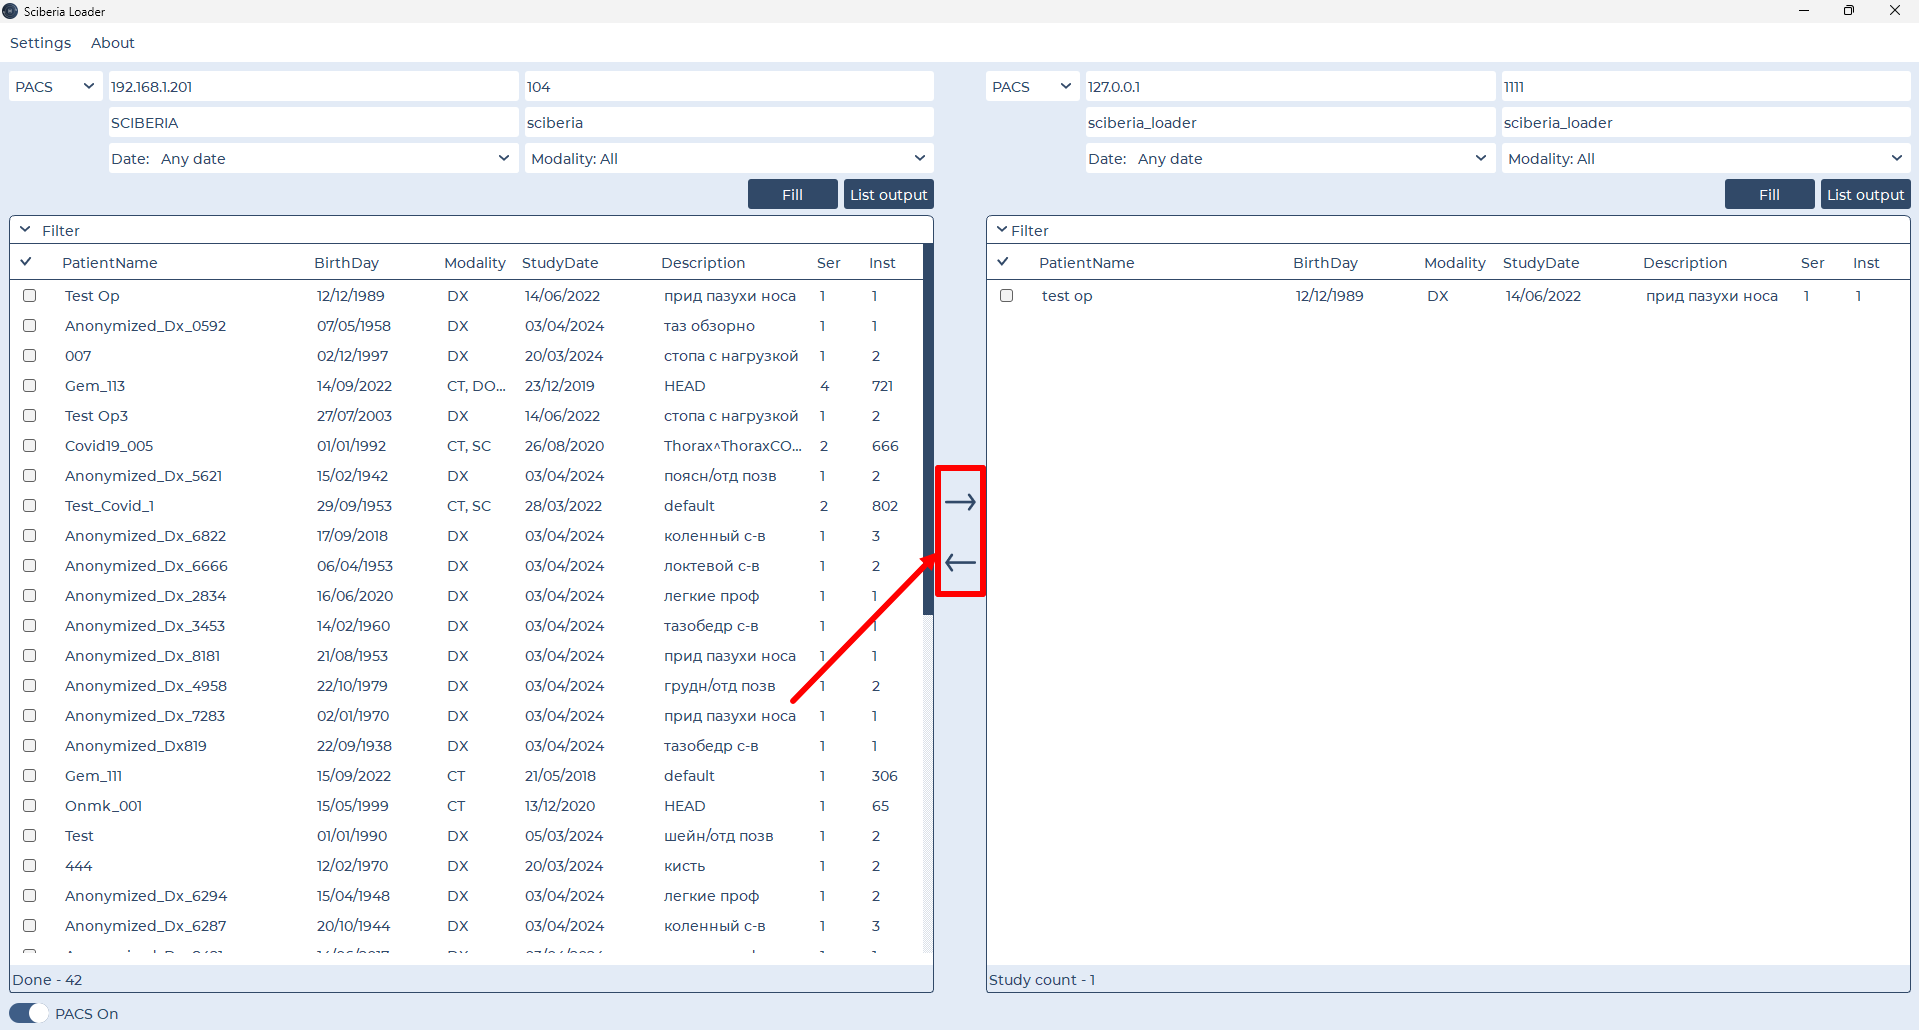
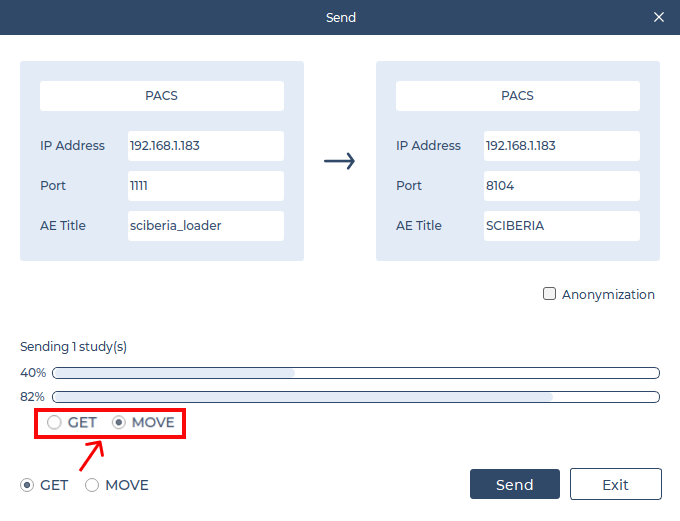
In the pop-up window, verify the correctness of the entered data and click «Send», otherwise «Exit».
If the connection is medical equipment, select the GET service in the bottom left corner by default.
If the equipment does not respond to the specified service, select MOVE in the bottom left corner.
Note
Transfer of studies can be carried out via GET or MOVE protocols.
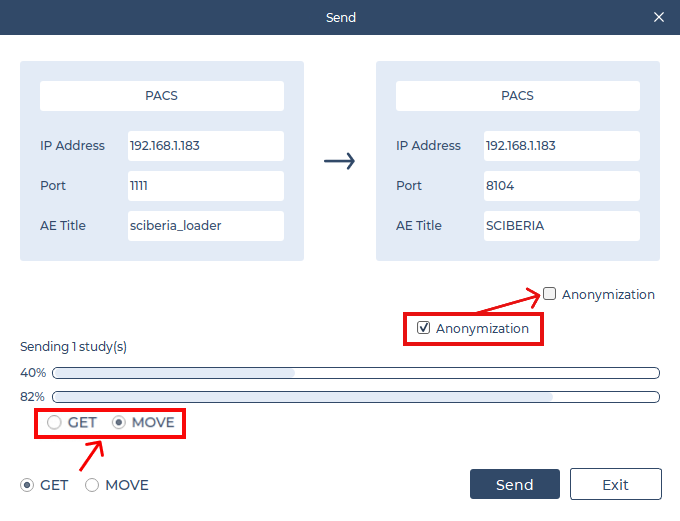
Studies can be anonymized before transfer. To do this, click the Anonymize button. With the Anonymize button active, studies will be automatically anonymized before being sent.
5. Settings
To open the settings window, click on the «Settings » button in the top left corner of the main window.
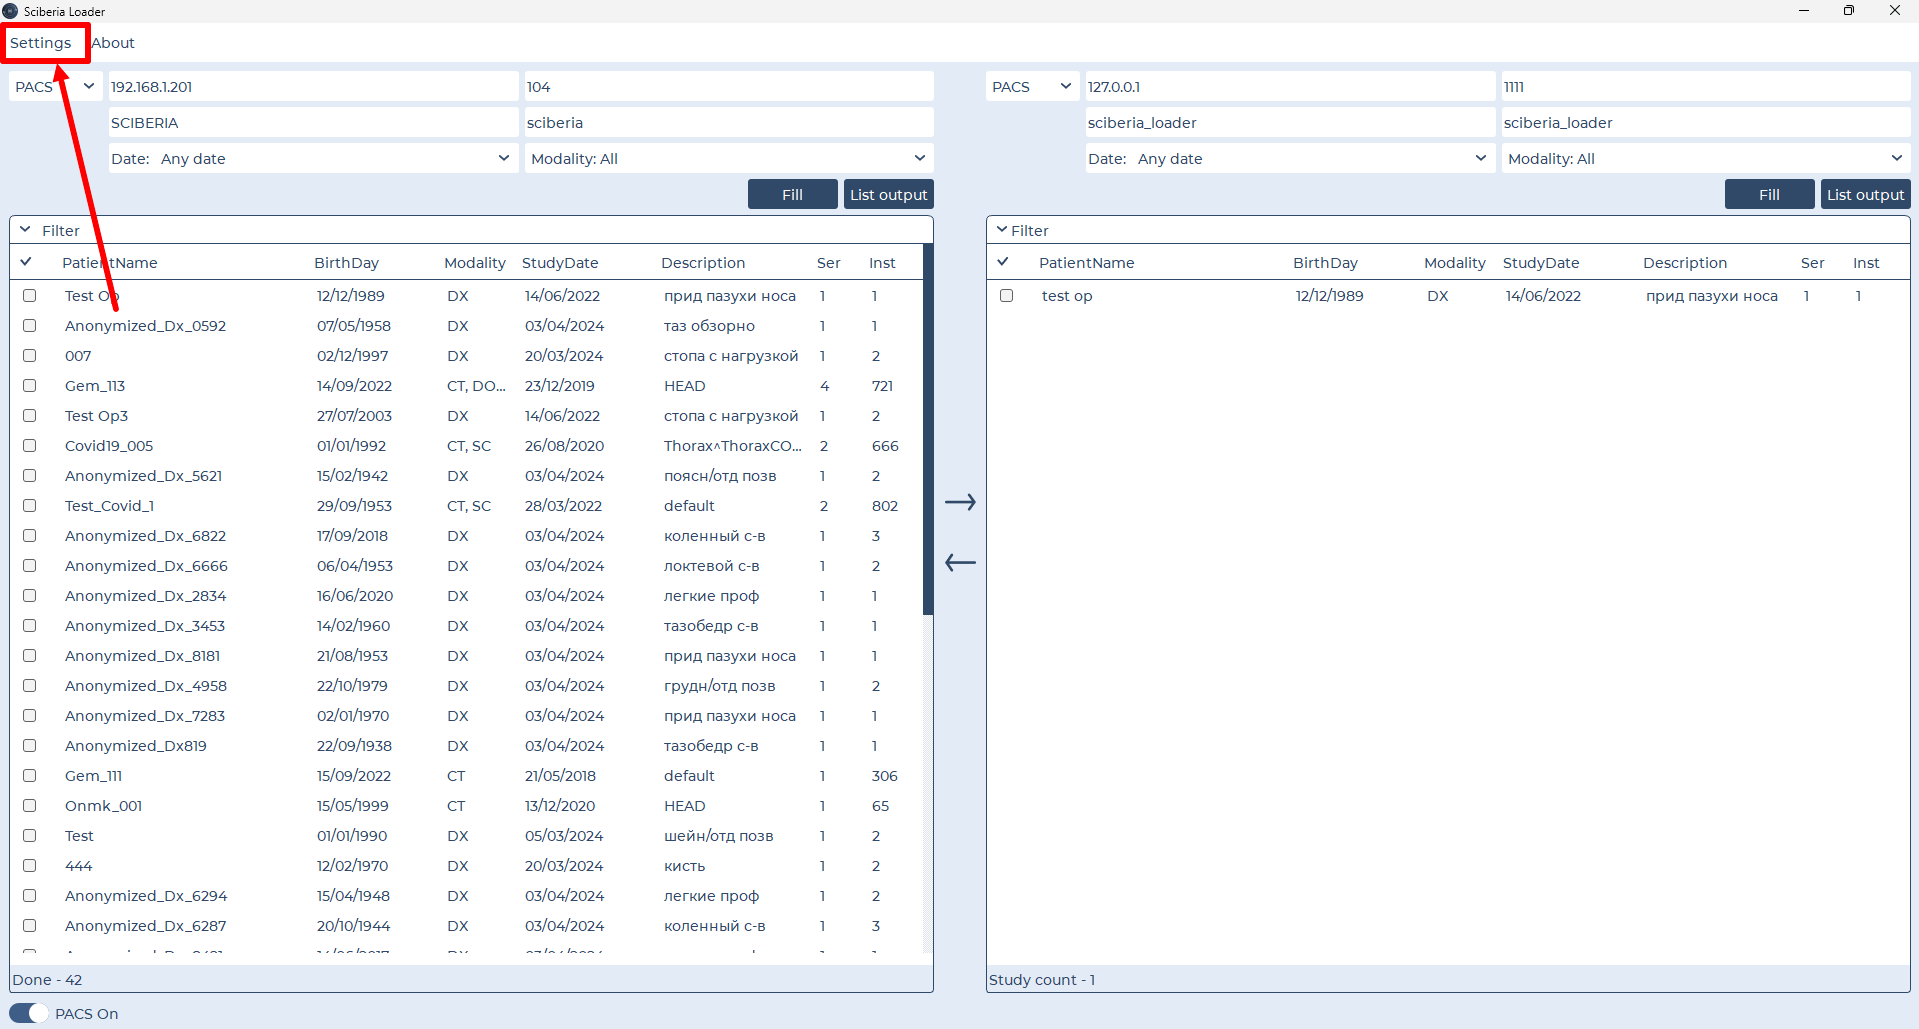
The window that opens is shown below:
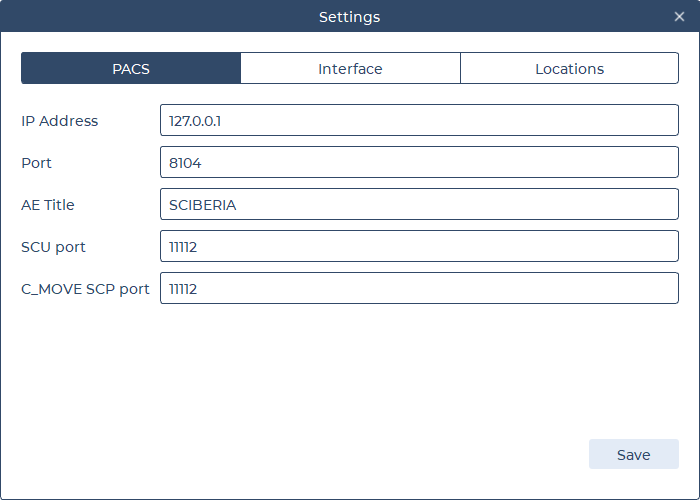
The left part of the window displays the list of settings sections:
«PACS» - loader’s PACS server settings.
«Interface» - interface settings.
«Locations» - settings for connecting to remote sources.
5.1. PACS Configuration
The following fields are available for editing:
Field |
Description |
|---|---|
IP Address |
Local ARM IP Address (default 0.0.0.0). |
Port |
Local ARM port. |
AE Title |
Local ARM AE Title. |
SCU port |
SCU port. |
C_MOVE SCU port |
SCU port for receiving C_MOVE service requests. |

To edit the data, click on the « **Edit**» button and make the necessary adjustments.
“To save changes, click on the «Save» button.”
5.2. Interface Configuration
This section configures user interface parameters. The settings include:
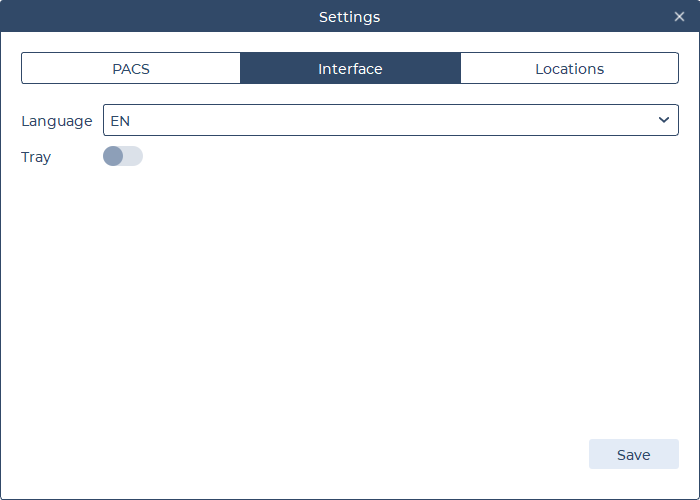
«Language» - language (Russian/English).
«Theme» - theme color (dark/light).
«System Tray» - slider to activate the system tray in the notification area on the taskbar.
“To save changes, click on the «Save» button.”
5.3. Location Settings
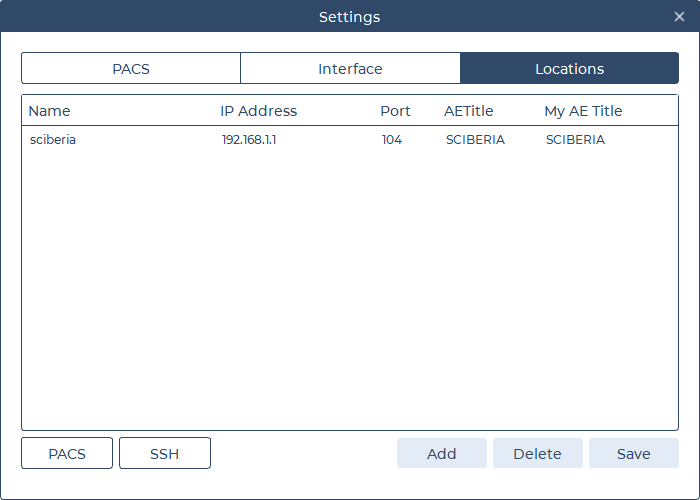
To register a PACS or ARM location, click on the respective PACS or SSH section.
Note
The process of adding, editing, and deleting connections for PACS and SSH sections is identical.
To register a source, click on the Add button. After clicking, a new empty default connection will appear.
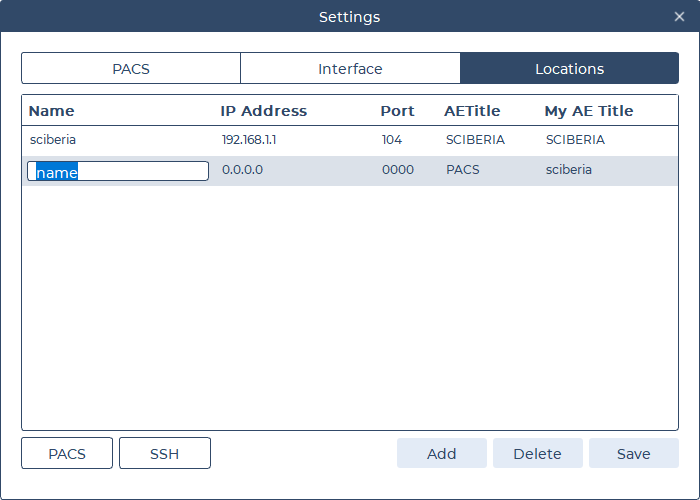
To edit data, double-click on the desired field and make the necessary adjustments.
To delete a connection, select the desired source from the list and click on the «Delete» button.
“To save changes, click on the «Save» button.”
Registered sources will be available when clicking the «Fill» button for automatic parameter filling during connection.
5.3.1. PACS Section
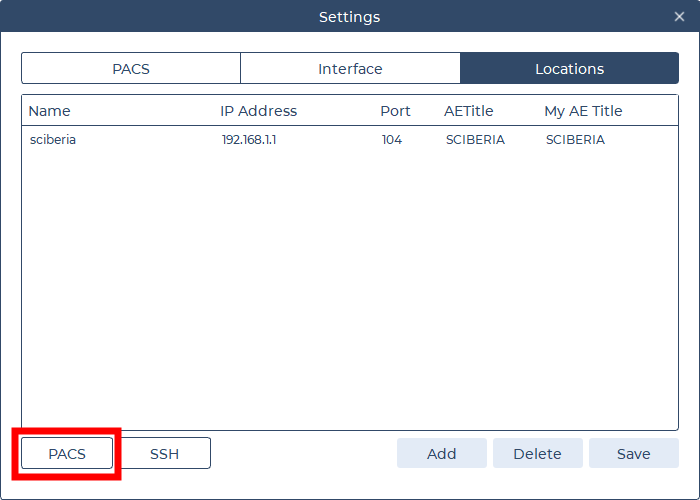
The following fields are available for editing:
Field |
Description |
|---|---|
Name |
Name of the PACS server/medical equipment. |
IP Address |
IP Address of the PACS server/medical equipment. |
Port |
Port of the PACS server/medical equipment. |
AE Title |
AE Title of the PACS server/medical equipment. |
5.3.2. SSH Section
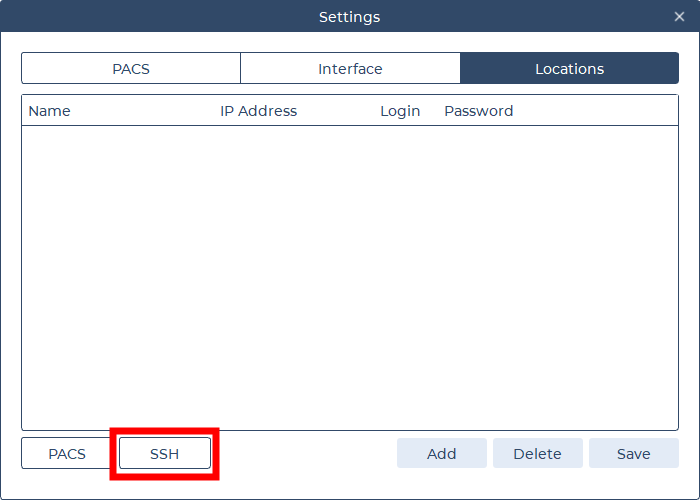
The following fields are available for editing:
Field |
Description |
|---|---|
Name |
Name of the remote physician’s Automated Workplace. |
IP Address |
IP Address of the remote physician’s Automated Workplace. |
Login |
Login for connecting to remote doctor’s workstation (ARM). |
Password |
Password for connecting to remote doctor’s workstation (ARM). |
6. Change History
v1.0.0
PACS server mode.
Transfer of studies to PACS server using DICOM protocol.
Capability to save studies in the file system.
Capability to anonymize studies during transfer.