Sciberia Viewer Pro
0. About the product
Sciberia Viewer Pro software with advanced features for exchanging, viewing, and analyzing DICOM format studies. It supports volumetric visualization technology for studies and semantic segmentation of CT scans of the lungs and brain.
0.1. Functionality
Functions:
Viewing flat images;
Viewing multiplanar reconstruction (MPR) in three planes (axial, coronal, sagittal);
Printing images on paper and film using a DICOM printer;
Previewing series of studies in the main window;
Viewing volumetric reconstruction 3D/VRT;
Burning data to CD/DVD discs, locally (workstation) and flash drives;
Mass anonymization of studies and/or sending to a PACS server;
Exporting model to a graphic file or a new series of DICOM images;
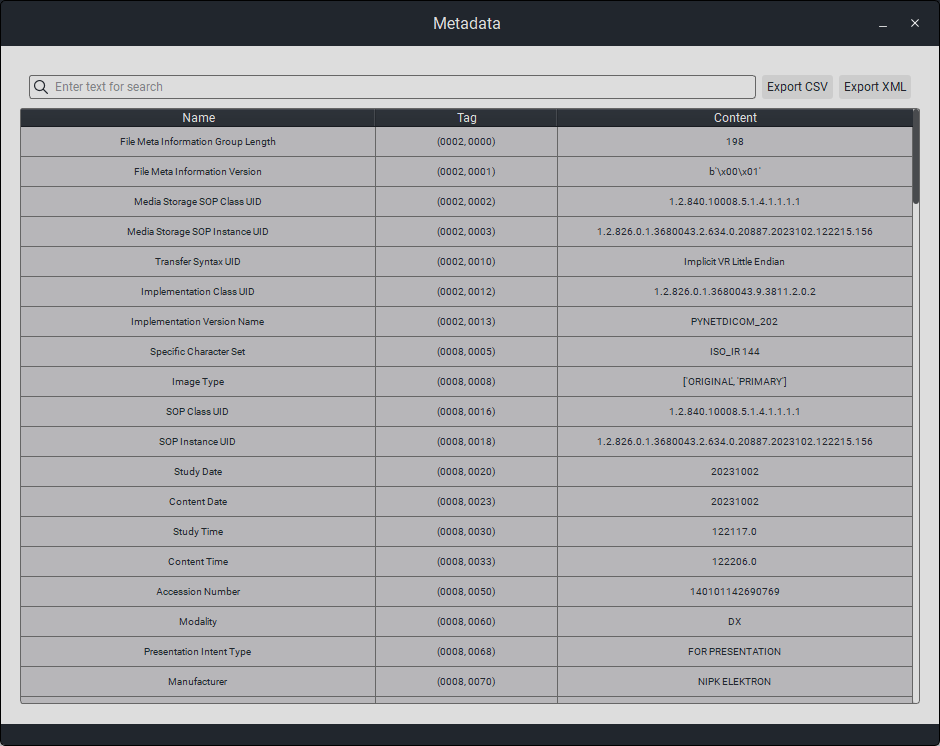
The software provides study information (metadata) viewing;
Micro-model of semantic segmentation CT (chest and brain);
Adding study albums based on specific parameters with auto-query function from PACS server;
Support and display of PDF data in DICOM files;
Support for miniPACS DICOM node function, sending and saving studies with the ability to integrate with medical equipment;
Support for PACS server, processing Query/Retrieve SCP and C-Store commands.
“Image viewing toolkit”:
The software opens locally saved DICOM format files.
The software is a DICOM client (SCU). It has the ability to interact with DICOM servers via Query/Retrieve services.
The software provides detailed viewing of medical images from the following modalities: RF, DX, US, CT, MR, MG, SR, SC, CR, PT, NM, XA;
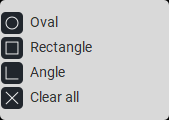
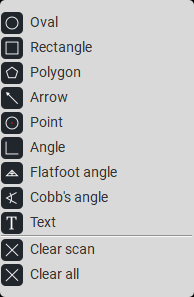
The software has the ability to use various tools (ellipse, rectangle, etc.);
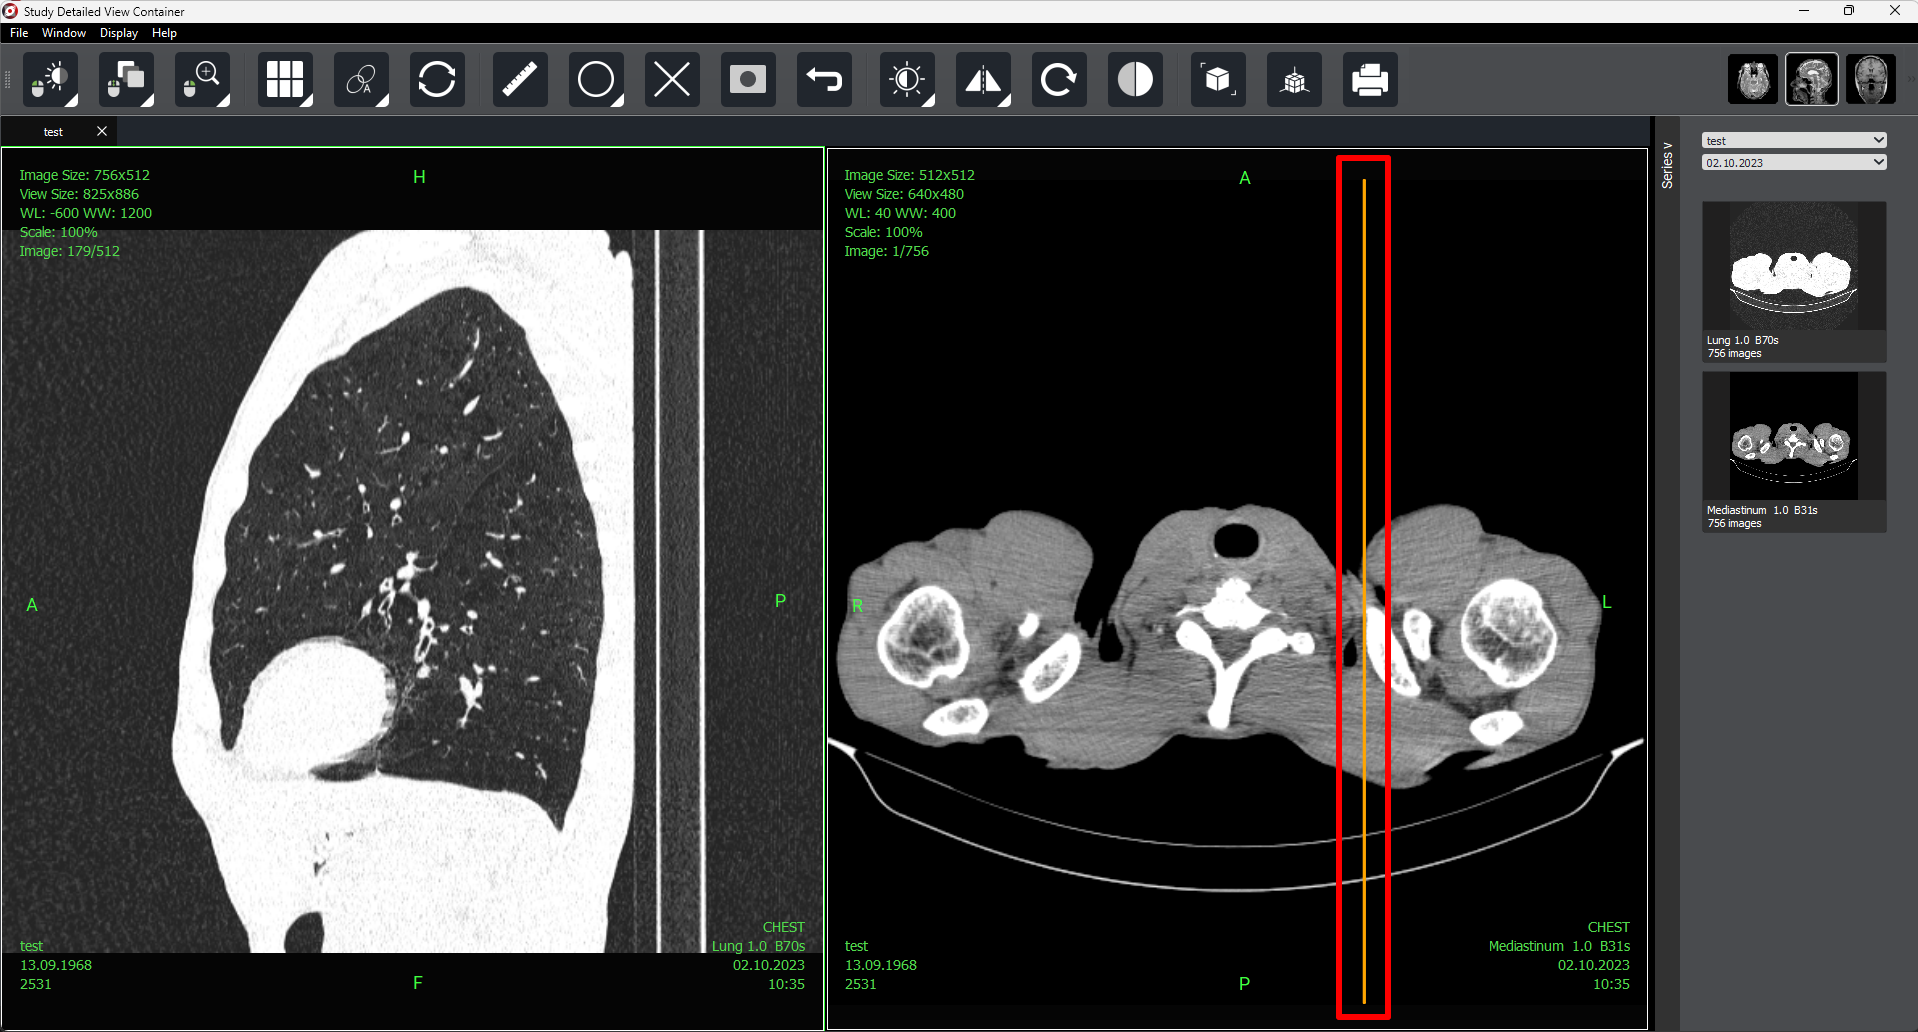
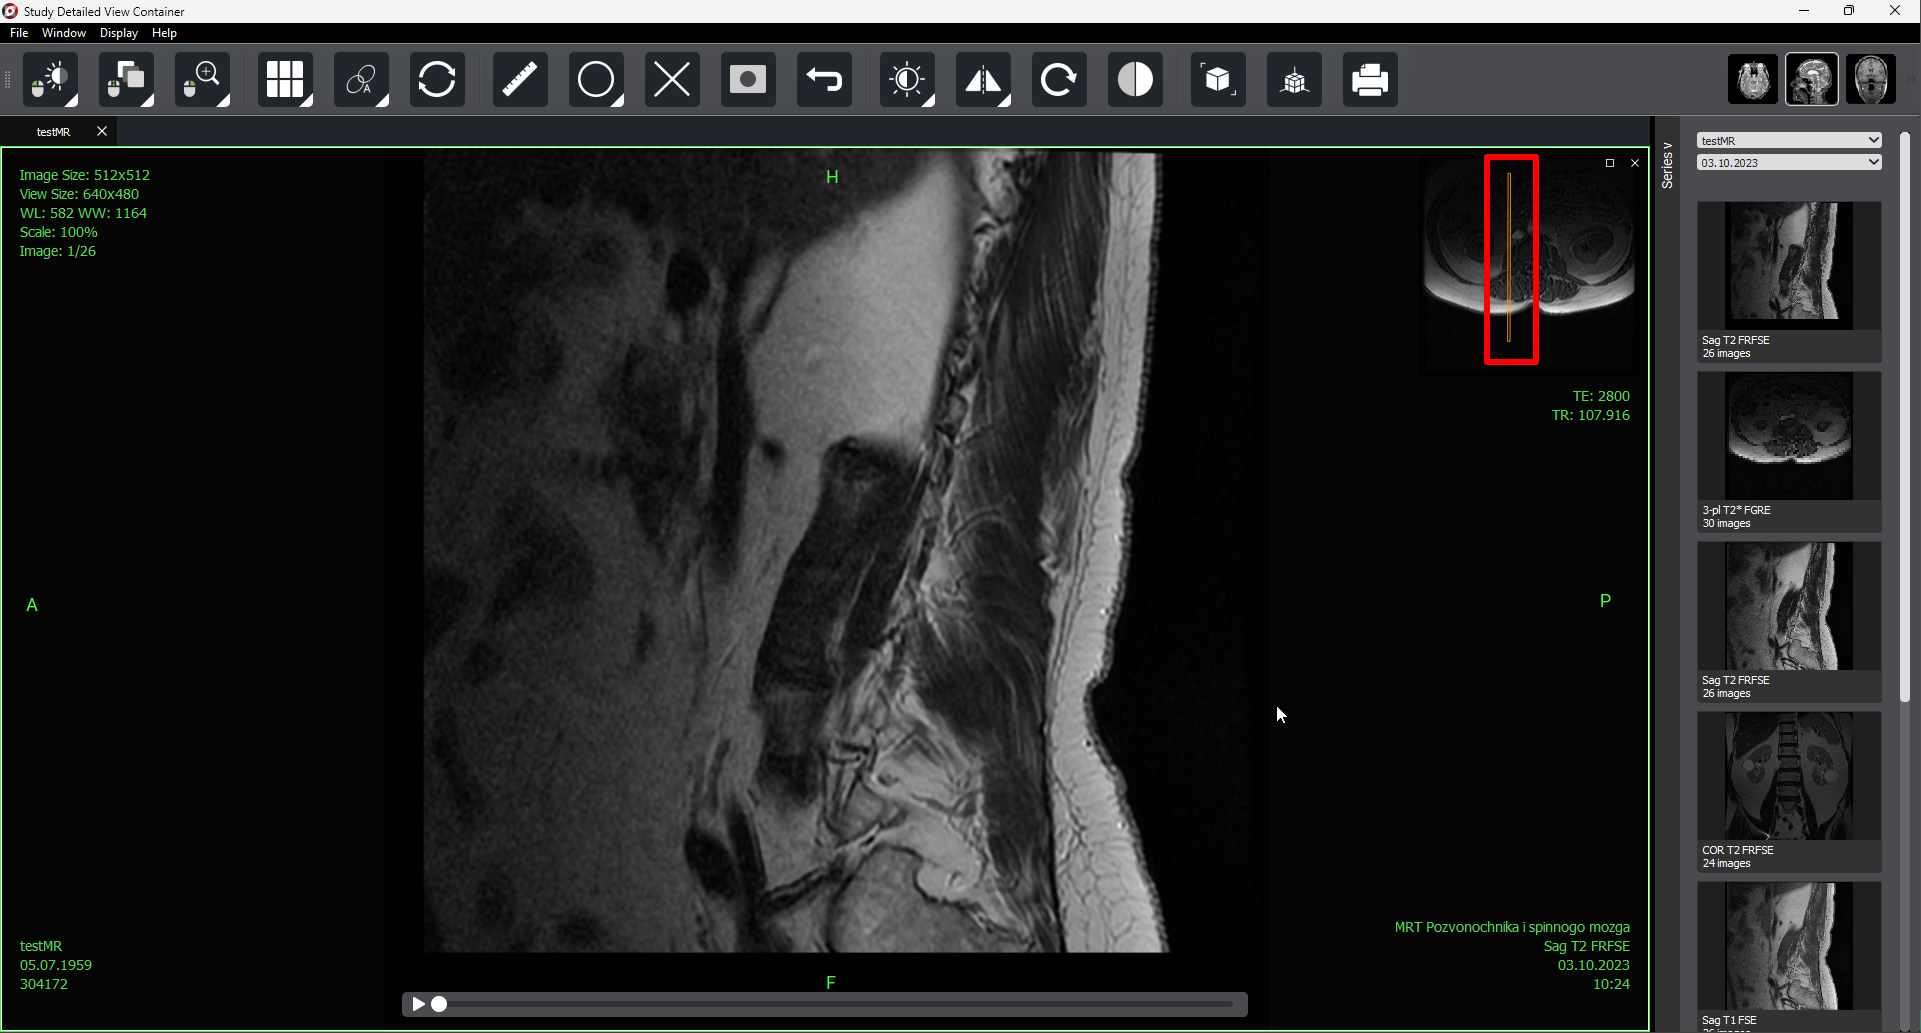
The software displays projection lines for axial/coronal/sagittal views;
The software has the capability to print medical studies on specialized film printers (DICOM printing);
The software has the capability to view metadata (service information);
The software has the ability to measure angle values (normal angle and Cobb angle);
The software has the ability to rotate images (by 90 degrees) or mirror images horizontally and vertically;
The software allows recording studies on CD and DVD discs;
The software allows saving studies locally and in the cloud on a PACS server;
The software provides the ability to use the MPR tool, built into the program, which can be used for image reconstruction in orthogonal planes (coronal, sagittal, axial, or oblique, depending on the base plane of the image). This helps to obtain a new anatomical picture that could not be visualized using only the base images;
The software has functionality for anonymizing studies;
The software has albums (management of the list of downloaded or imported studies at the click of a button);
The software has the ability to adjust brightness and contrast, and a ‘negative’ mode;
Software provides the ability to use the MPR tool integrated into the program, which can be used to reconstruct images in orthogonal planes (coronal, sagittal, and axial, depending on the base plane of the image);
The software has the ability to measure segment length (polygon and ruler);
The software includes a 3D cursor tool (changing the positions of images from other projections based on the cursor location, for accurate projection of the study in multiplanar reconstruction (MPR) mode);
The software has the ability to visualize 3D/VR (volume rendering) allowing visualization of large volumes of data obtained from modern CT/MRI scanners in three-dimensional space.
The software allows detailed viewing of up to 10 different studies simultaneously.
Functionality of the detailed viewing window:
Zooming, vertical and horizontal mirroring, and image panning;
Adjusting image brightness and contrast;
Image inversion;
Measuring lengths and angles;
Projection lines for axial/coronal/sagittal views
Adding comments, labels, and various graphic elements to images;
Measuring flat feet with a specialized tool;
Measuring spinal curvature with a specialized tool;
Measuring affected areas using a specialized tool (polygon);
The 3D/VRT (Volume Rendering) tool visualizes studies obtained from modernCT/MRI scanners in three-dimensional space;
Smoothing the study image for clearer and easier interpretation
Adding comments to the study;
Synchronizing the viewing of volumetric studies;
Moving comments, measurements, measurement results, and graphic elements on images
Viewing the study in multiplanar reconstruction mode (in three planes), as well as setting MIP, MinIP, AIP modes
Printing images on paper and film printers (DICOM) with advanced print settings (font, orientation, cropping, type, etc.)
Segmenting the chest and brain using Sciberia AI micro-models
Using various tools (oval, rectangle, etc.)
Ability to edit placed tools and comments
Ability to open/save studies locally
3D cursor (changing the positions of images in other projections based on cursor location for accurate projection in a 3D model)
Selecting GPU/CPU device for 3D modeling
Trimming the 3D model
Ability to move comments, measurements, measurement results, and graphic elements on images
Additional Functionality for CT Modality:
Changing the width and level of the Hounsfield window
Determining the Hounsfield number for a selected area (line, oval, arrow, angle, Cobb angle, flatfoot angle, point, ellipse, rectangle, polygon)
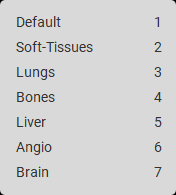
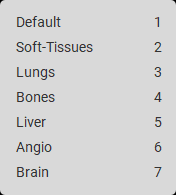
Preconfigured windows for viewing various organs (lungs, bones, brain, soft tissues, liver, angiography)
Determining Hounsfield window values for CT modality
0.2. System Requirements
Minimum Requirements |
Recommended Requirements |
|
|---|---|---|
Processor |
2 cores, 1.3 GHz |
4 cores, 2.0 GHz or higher |
RAM |
DDR4 4 GB |
DDR4 16 GB or more |
Disk Space |
1.5 GB |
1.5 GB |
Operating System |
|
|
0.3. Installation
For installing the program on Windows 7 operating system, follow these steps:
Unzip the program file;
Go to the “app” folder and run the file named “VC_redist”;
Run the file named “Viewer.exe”.
For installing the program on Windows 8+ and Linux operating systems, follow these steps:
Unzip the program file;
Go to the “app” folder and run the file named “Viewer.exe”.
For installing the program on Mac OS, follow these steps:
Open the “Viewer.dmg” file and move “Viewer.app” to the “Applications” folder;
Carefully read the license agreement. If you accept the terms of the license agreement, select “Accept”.
1. License Activation
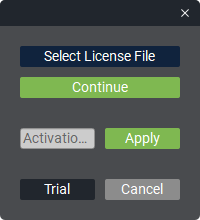
When launching the program without a license, the activation window opens first.
There are 3 ways to activate:
Using a license file (offline). To do this, specify the license file by clicking the «Choose license file» button, enter the license expiration date in the «License expiration date» field, and click the «Continue» button.
Using a code (online). For activation, enter the code in the «Activation code» field and click the «Apply» button.
Activating a trial version (online) for 2 weeks. To do this, simply click the «Try» button, and the trial period will begin.
The license is activated once for the entire validity period.
2. Getting to Know Viewer
2.1. Main Window
Main program window:
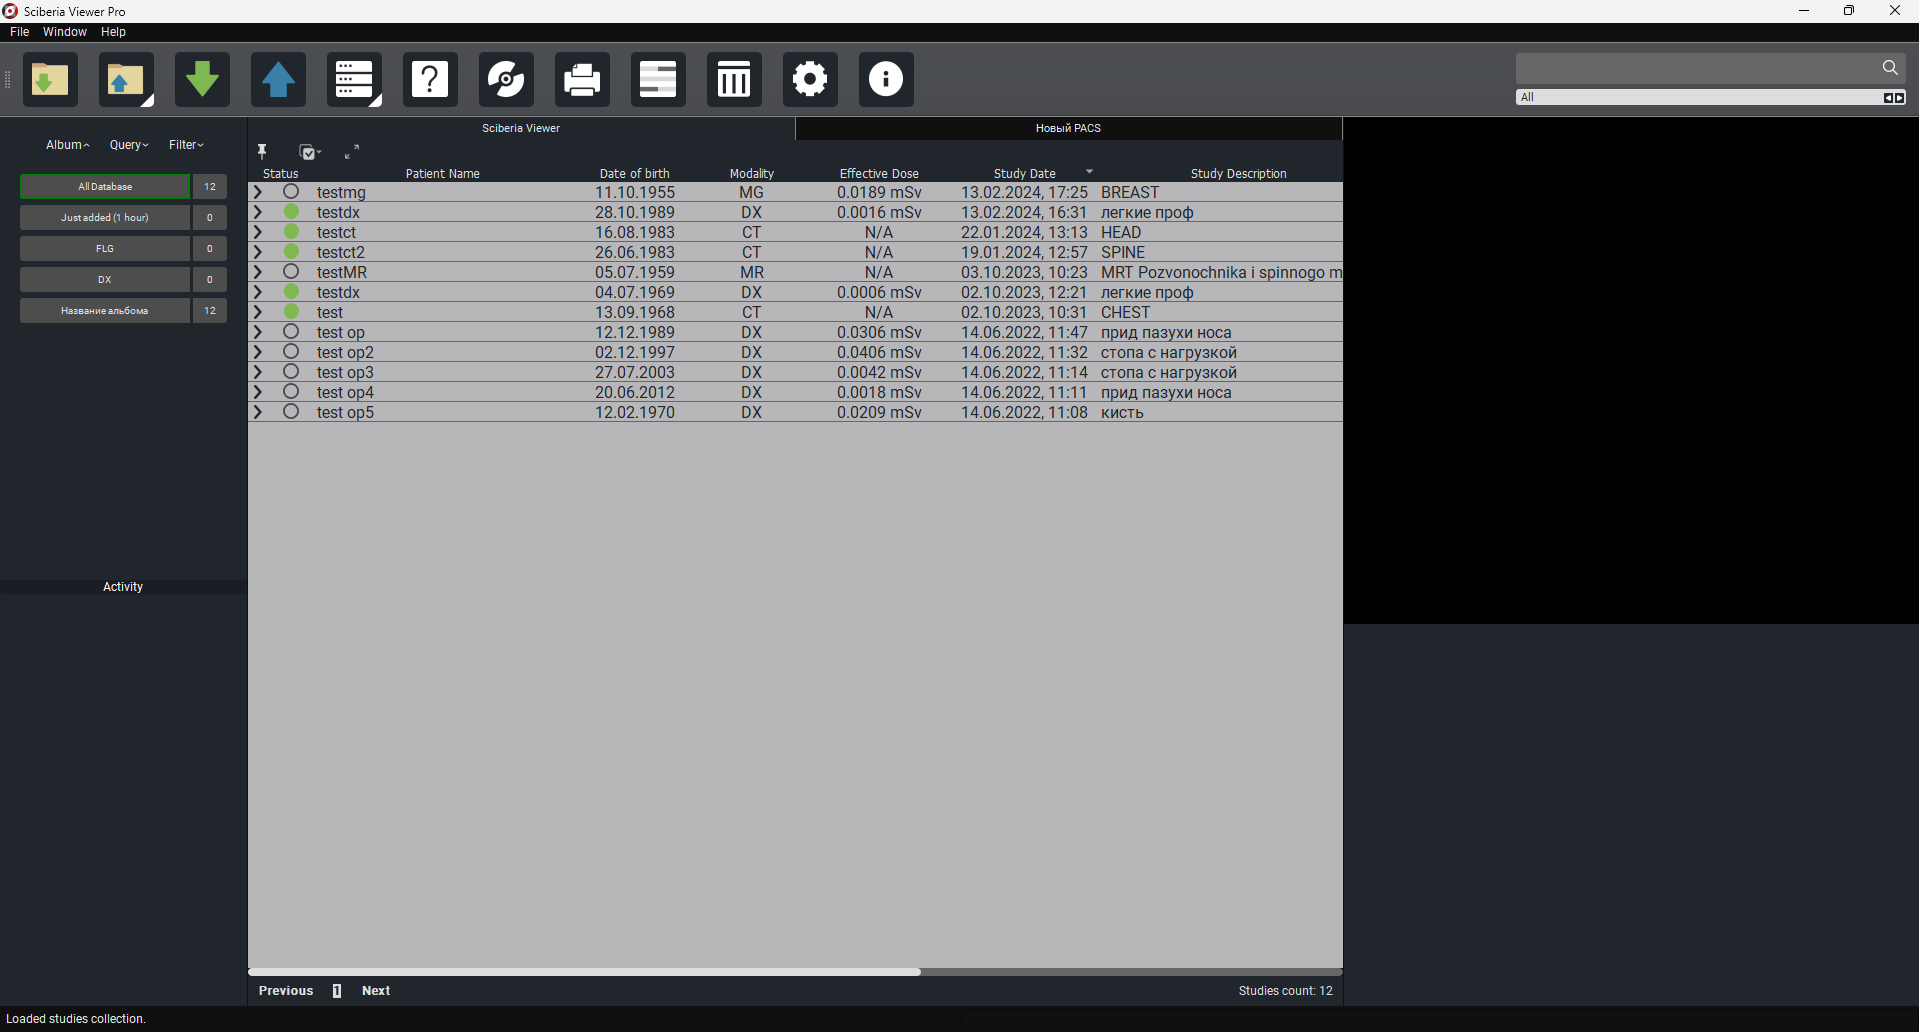
The Study Table includes the following fields by default:
Status - a color indicator allowing the user to mark the item.
Patient’s Full Name - the patient’s full name.
Date of Birth - the patient’s date of birth.
Age - the patient’s age.
Modality - the modality of the study.
Effective Dose - a measure of the risk of radiation effects.
Date of Study - the date of the study.
Study Area - the area of the study.
Study Area - the area of the study.
Images - the number of images.
Date Added - the date and time the study was added.
The main window has the following buttons:

Button |
Description |
||
|---|---|---|---|
Load |
Loading studies stored locally on the doctor’s workstation (DWS). |
||
Unload |
Saving studies locally to the doctor’s workstation (DWS). |
||
Request |
Loading studies from PACS servers. |
||
Send |
Sending a study to the PACS server. |
||
Source |
Managing sources (changing study lists, interaction with other Sciberia products). |
||
Anonymize |
Anonymization of the study based on selected tags. |
||
Record |
Recording the selected study to disk. |
||
Printing the selected study image. |
|||
Metadata |
Viewing study metadata. |
||
Delete |
Deleting a study. |
||
|
Settings |
Settings. |
|
|
Help |
Help. |
|
In the upper right corner, there are fields:
Field |
Description |
|
|---|---|---|
|
Search for studies by patient’s name. |
|
|
Selection of modalities for viewing. |
|
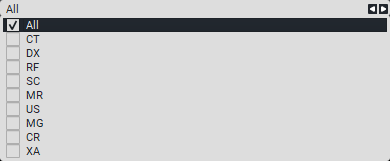
To select the desired modality, you need to click on the field with the left mouse button  , then select the desired modality or several at once from the list that appears (by default, all modalities are displayed):
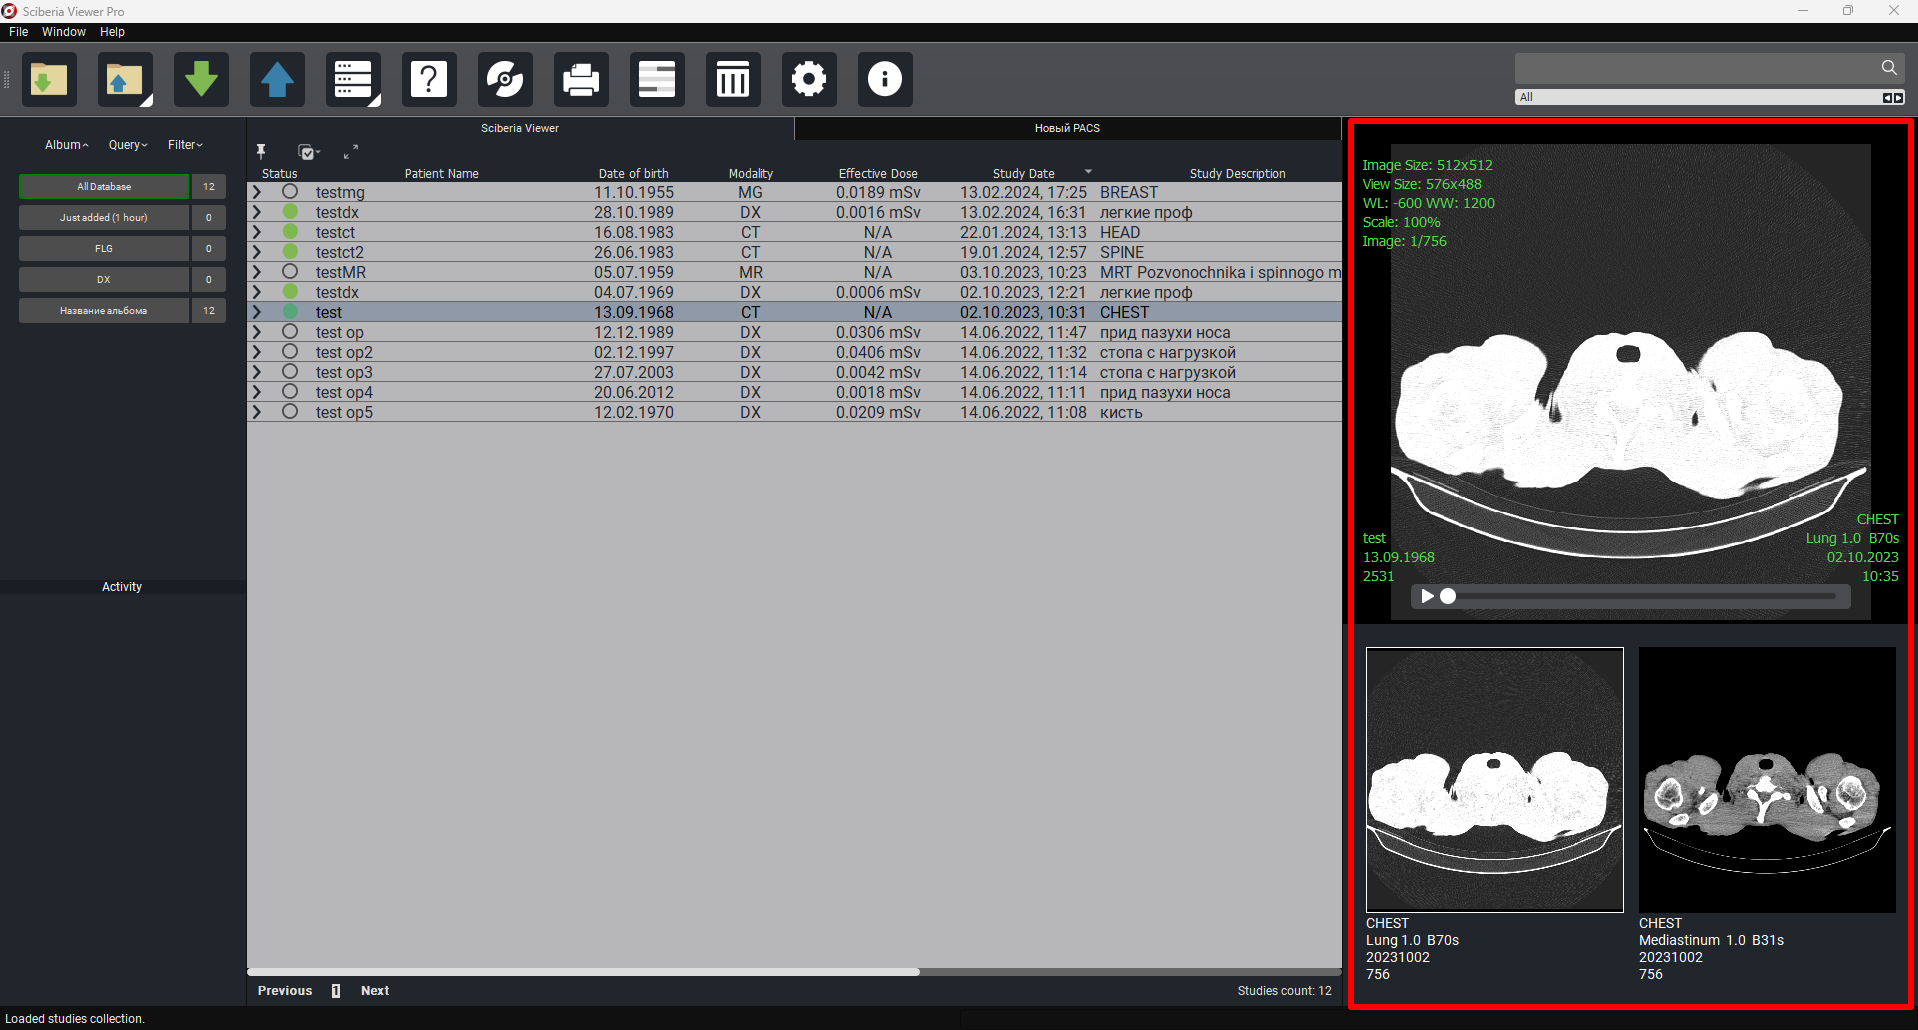
To the right of Study Table is a preview column of the selected study with the possibility of auto-scrolling (player) of the study.To preview the study, simply click on the study or the required series.
Below the Study Table is a field with the necessary tools:

1. «Album» - studies grouped by days and type of study. By default, there are two non-deletable albums – Database (all loaded studies), Recently Added (1 hour) (this album contains all studies loaded within 1 hour).
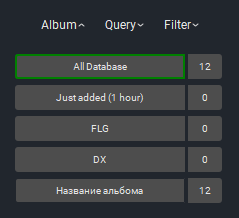
If you right-click in the album column, the «Add Album» button will appear to add a new album:
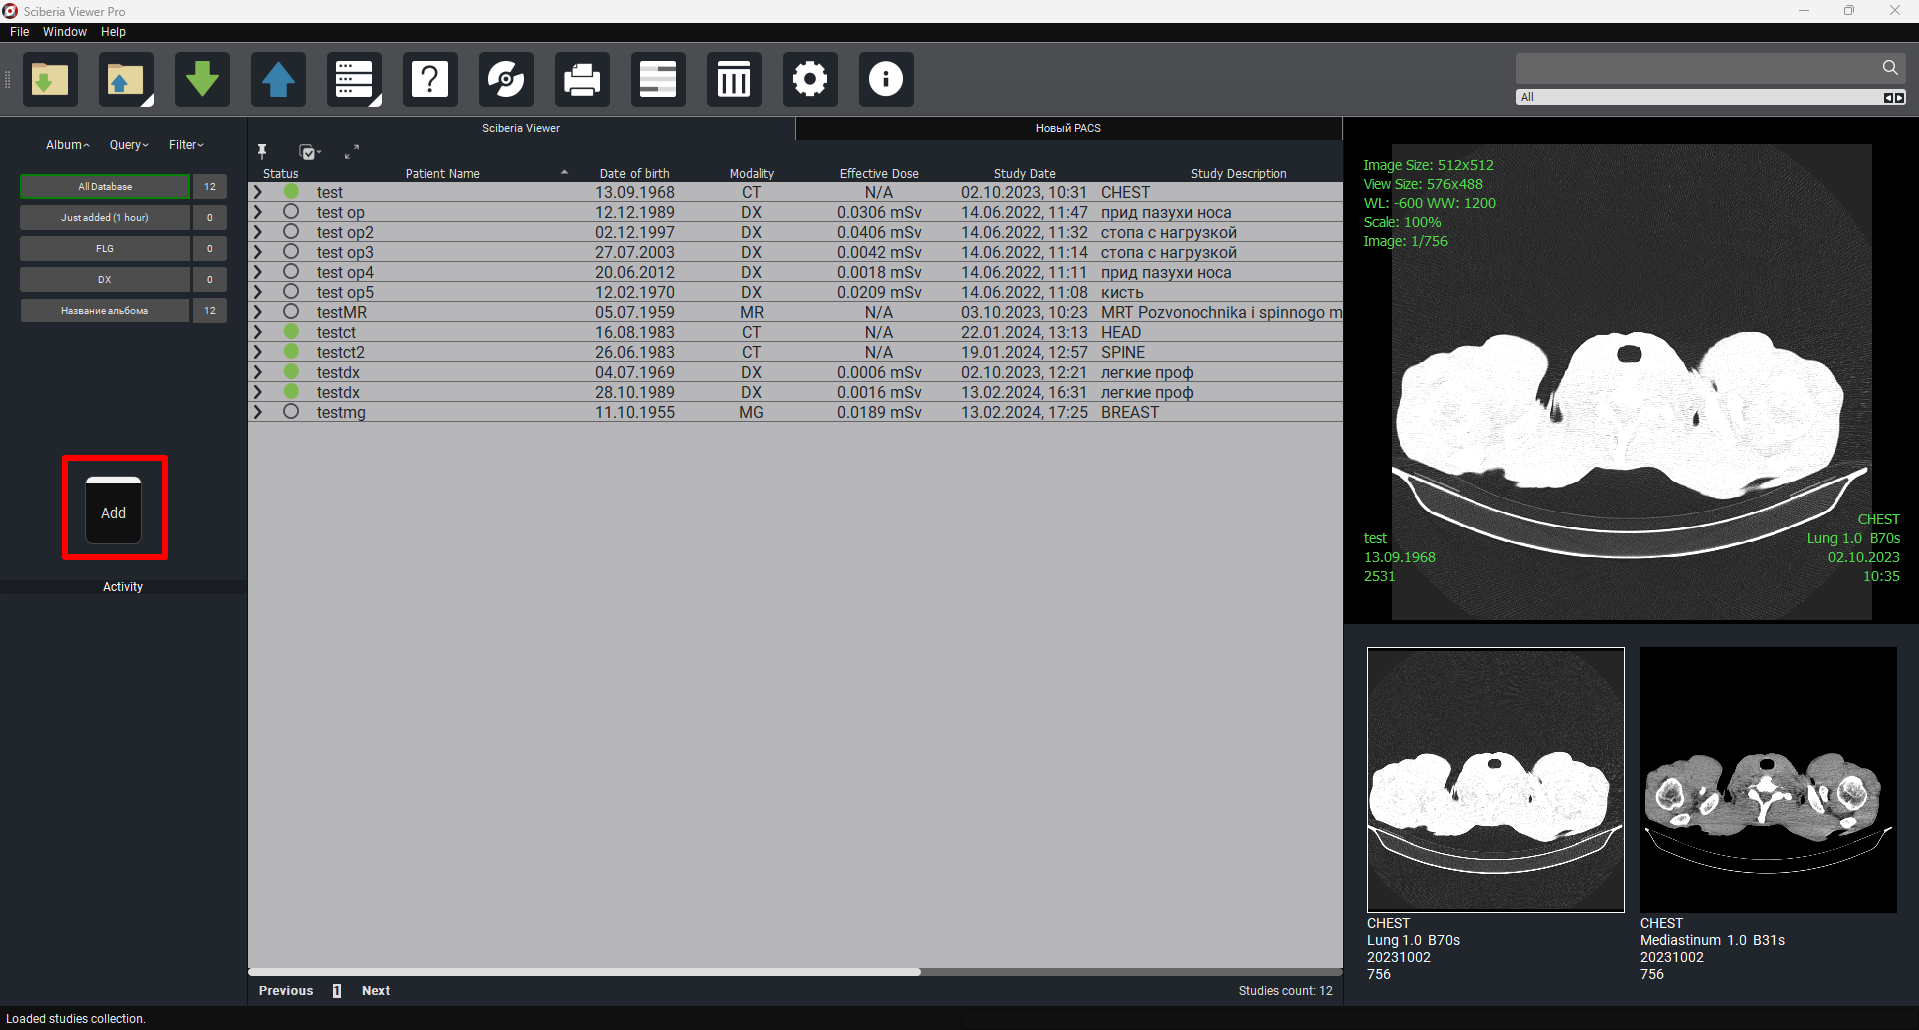
When you click on it, a window will appear:
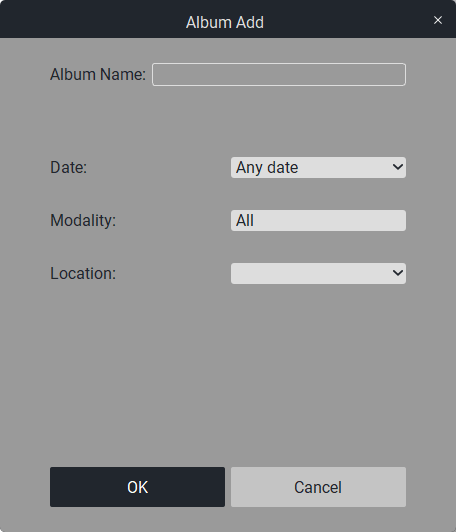
In the «Album Name» field, write the name of the new album.In the «Date» field, select the period for the new album.In the «Modality» field, select the modality of the new album from the list of modalities (by default, all modalities).In the «PACS server» field, select the PACS server.
Click the «OK» button to create or the «Cancel» button to exit.
The icon to the right of the album indicates the number of studies included in the album.
2. «Query» - query to PACS by specified criteria. More details in 3.4. Export from PACS Server.
3. «Filter» - search by specified criteria in downloaded studies.
Filter |
Window |
|---|---|
Patient Name |
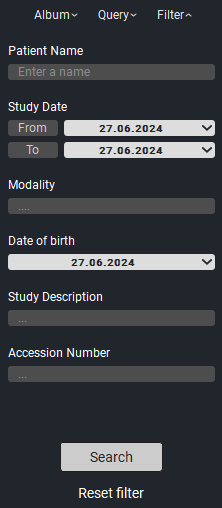
|
Study Date |
|
Study Modality |
|
Date of Birth |
|
Description |
To use the filter, enter the necessary data in the parameters and click the «Apply» button. To reset the filters click the «Reset» button.
«Activity» - shows current processes.
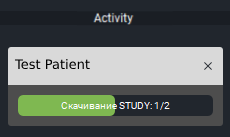
4. « Button  » - hides/shows the column with albums/filters/activity. To return the column to its original position, just click on « Album » or « Filter ».
5. « Button  » - mode that allows you to select the necessary series of studies or several studies at once.

6. « Button  » - allows you to collapse/expand series in the study or in several studies at once.
2.2. Detailed View Window
To access the detailed view, select a study and double-click on it, its series, or in the preview column of the selected study.
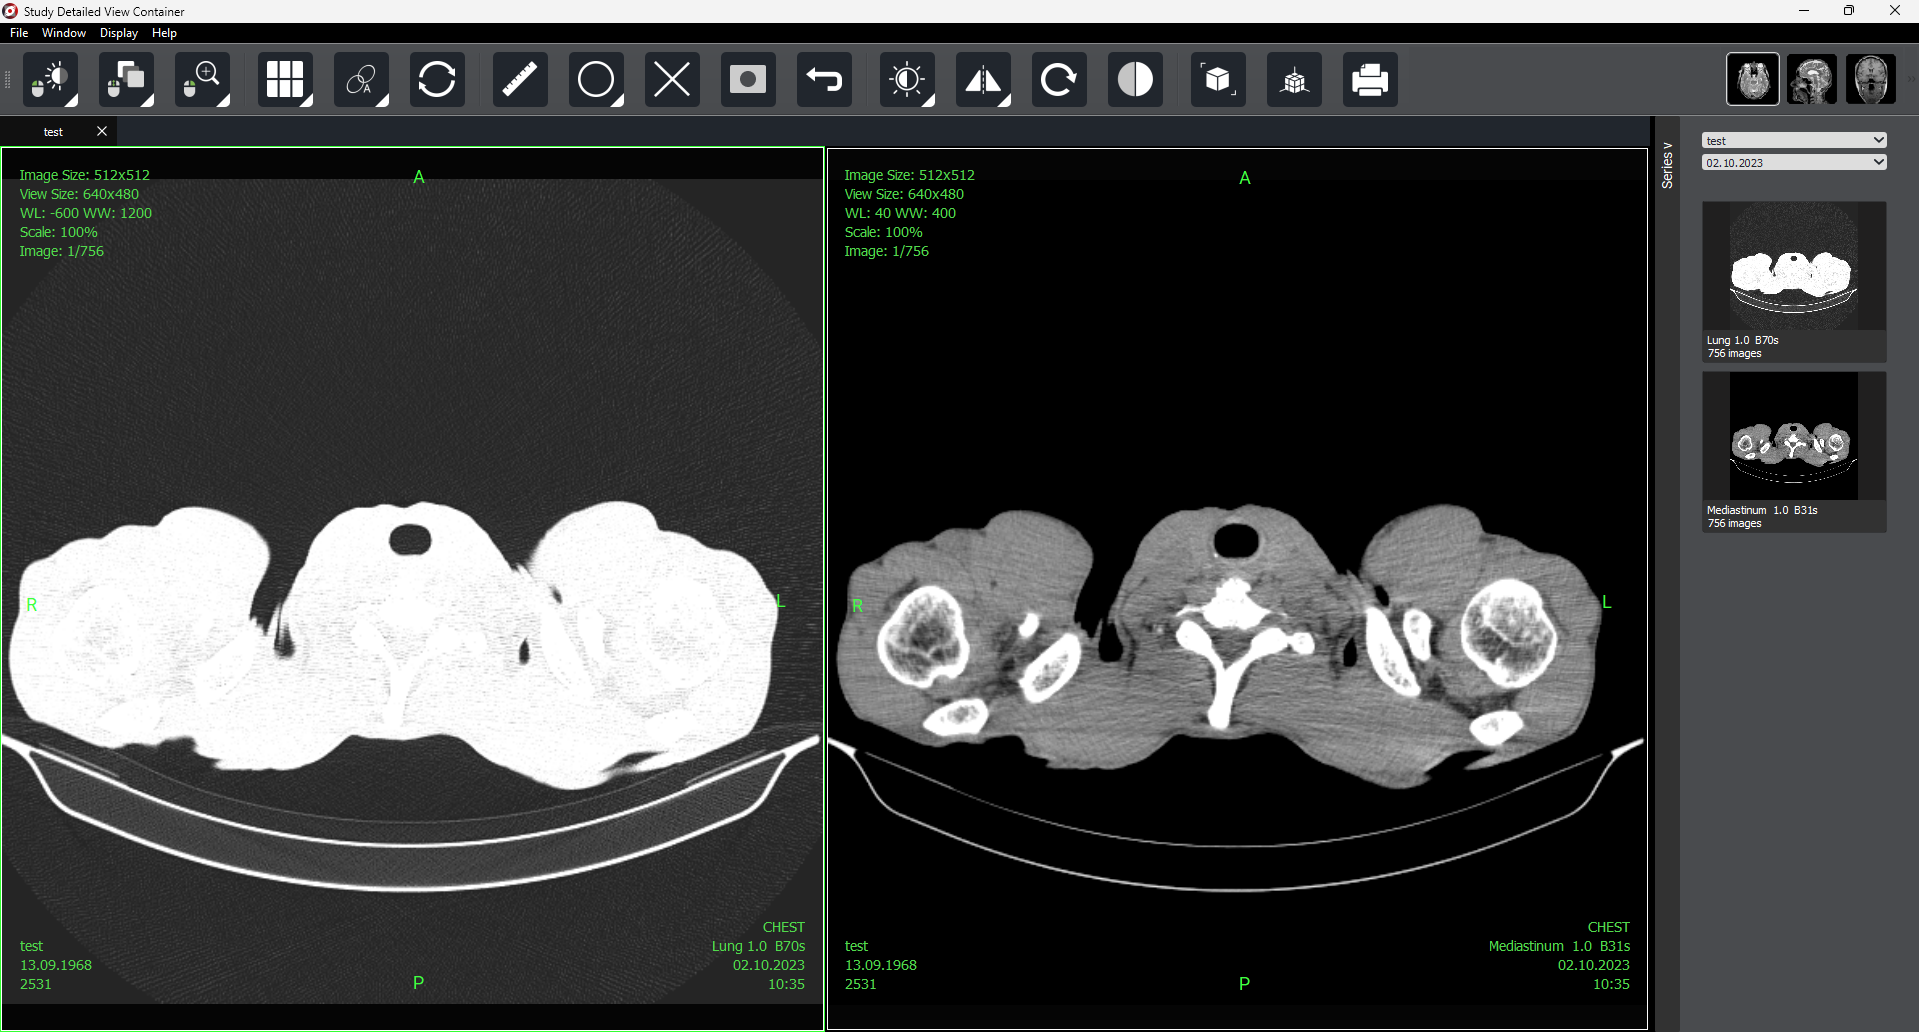
In the upper left corner, there are the following buttons:

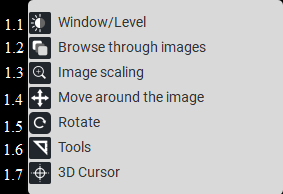
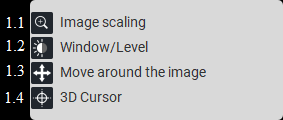
List of modes for left mouse button |
List of modes for middle mouse button |
List of modes for right mouse button |
|---|---|---|
|
|
|
On the right side of the screen, there is a «Series» button  that allows you to open or hide the series panel.
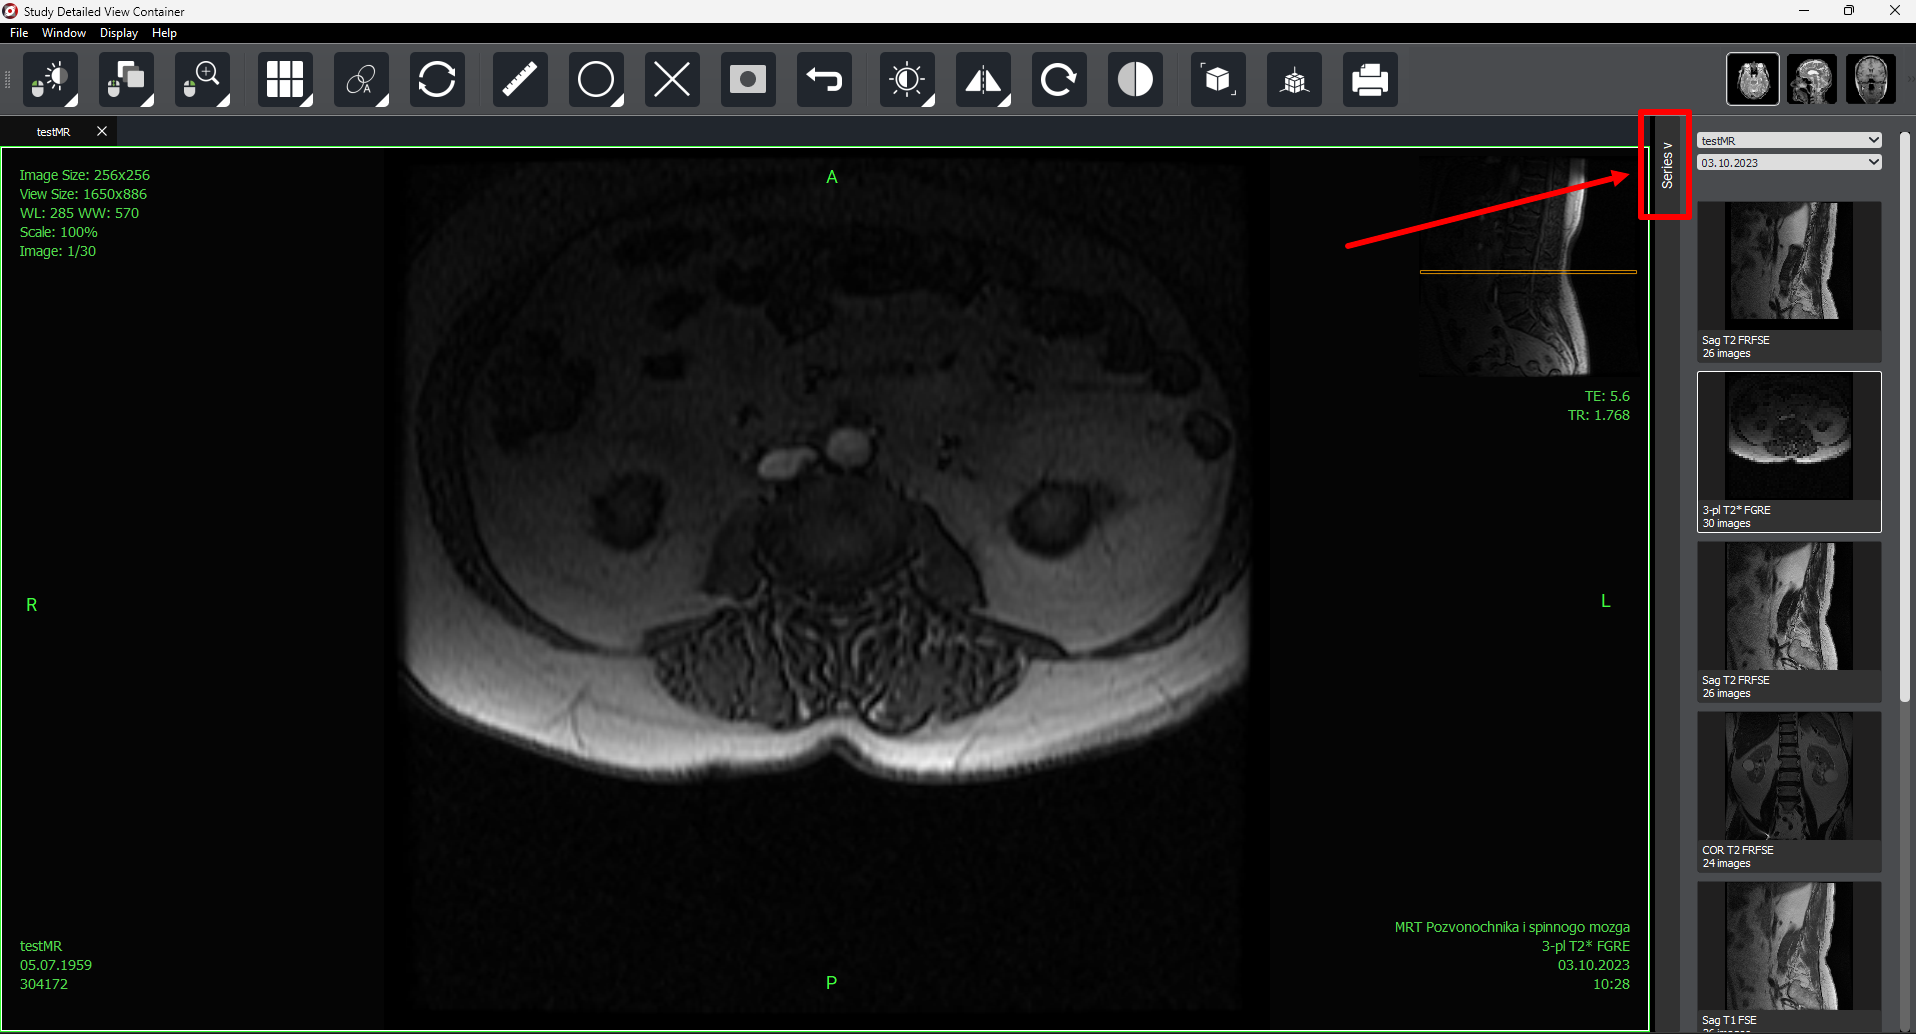
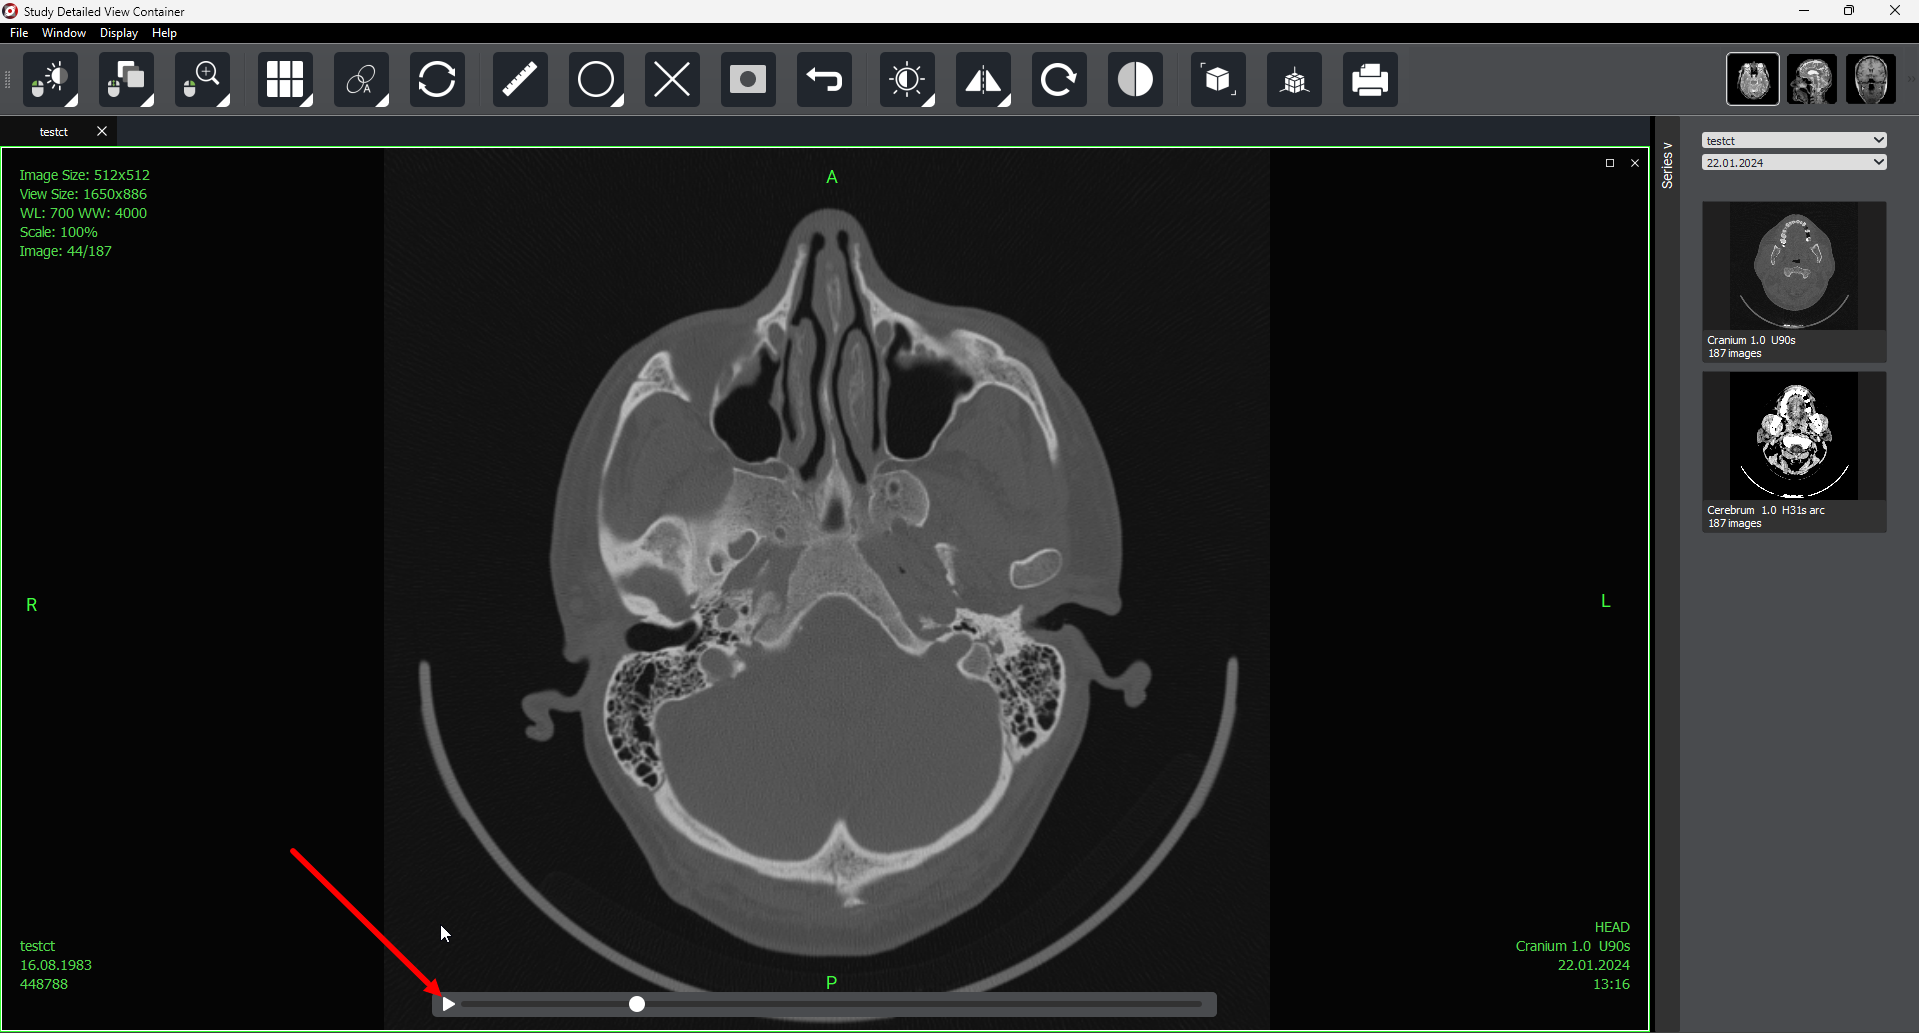
As with selected study preview, autoscrolling is available in detailed view mode (for one or several selected series).
3. Importing Studies
3.1. Sources
Sources are a feature that allows convenient navigation between different desktops and Sciberia products.
The “Database” function in Sciberia Viewer not only provides the ability to work in a separate window but also ensures a seamless transition between different Sciberia products.
Sciberia Loader and various editions of Sciberia Viewer support database operations, allowing you to save progress when switching between them.The previously created database with saved studies is available in the «SciberiaWorkspace» folder.
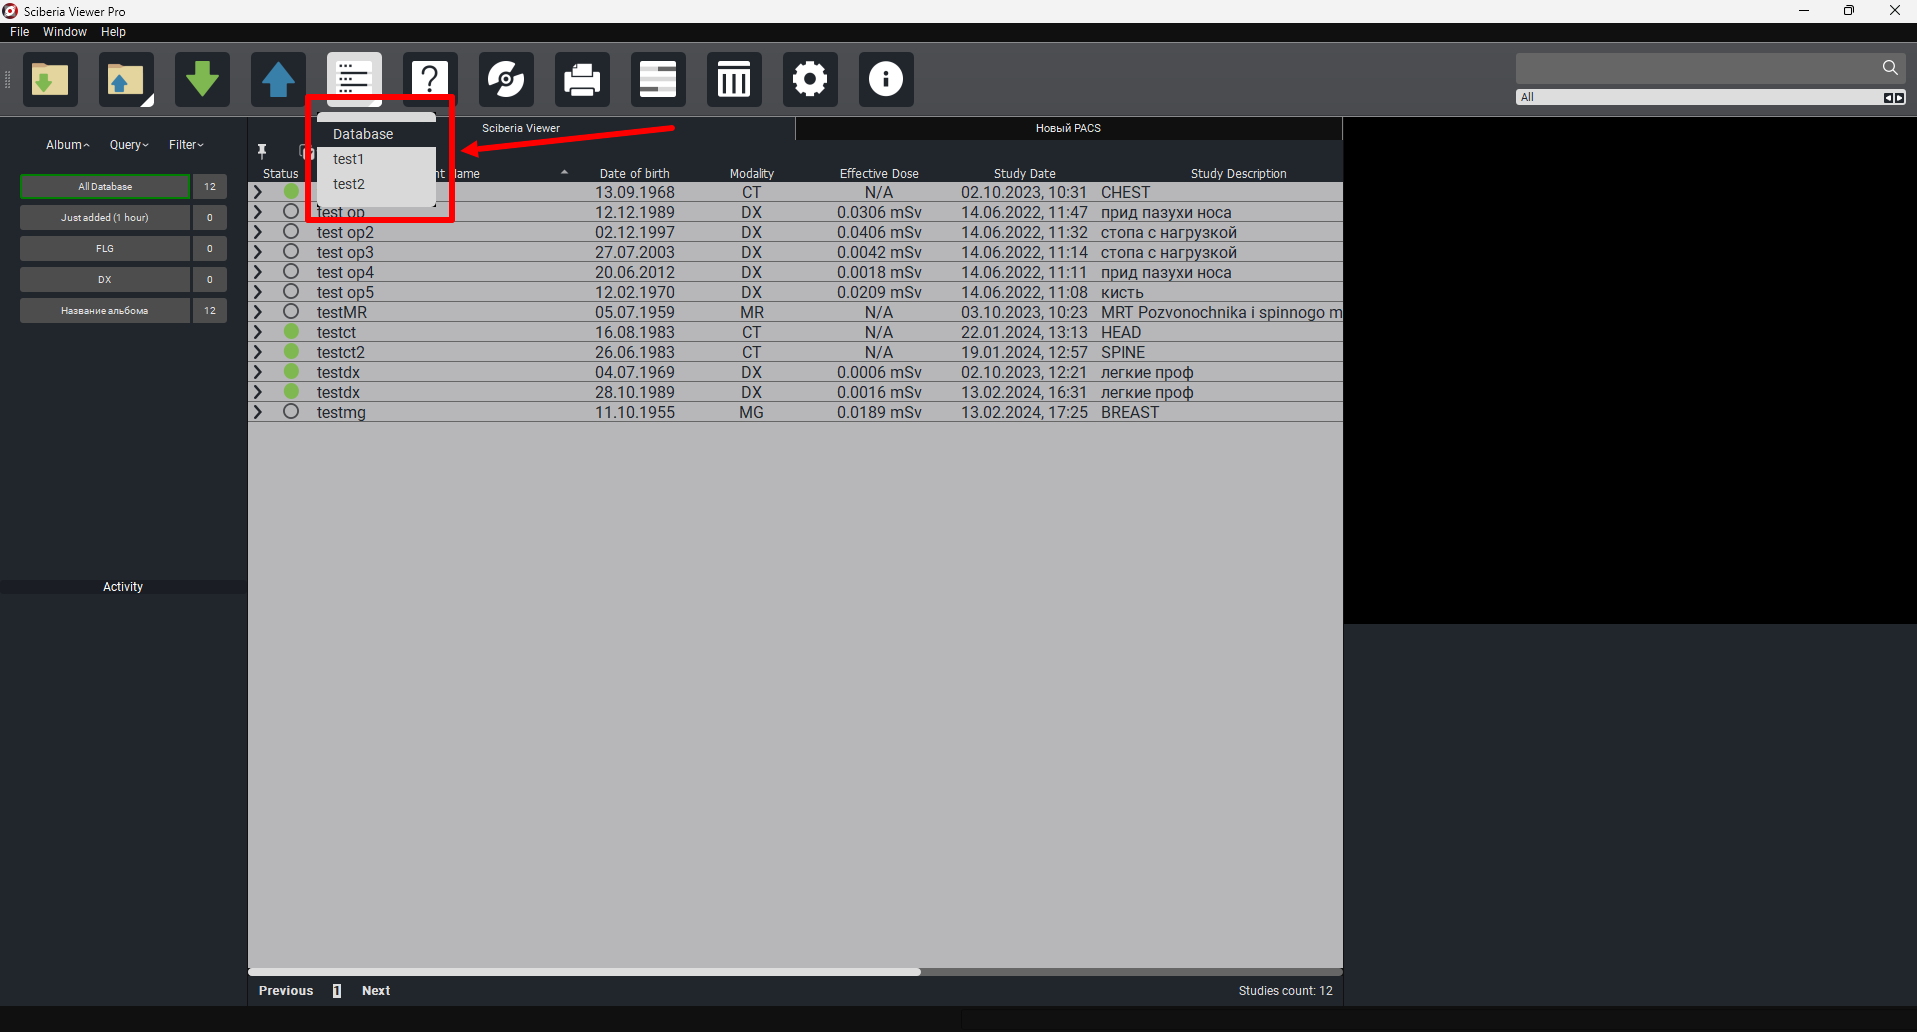
Note
You need to preconfigure the sources in the settings. To do this, simply click on the «Settings»  button in the main window. (The connection is described in section 7.2 of this guide).
3.2. Local Import
3.3. Import from PACS Server
To import from the PACS server:
Click on the «Request» button.
In the window that appears, in the «PACS Name» column, enter the name of the PACS server, in the «AETitle» column, enter the AETitle of the PACS server,in the «PACS Server Address» column, enter the IP address of the PACS server and check the box next to the study name.
Click on the «Request» button.
To request a study, either select the time/date (on the right side of the screen), or select the study modality, or find the patient by name, ID, date of birth, or description, by clicking on the corresponding button above the search field (on the left side of the screen), and entering the appropriate information in the search field.Then click on the «Request» button.
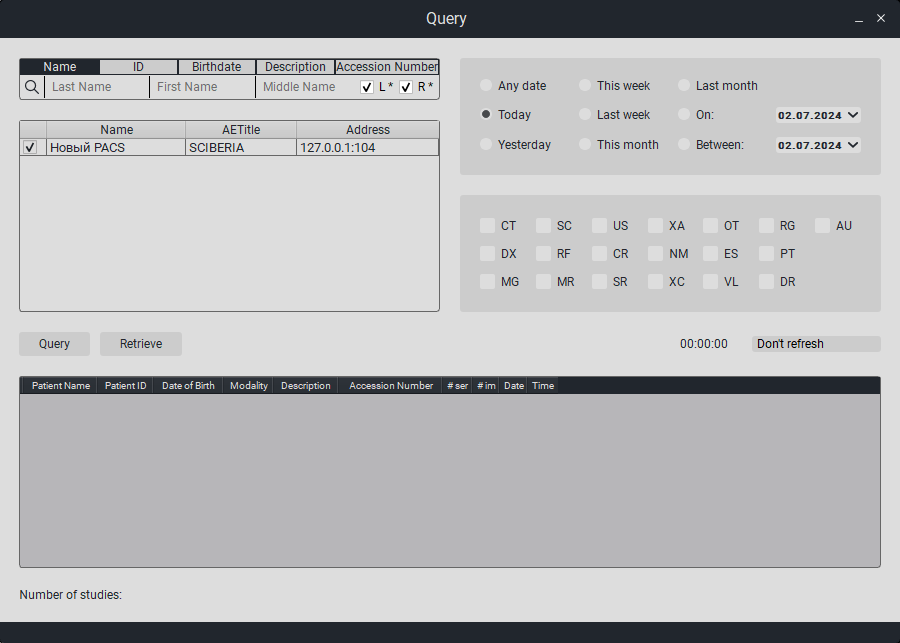
Studies matching the request will appear at the bottom of the table.
Below the modality list is a field for setting the update interval (5 sec., 10 sec., etc.).
The imported study will appear in the table in the main Sciberia Viewer window.
3.4. Export from PACS Server
To export from the PACS server:
Click on the «Request» button.
In the window that appears, in the «PACS Name» column, select the name of the PACS server, in the «Date» column, select the date the study was uploaded to the PACS server, in the «Modality» column, select the study modality.
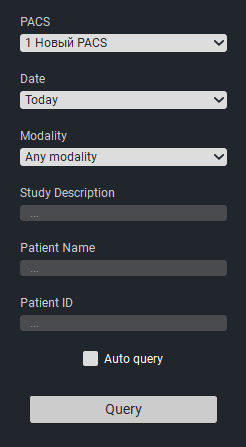
Click on the «Request» button.
Studies matching the request parameters will appear in the table.Select the desired study and click on the «Import» button.
The imported study will appear in the table in the main Sciberia Viewer window.
4. Saving Studies Locally on the Workstation
5. Sending Studies to PACS Server and Modules
5.1. Sending Studies to PACS Server
To send a study to the PACS server, select the desired study and click on the «Send» button
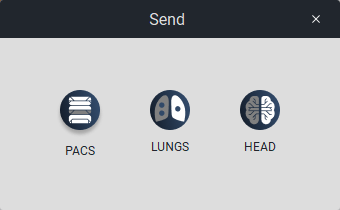
. In the window that appears, select «PACS» or the required module for processing chest organ studies - «LUNGS» and brain studies - «HEAD».
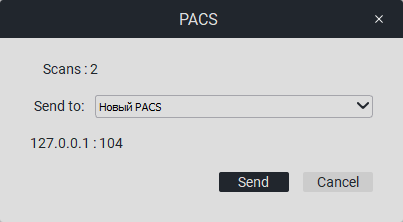
When you click on «PACS», a window will appear with the number of images and a list of connected PACS servers (you can connect a PACS server in the settings).
Select the desired PACS server and click on the «Send» button.
5.2. Sending Studies to Sciberia Lungs/Sciberia Head Modules
To send a study to the Sciberia Lungs/Sciberia Head processing module, select the desired study and click on the «Send» button
. In the window that appears, select the required module for processing chest organ studies - «LUNGS» and brain studies - «HEAD».
When you click on «LUNGS» or «HEAD», the following window will appear:
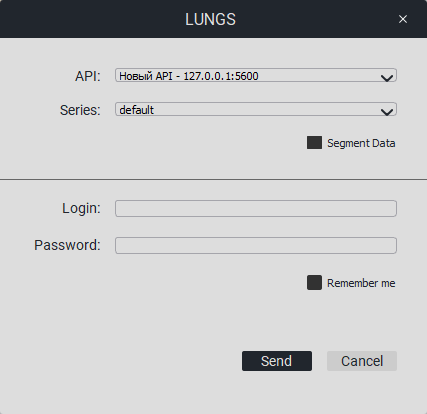
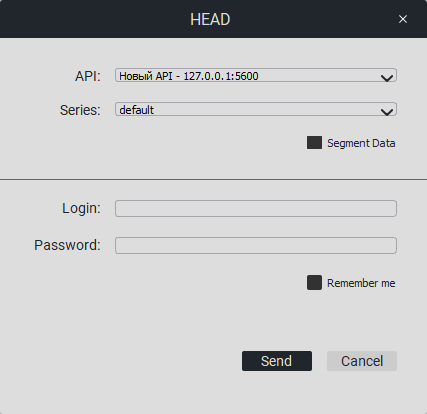
Select the API and the necessary series from the list, enter the API login and password. You can check the «Remember me» box.Click on the «Send» button.
Note
Sciberia Lungs and Sciberia Head modules are available for an additional fee.
Note
The guides for using the modules are available at: Sciberia Lungs, Sciberia Head.
6. Working with the Study
6.1. Viewing Metadata
6.2. Anonymizing the Study
To anonymize, select the desired study (or multiple studies) and click the button «Anonymize»
.
By default, you can choose to anonymize the following study tags: Study Description, Institution Name, Patient’s Name, Patient ID, Patient’s Sex, Series Description, Institution Address, Patient’s Birth Date.
If the required cell is not present, click on the empty field, select the desired cell from the dropdown list, then click the plus button.
Select the desired cells you want to anonymize (in the field «Empty Value» you can write what you want to replace it with) and click the corresponding button.
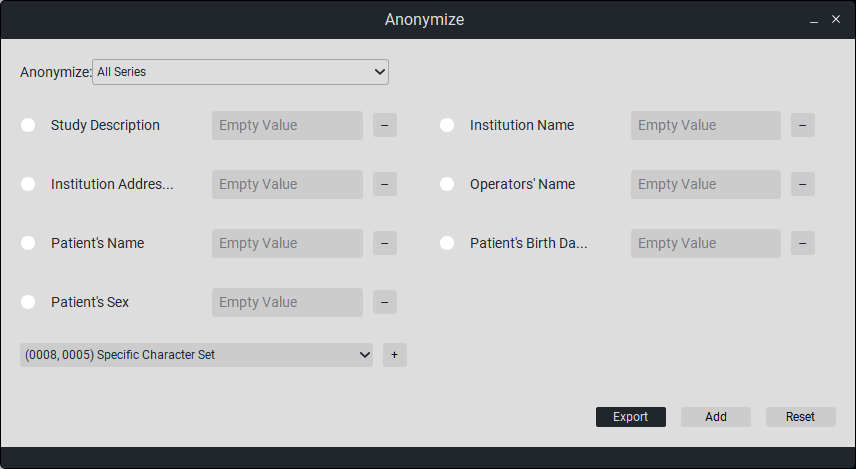
At the bottom, there are 4 buttons:
Buttons
Reset - cancel anonymization.
Replace - replace the selected study with the anonymized one.
Add - add the anonymized study to the viewer window.
Export - export (save) the anonymized study.
6.3. Writing to Disk
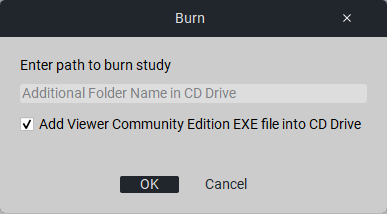
To write the study to disk, click the button «Write». In the field «Write study to disk» enter the name of the folder on the disk where you want to write. Click the button «Ok».
6.4. Detailed Study View
6.4.1. Selecting Another Series for Viewing
To select another series, from the right sidebar menu with the list of all series, select the desired one and drag it to the desired window while holding the left mouse button.
6.4.2. Tools for Scaling and Moving the Image
6.4.3. Resetting the Viewing Window to Initial State
6.4.4 MPR
Button |
Description |
||
|---|---|---|---|
Left Mouse Button Mode |
Clicking brings up a list of modes for the left mouse button function. |
||
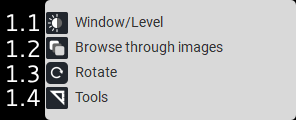
|
|||
1.1. |
Window/Level |
Mode for adjusting brightness levels by holding the left mouse button. |
|
1.2. |
Image Scrolling |
Mode for scrolling through images by holding the left mouse button. |
|
1.3. |
Rotate Image |
Image rotation mode by holding down the left mouse button. |
|
1.4. |
Tools |
Mode for zooming in and out by holding the left mouse button. |
|
|
|||
Reset |
Resets the view window to its initial state. |
||
Hounsfield Window Selection for CT |
Hounsfield density ranges for CT modalities. |
||
|
|||
Ruler |
Selects the ruler tool. |
||
Tool Selection |
Selects a tool. |
||
|
Rotation Axes |
Enable or disable the display of rotation axes. |
|
|
Rotate Both Axes |
Enable or disable simultaneous rotation of both axes. |
|
|
Projection Mode |
Displays the selected projection mode. |
|

|
|||
8.1. |
MPR |
Multiplanar reconstruction mode. |
|
8.2. |
MIP |
Maximum intensity projection. |
|
8.3. |
MinIP |
Minimum intensity projection. |
|
8.4. |
Mean |
Mean intensity projection. |
|
|
Slice Thickness |
Select slice thickness. |
|
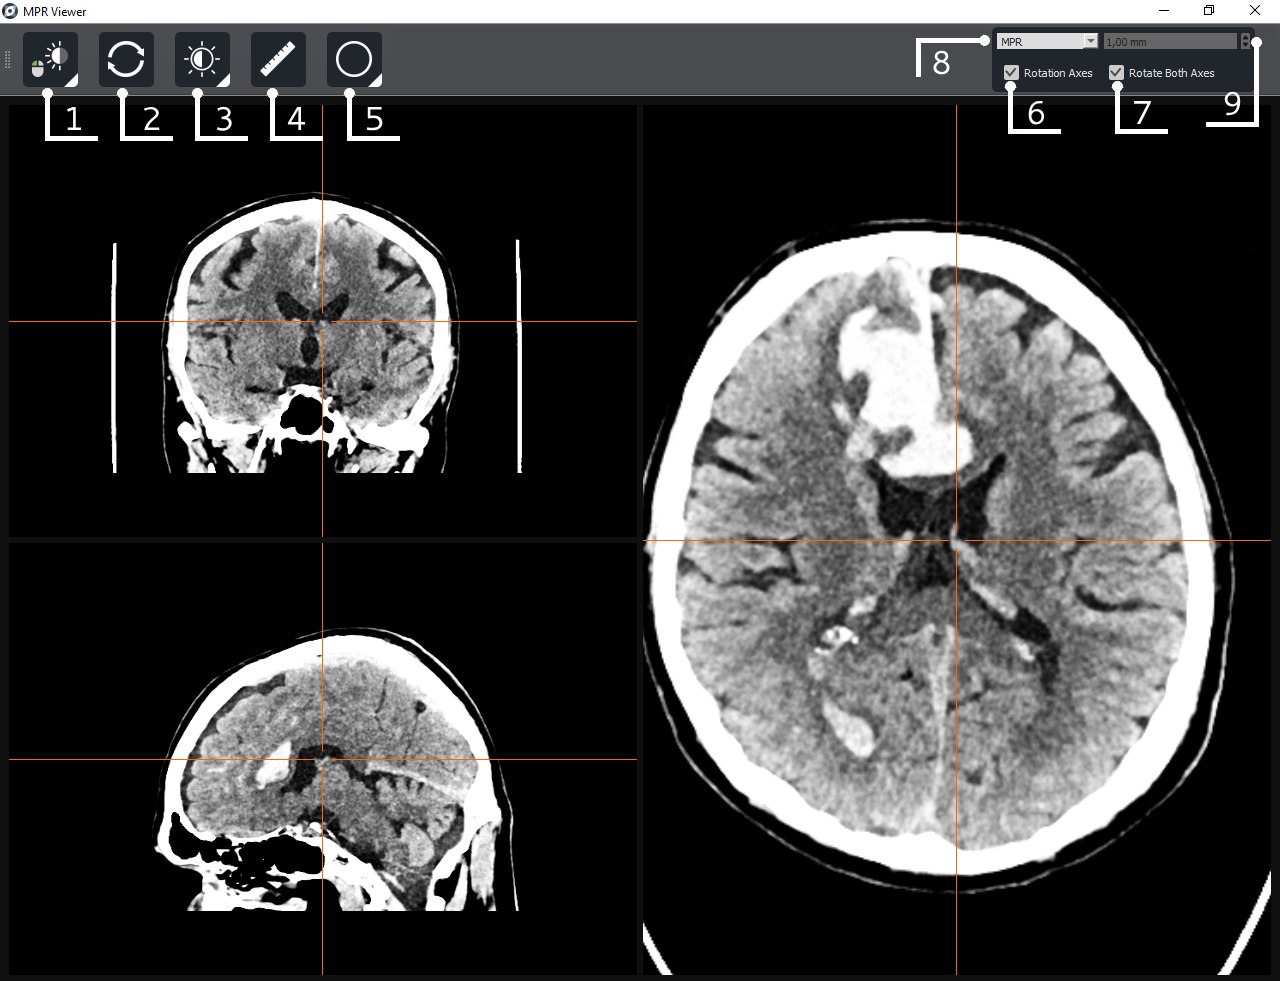
By default, three projection windows are presented: axial, frontal, sagittal. Move around the image using the right mouse button. To rotate along the axes, hover over the corresponding line until the cursor changes to  and drag it while holding it down to the desired position. When hovering over the center of the lines, the cursor will change to
  , then, by holding down the left mouse button, you can move the center of the axes.
6.4.5. 3D Reconstruction Mode
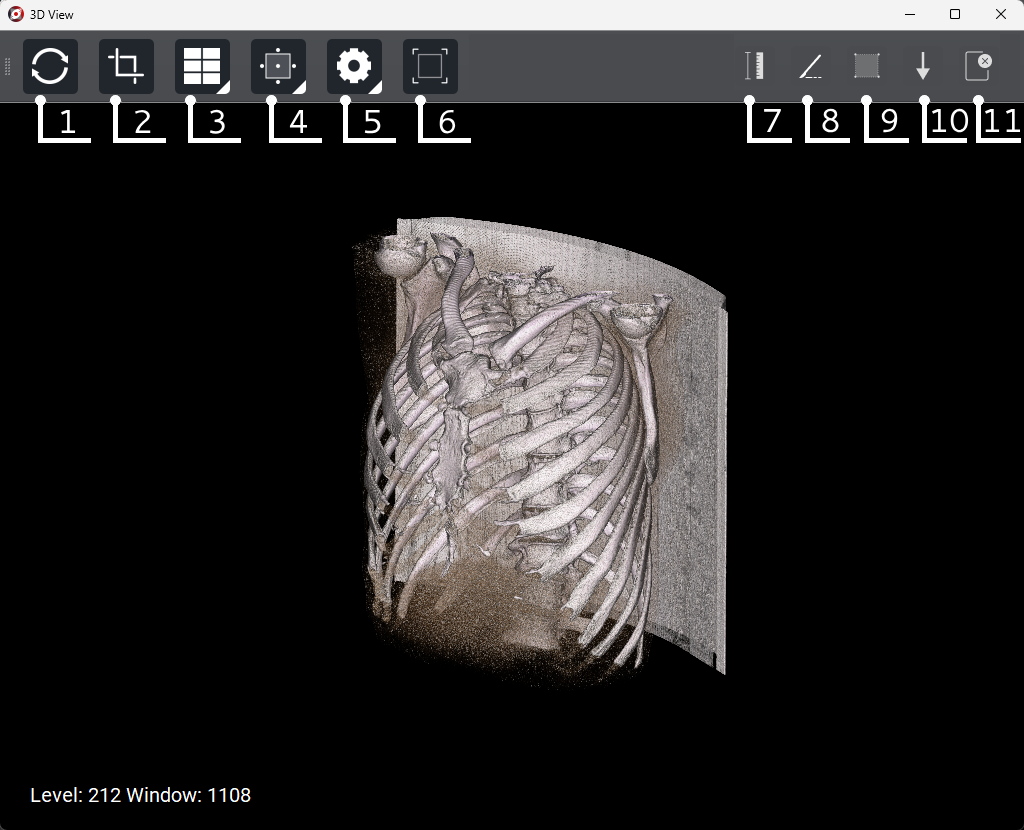
Button |
Description |
||
|---|---|---|---|
Reset |
Reset the view to the initial state in space. |
||
Crop |
Crop mode by axes. |
||
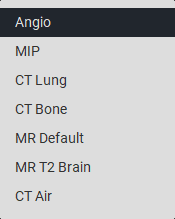
Presets |
Predefined density windows. |
||
|
|||
Segmentation |
Model segmentation. |
||
|
|
||
Settings |
Rendering settings. |
|
|
Screenshot |
Places the frame on the cell for printing. |
||
Ruler |
Ruler tool. |
||
Scalpel |
With the scalpel tool, you can cut any arbitrary part from the model. You can cut both “Inside” and “Outside” the selected area. |
||
Polygonal ruler |
Polygonal ruler tool. To complete the measurement, double-click. |
||
Arrow |
Arrow tool with note. |
||
Remove all tools |
Remove all measurements from the frame. |
||
Left mouse button - adjust the density of the image by holding up/down and left/right.
Right mouse button - rotate the model in space.
Middle mouse button - move across the frame.
Mouse wheel - zoom in or out.
6.5. Printing
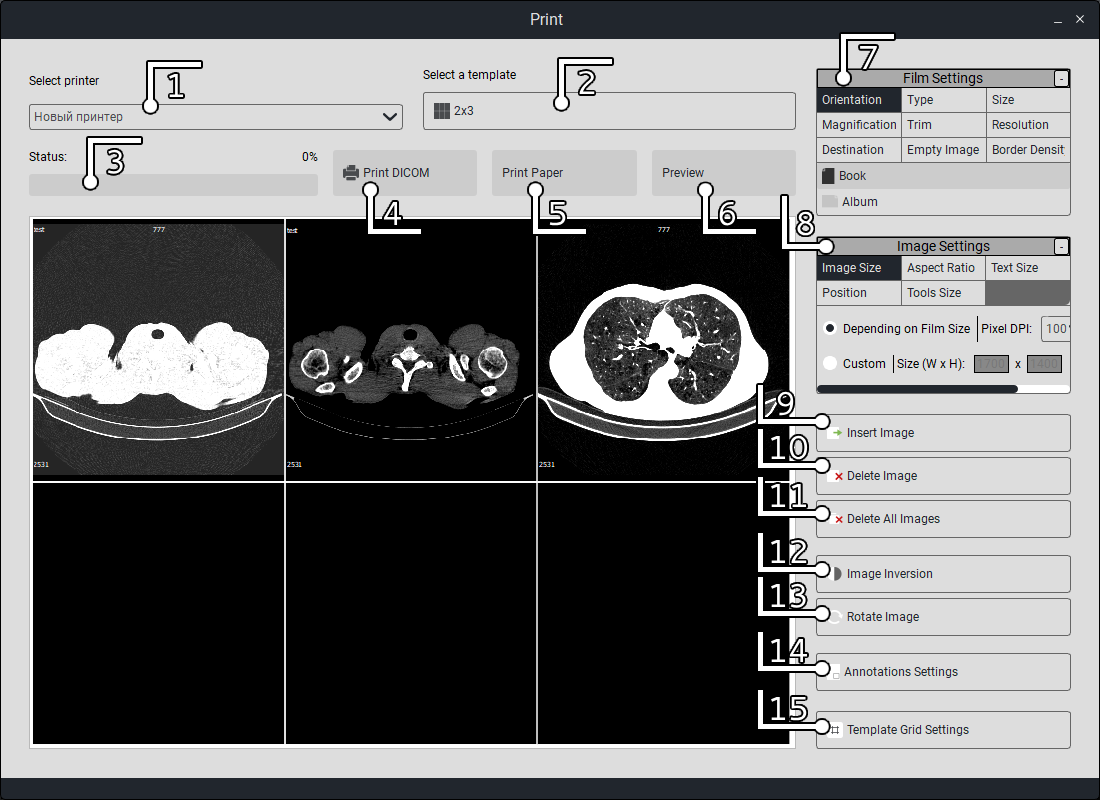
Next, you need to select a window (by clicking with the mouse, after selection, the edges of the selected window will be highlighted in red), right-click twice on the window, and the series will be displayed in the selected window.
Button |
Description |
|---|---|
Select the connected printer from the list. |
|
Select the frame template for layout on the film. |
|
The print status is indicated by a color indicator showing the readiness of the printing process. |
|
Start printing. |
|
Printing on regular paper (not DICOM). |
|
Preview. |
|
Print settings. |
|
Image inversion; |
|
Adding an image to the selected frame, similar to double-clicking on the frame to add. |
|
Remove the selected frame from the film template. |
|
Remove all frames on the film. |
|
Invert the frame. |
|
Rotate the image on the frame. |
|
Print annotation settings. |
|
Print template settings. |
Note
Printers need to be pre-configured in the settings; for this, simply press the  «Settings» button in the main window. (connection is described in 7.4. Print Settings of this guide).
Film settings tabs:
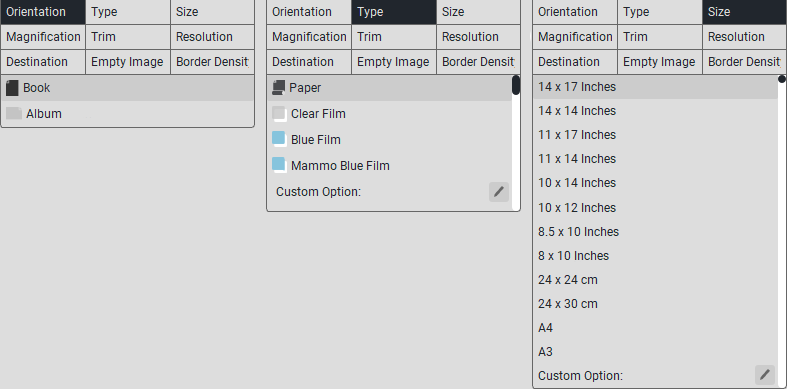
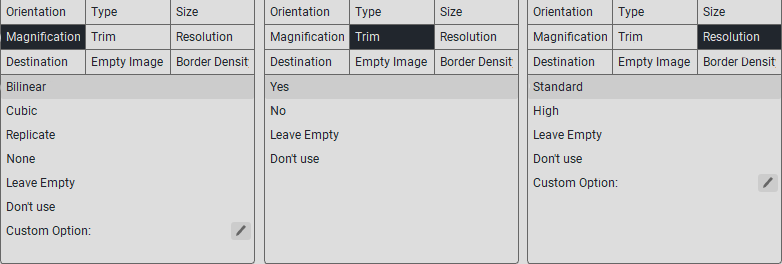
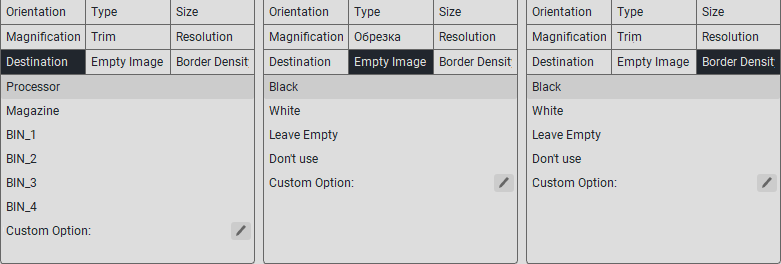
Note
If the parameter you need is not in the specified list, then in the «Custom option:» field, enter the value from the printer documentation.
Image inversion;


To create a caption template, press the «Annotation Settings» button. The following window will appear:
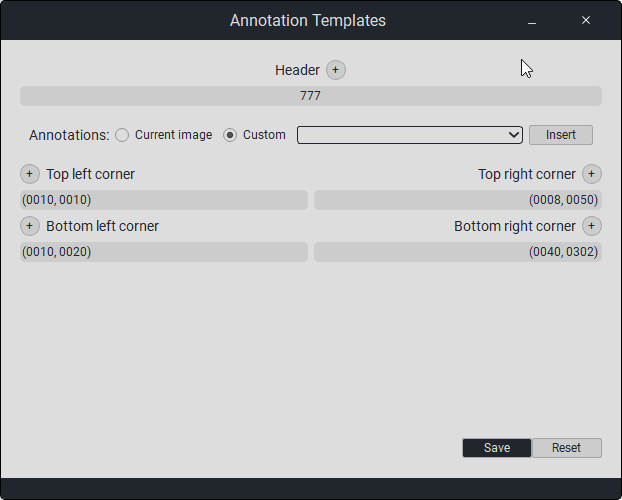
In the «Title» field, click on «+», a new field will appear where you need to enter the title.
In the «Annotations» section, when selecting Scan Annotations, custom annotation modifications will not be available; you can choose from the study’s metadata (tags).You can add them in the empty field, and after selecting, you need to click the Insert button.When selecting Custom, custom annotation modifications are available:
In the «Top/Bottom Left» field, click on «+», a new field will appear where you need to enter the text that will be displayed in the top left/bottom left corner.
In the «Top/Bottom Right» field, click on «+», a new field will appear where you need to enter the text that will be displayed in the top right/bottom right corner.
To save the changes, press the «Save» button, otherwise press «Reset».
7. Settings
To open the settings window, press the  «Settings» button in the main window. The window shown below will open:
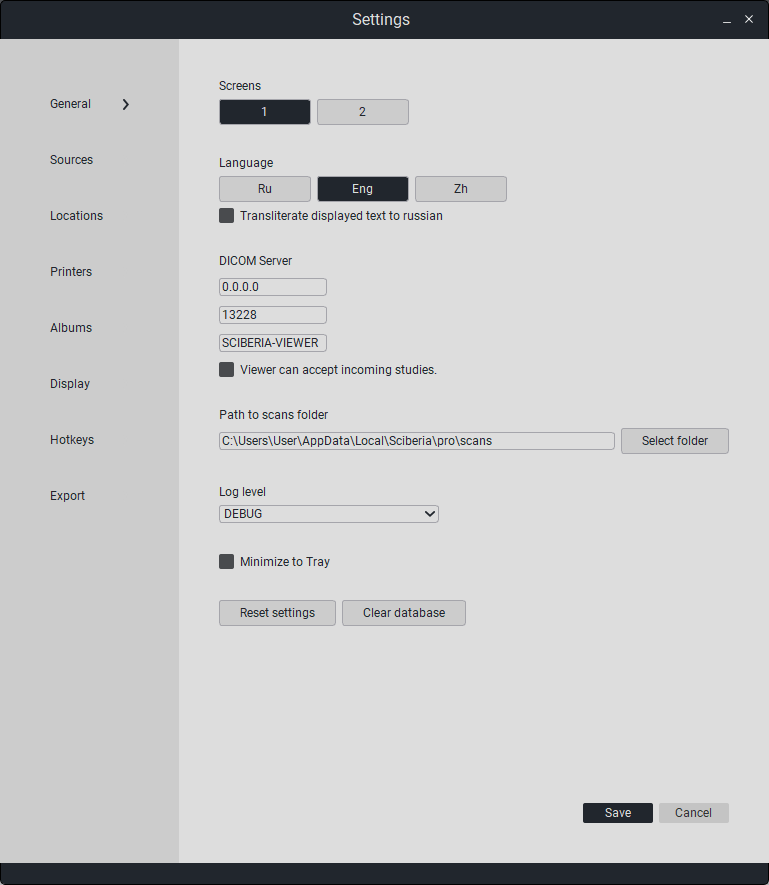
The list of settings sections is displayed on the left side of the window:
«General»” - main settings.
«Sources» - database settings.
«Location“ - PACS and API connection settings.
«Printers» - study print settings.
«Albums» - album settings.
«Interface» - interface settings.
«Hotkeys» - hotkey settings.
7.1. General settings

This section contains settings for:
«Number of monitors» - the number of additionally connected monitors (the maximum allowable number of open screens is 3).
«Language» - language (Russian/English).
«DICOM server» - DICOM mode setting.
«0.0.0.0» - specifies the IP address of the viewer for the C-MOVE transfer method, as well as for the study reception mode.
«13228» - port for study reception mode.
«SCIBERIA-VIEWER» - AE-title for study reception mode.
«The viewer can receive studies» - enable mini-PACS mode to receive studies.
«Path to image folder» - specifies the path to the folder where downloaded studies will be stored.
«Logging level» - select the logging level.
Minimize to tray» - allows you to minimize the program to the tray when closing the program.
«Viewer IP Address (for C-Move)» - connection IP address.
«Reset settings» - reset all viewer settings.
«Clear database» - delete all downloaded studies from the database.
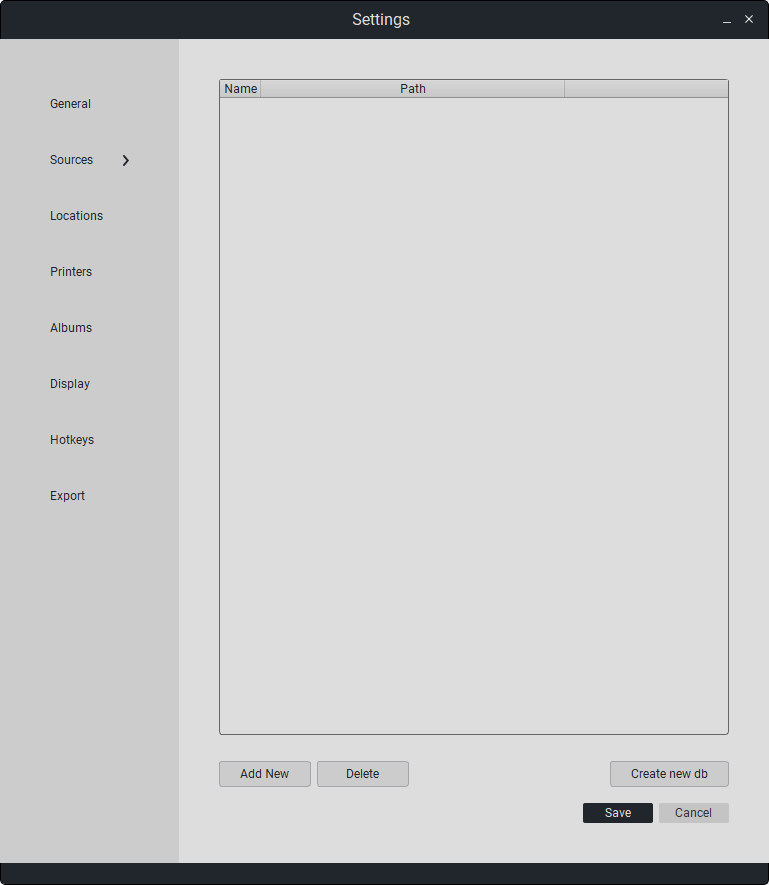
7.2. Source Settings
This section provides management of study lists from various sources.
Sources are a feature that allows convenient navigation between different desktops and Sciberia products.
7.2.1. Creating a Database
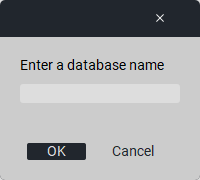
To create a new workspace, click the «Create new db» button, enter a name, and click «Save».
The new database will appear in the list with the specified name and file location.
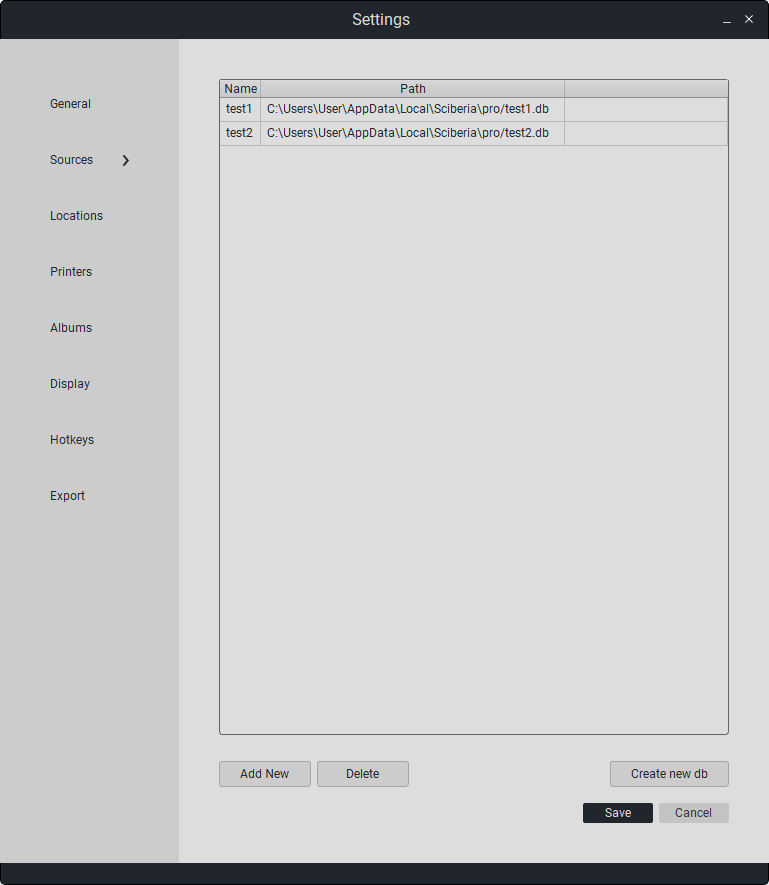
To set a database as the default, check the «Default» box. Thus, the selected database will automatically start when Sciberia Viewer is launched. To save changes, click «Save», otherwise click «Cancel».
The created database is displayed in the «Sources» section in the main program window. The new database can be used as a separate workspace and to save studies.

7.2.2. Working with Databases
The ‘Database’ feature in Sciberia Viewer not only allows working in a separate window but also seamless transition between different Sciberia products. Sciberia Loader and various editions of Sciberia Viewer support database work, enabling you to save work progress across them. Previously created databases with saved studies are accessible in the «SciberiaWorkspace» folder.
To add a previously formed database, click «Add», then the file manager will appear. Select the previously formed database and click «Open». The new database will appear in the table.
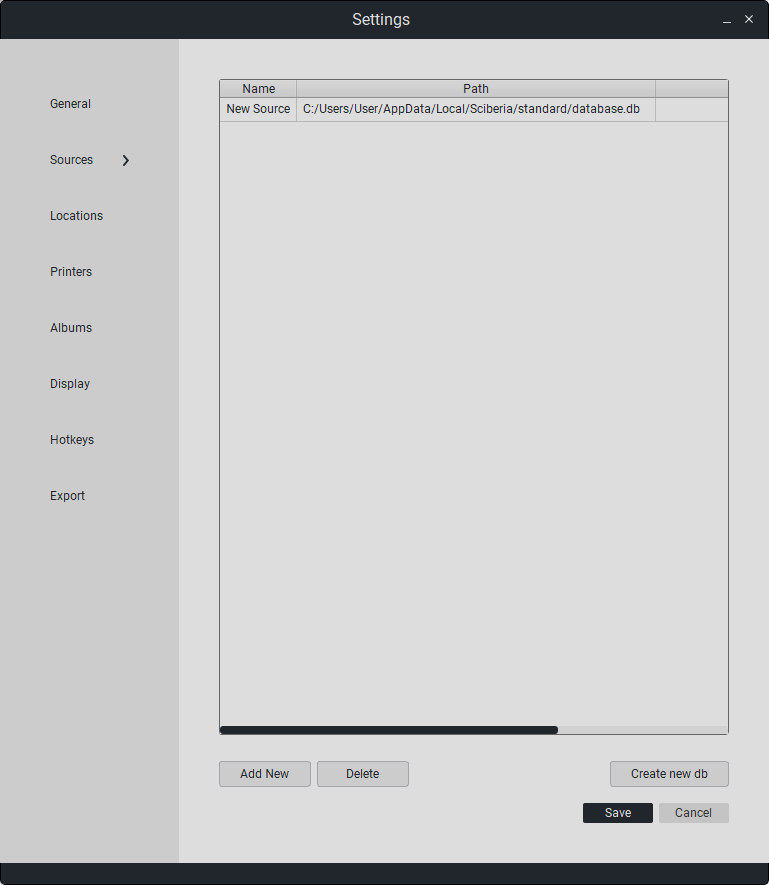
To delete a database, select it in the list with a single left-click and click on «Delete».
To save all changes, click «Save». Otherwise, click «Cancel».
7.3. Connection Settings
This section configures connection parameters to PACS servers and APIs. Besides editing, options for deletion and addition are available.
Double-click on the field to edit the data.
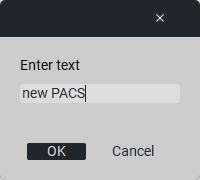
To add a new PACS server or API, click on «Add».
To delete a PACS server or API, click on «Delete».
PACS Parameters:
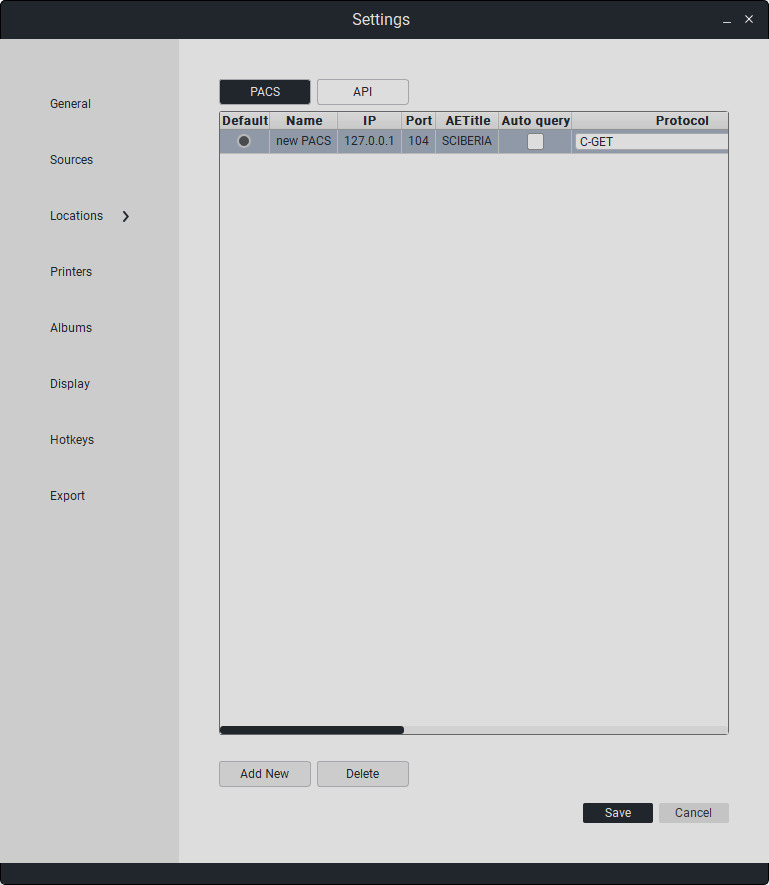
Name |
IP Address |
Port |
AETitle |
Protocol |
Your AETitle |
Receiver Port |
|---|---|---|---|---|---|---|
PACS Server Name |
PACS Server IP Address |
PACS Server Port |
PACS Server AETitle |
Request Type |
User AETitle |
Receiver Port |
API Parameters:
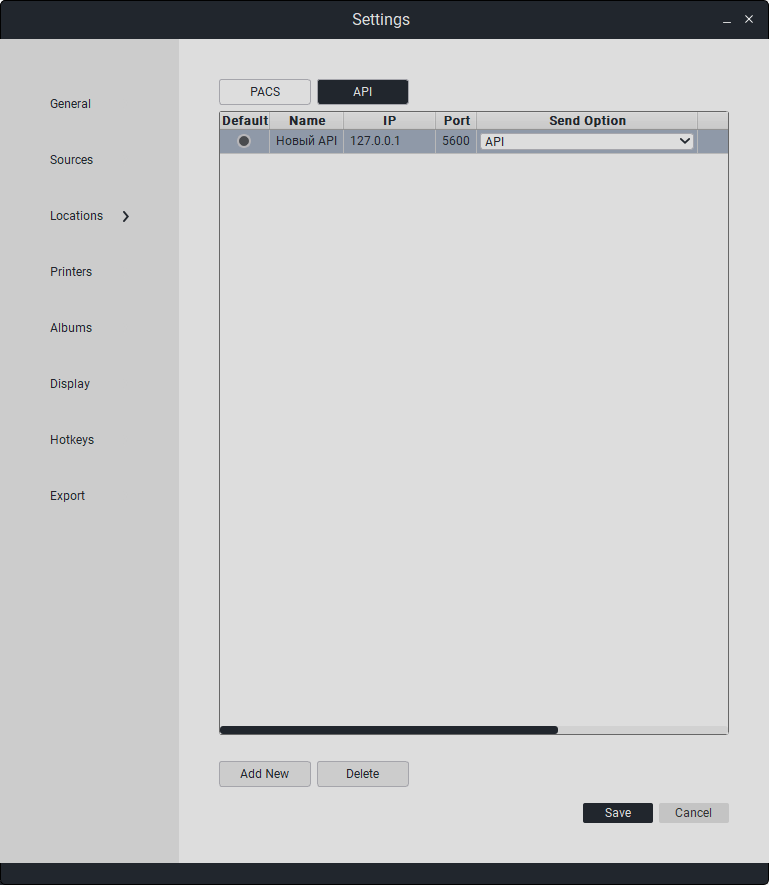
Name |
IP Address |
Port |
Send Option |
Default |
|---|---|---|---|---|
API Name |
API IP Address |
API Port |
API/PACS |
Default API Selection |
“To save changes, click «Save». Otherwise, click «Cancel».”
7.4. Print Settings
This section configures printing parameters for DICOM studies.
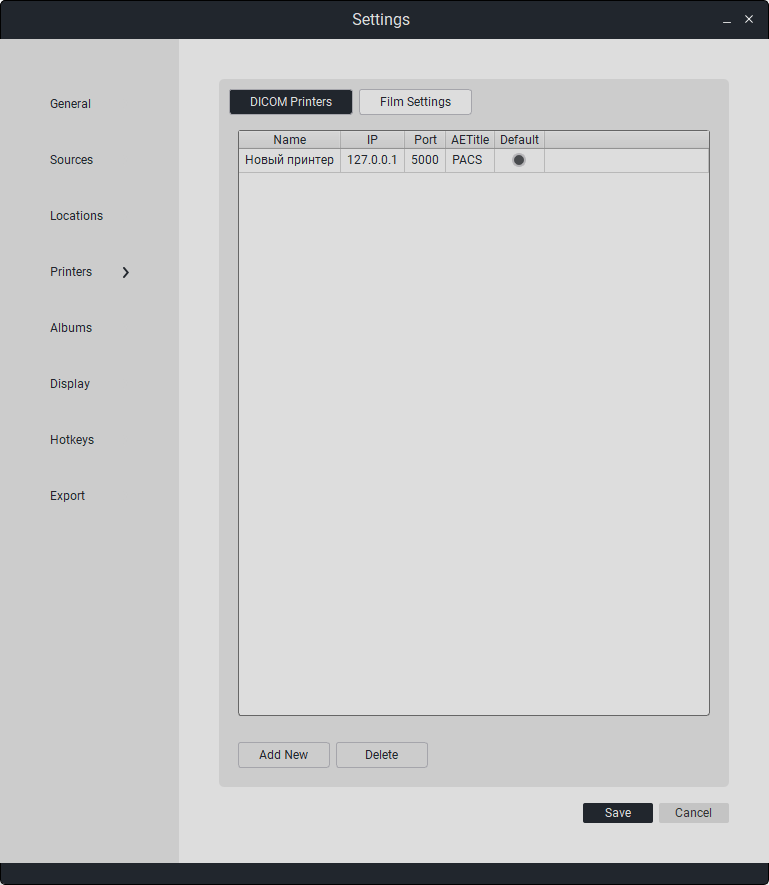
Connected DICOM Printer Parameters:
Name |
IP Address |
Port |
AETitle |
Default |
|---|---|---|---|---|
Printer Name |
Printer IP Address |
Printer Port |
Printer AETitle |
Default Printer Selection |
Besides editing, options for deletion and addition are available.
Double-click on the field to edit the data.
To add a new printer, click on «Add».
To delete a connected printer, click on «Delete».
This section includes categories «Film Type», «Templates», «Film Orientation», and «Film Size».
In «Film Type», select the desired media type from the list: paper, blue film, transparent film.
In «Templates», select a template (from 1x1 to 4x4).
In «Film Orientation», select the desired orientation: portrait or landscape.
In «Film Size», select the film size (8x10 inches, 10x12 inches, etc.).
You can also select:
«Printer Label Templates»;
«Fonts».
To save the changes, press the «Save» button, otherwise press «Reset».
7.4.1. Printer Label Templates
To create a label template, click on the button «Printer Label Templates». The following window will appear:

In the «Title» field, click on «+», a new field will appear where you need to enter the title.
In the «Annotations» section, when selecting Scan Annotations, custom annotation modifications will not be available; you can choose from the study’s metadata (tags).You can add them in the empty field, and after selecting, you need to click the Insert button.When selecting Custom, custom annotation modifications are available:
In the «Top/Bottom Left» field, click on «+», a new field will appear where you need to enter the text that will be displayed in the top left/bottom left corner.
In the «Top/Bottom Right» field, click on «+», a new field will appear where you need to enter the text that will be displayed in the top right/bottom right corner.
To save the changes, press the «Save» button, otherwise press «Reset».
7.4.2. Fonts
«Fonts» - allows user selection of fonts.
To save the changes, press the «Save» button, otherwise press «Reset».
7.5. Album Settings
This section configures album parameters.
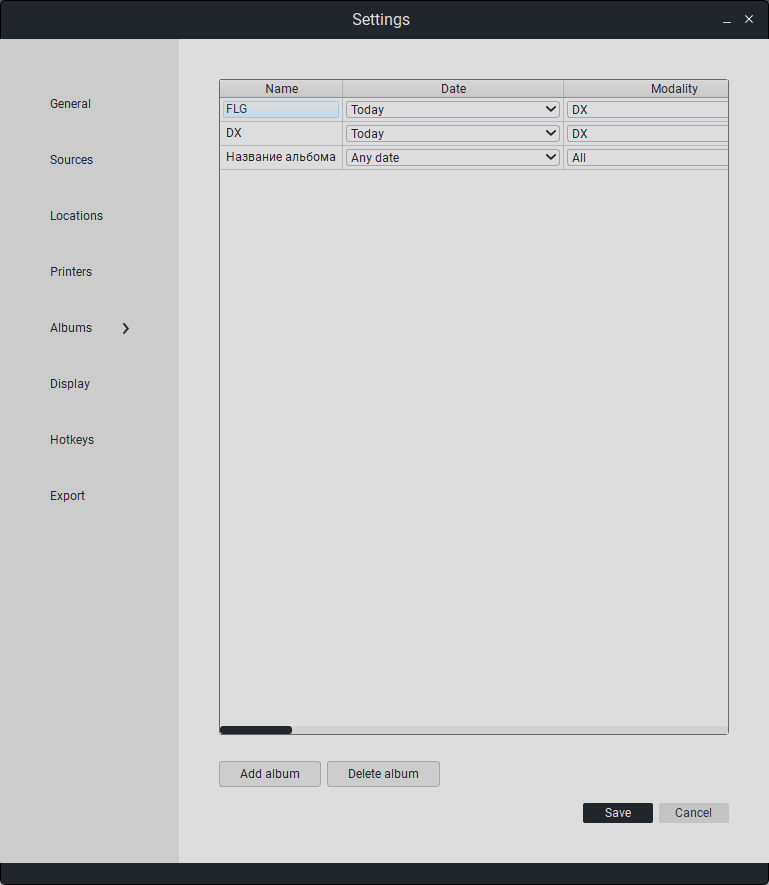
Besides editing, options for deletion and addition are available.
Double-click on the field to edit the data.
To add a new album, click on the button «Add Album».
To delete an album, click on the button «Delete Album».
There is an option to auto-collect studies from the PACS server into an album. To do this, fill in the album parameters:
Description |
|
|---|---|
Name |
Album Name. |
Date |
Time Filter. |
Modality |
Modality Filter. |
Pacs |
PACS server location for study requests. |
Auto |
Optional automation of requests from PACS to the album. |
Period |
PACS server request frequency. |
“To save changes, click «Save». Otherwise, click «Cancel».”
7.6. User Interface Settings
This section configures user interface parameters.
Parameters for the appearance section of Sciberia Viewer:
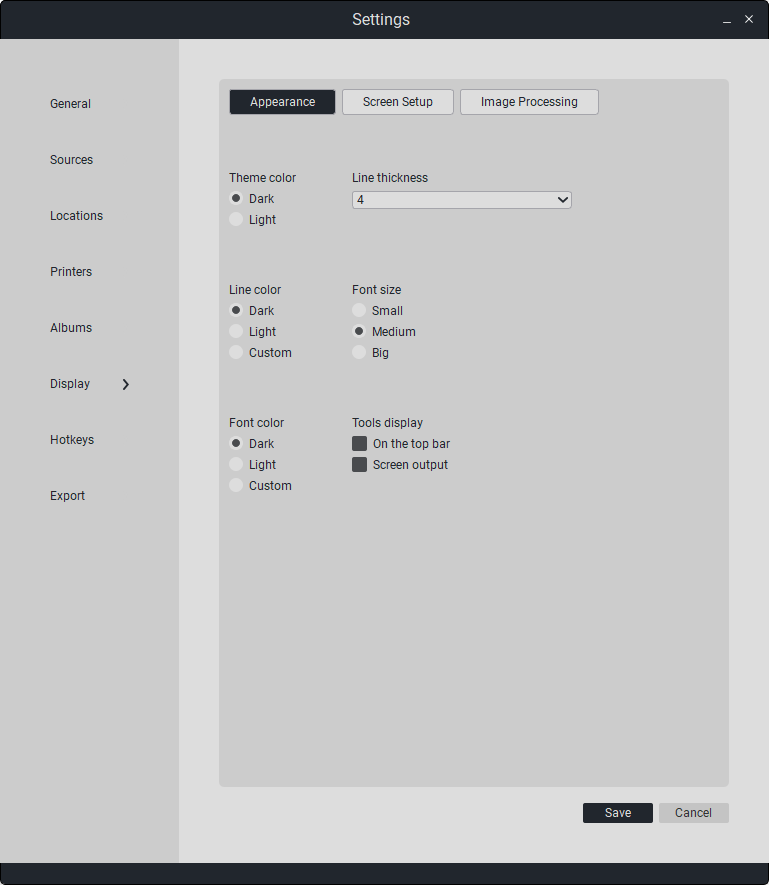
«Theme Color» - theme color (dark/light).
«Line Color» - tool line color (dark/light).
«Tool Thickness» - tool line thickness (from 1 to 6).
Font Color» - font color (dark/light).”
«Font Size» - font size (small/medium/large).
«Tool Display» - tool button display (on top panel/on viewing window).
Parameters for the viewing settings section:
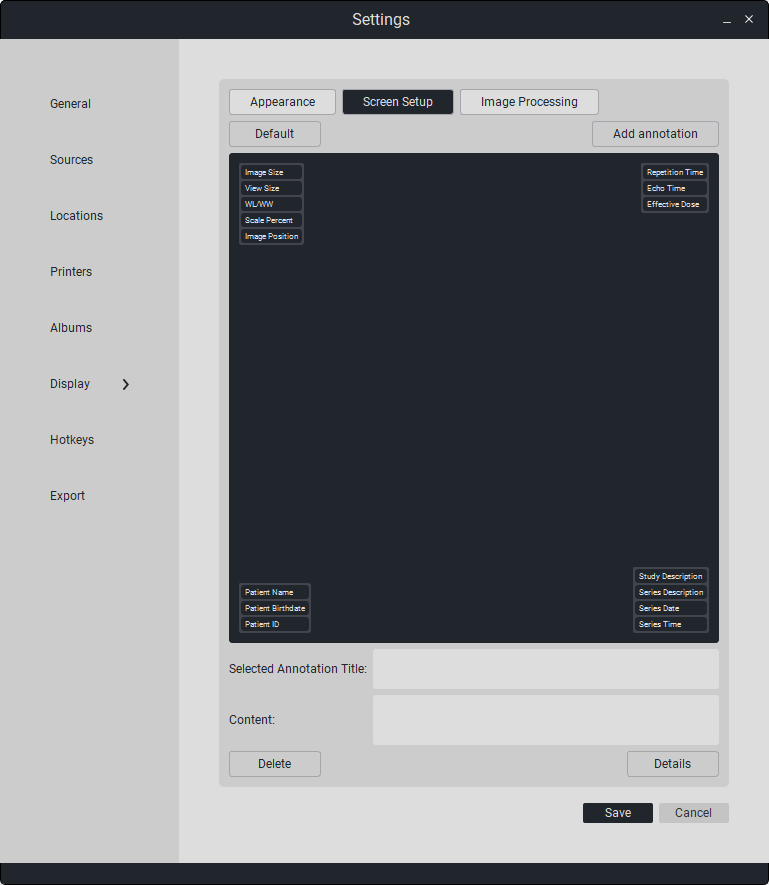
To view information about the current annotations, simply click on the desired annotation. In the field «Selected Annotation Name» the name of the annotation is displayed, and in the field «Content» - the data of the annotation.
To add a new annotation, select the location (click on the corner, numbered from 1 to 4) of the future annotation and click on the button «Add Annotation».
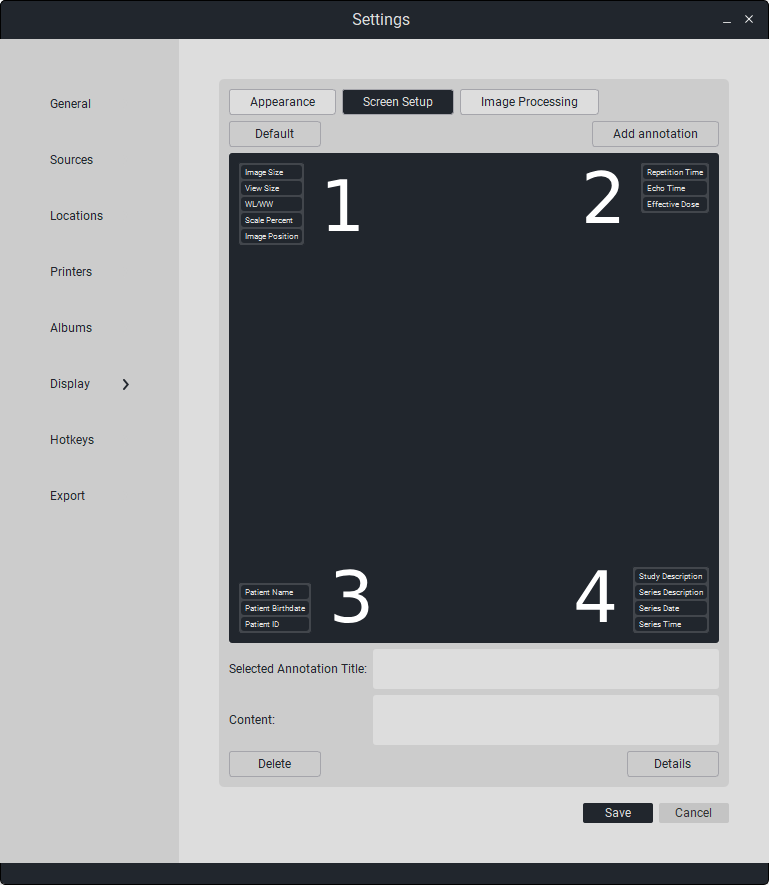
To edit or add data to an annotation, click on the button «Details», then a new window «Detailed Annotation View» will open, as shown below:
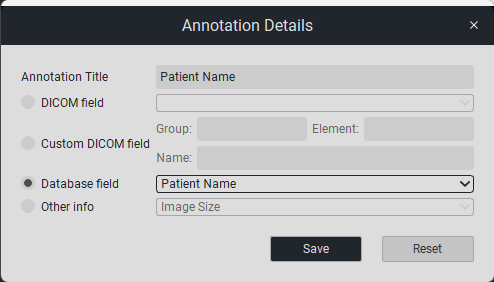
After adding a new annotation, click on the button «Add New Annotation».
“To save changes, click «Save». Otherwise, click «Cancel».”
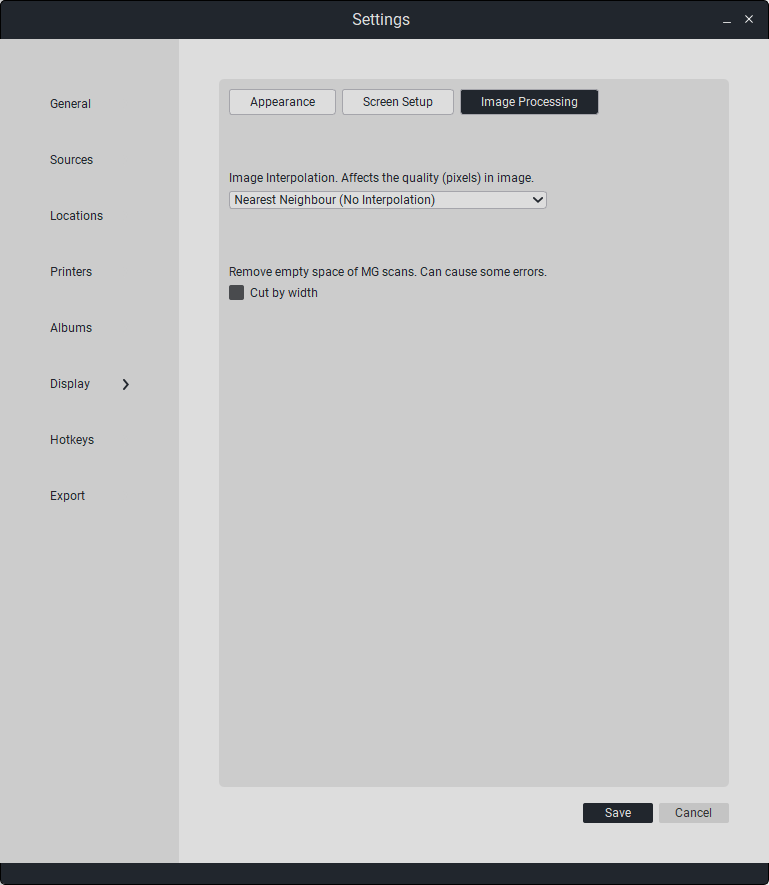
In the “Image Processing” section, you can set smoothing when displaying the image in detailed view, as well as enable the cropping of empty space in mammography.
7.7. Hotkey Settings
This section configures hotkeys for various actions.
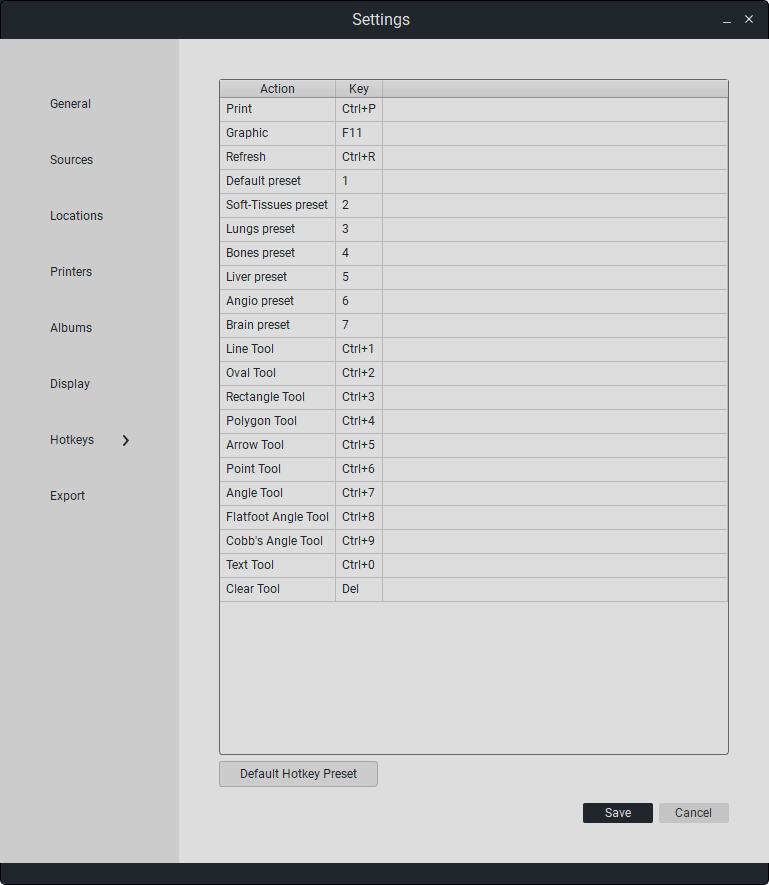
To edit hotkeys, select an action and double-click on the field in the «Key» table, then enter the key combination or define a «hotkey».
To restore default combinations, click on «Default Key Combinations».
“To save changes, click «Save». Otherwise, click «Cancel».”
8. Change History
v1.3.6
Send to API now has option sending to MAMMO module. And it has option to send entire study for the Module
New feature: Batch Send to Print for CT/MR studies (multiple scans)
Burn CD/DVD Disk interface is reworked
Burn CD/DVD for Windows it now displays available size/maximum size and list of DVD drives
Burn CD/DVD for Linux, changed library from mkisofs to xorriso (xorrisofs)
Optimization for studies with SC Modality (Secondary Capture) for them more smooth changing level/window settings
Transliteration function available options updated
Added additional slots for print
Fixed image settings for Print view not being remembered
Fixed incorrect possible display of study for MPR View if its doubled by AcquisitionNumber
Fixed incorrect possible display of study for 3D Volume Rendering Widnow if its doubled by AcquisitionNumber
Reworked settings of Window/Level for 3D Volume Rendering Window
Added additional color/opacity presets for 3D Volume Rendering Window
Added shades and other graphical lighting effects for Segmented Organs (more smooth view) in 3D Volume Rendering Window
Added progress bar when segmenting study in 3D Volume Rendering Window
v1.3.5
Fix incorrect work of templates generator selection (in some cases)
Added test support of chinese translation
Fix possible crashes with some instruments upon canceling/deleting them
Rework scrolling of windows with opened DX studies to be more smooth/stable and less errors
Added option to send to printer via right click context menu
v1.3.3
Download not downloaded scans on attempted downloading same study again
Albums downloads scans from studies if some are missing
Optimized closing Study Detailed Viewer window descreasing lags
Anonymized study data applies to Dicom Printer scans too
Anonymization applies from 3D window too
Sending to API now anonymizes additional data
Further fixes with downloading study and updating it in Study Detailed Viewer
Fixed possible incorrect work of closing window with series in Study Detailed Viewer
Fixed possible incorrect work with updating study when it’s opened and downloading from PACS
MPR toolbar now shouldn’t show context menu on right click
Windowing Button in Study Detailed/MPR now have actions depending on place clicked
File meta (Transfer Syntax UID and etc) from study/series should be now displayed in metadata
Optimization for double click in Main Window in dicomlist to work even with laggy/heavy studies (instead of ignoring until loaded)
Translation fixes
License update
v1.3.1
Fix incorrect work of download from PACS via main window
v1.3.0
Prevent possible crashes when burning CD-ROM
Export as PNG
PACS studies list. Fast Query
Updated license activation window
Design remake
Send to DICOM Printer mechanism rework
Sended image to printer preview
Custom templates grid option
Annotations display on print window (in frames)
Custom annotations now can accept/display multiple dicom tags in one line
Fix possible crashes with annotations when printing
Annotations now rotate with image when rotated
Fixes with scaled image when sended on print view
Translation for DICOM tags in custom annotations edit window
Rotate by mouse
MR fix if localizer missing
Fix mistake when showing 3D cursor on series with same plane (view)
Prevented possible memory leak with instruments
Fix keyboard scrolling scans sometimes not working
Scrolling via keyboard now works via LEFT-RIGHT instead of UP-DOWN
Zoom via UP-DOWN keys
Rotate both axes function (test function)
Fix edit dialog to select all text when editing in tables
v1.2.3
Feat: Search on all parameters in quick search field in Main Window (instead of PatientName only)
Feat: MPR Rotate Window

Increased load of study in detailed view (of CT MR SC modalities)
Added few handling of possible errors when local importing from blocked folders
Reset settings now resets scans path
Deleting cloned studies (anonymized) now shouldn’t remove files unless all studies are deleted
Test version of CTRL + Z (Cancel last added tool)
Reader fixes
Added test handling of font not loading in 3D window when using arrow
Added progress bar for segmentation
v1.2.1
Removed support for DataElements from DB (now they are used only for anonymization).
Fixes in anonymization.
Adding datasets to DB moved to parallel thread. Loading from PACS should now cause less UI freezing.
Studies with the Secondary Capture (SC) modality can now be influenced by Window/Level, but in the range from 0 to 255.
Added a «Create report for Secondary Capture» button.

Redesigned Study Detailed Viewer.
New context menu for detailed study view (menu accessed by right-click).
Displaying SR modality.
Updated default annotations.
Added locator window display (for MR).
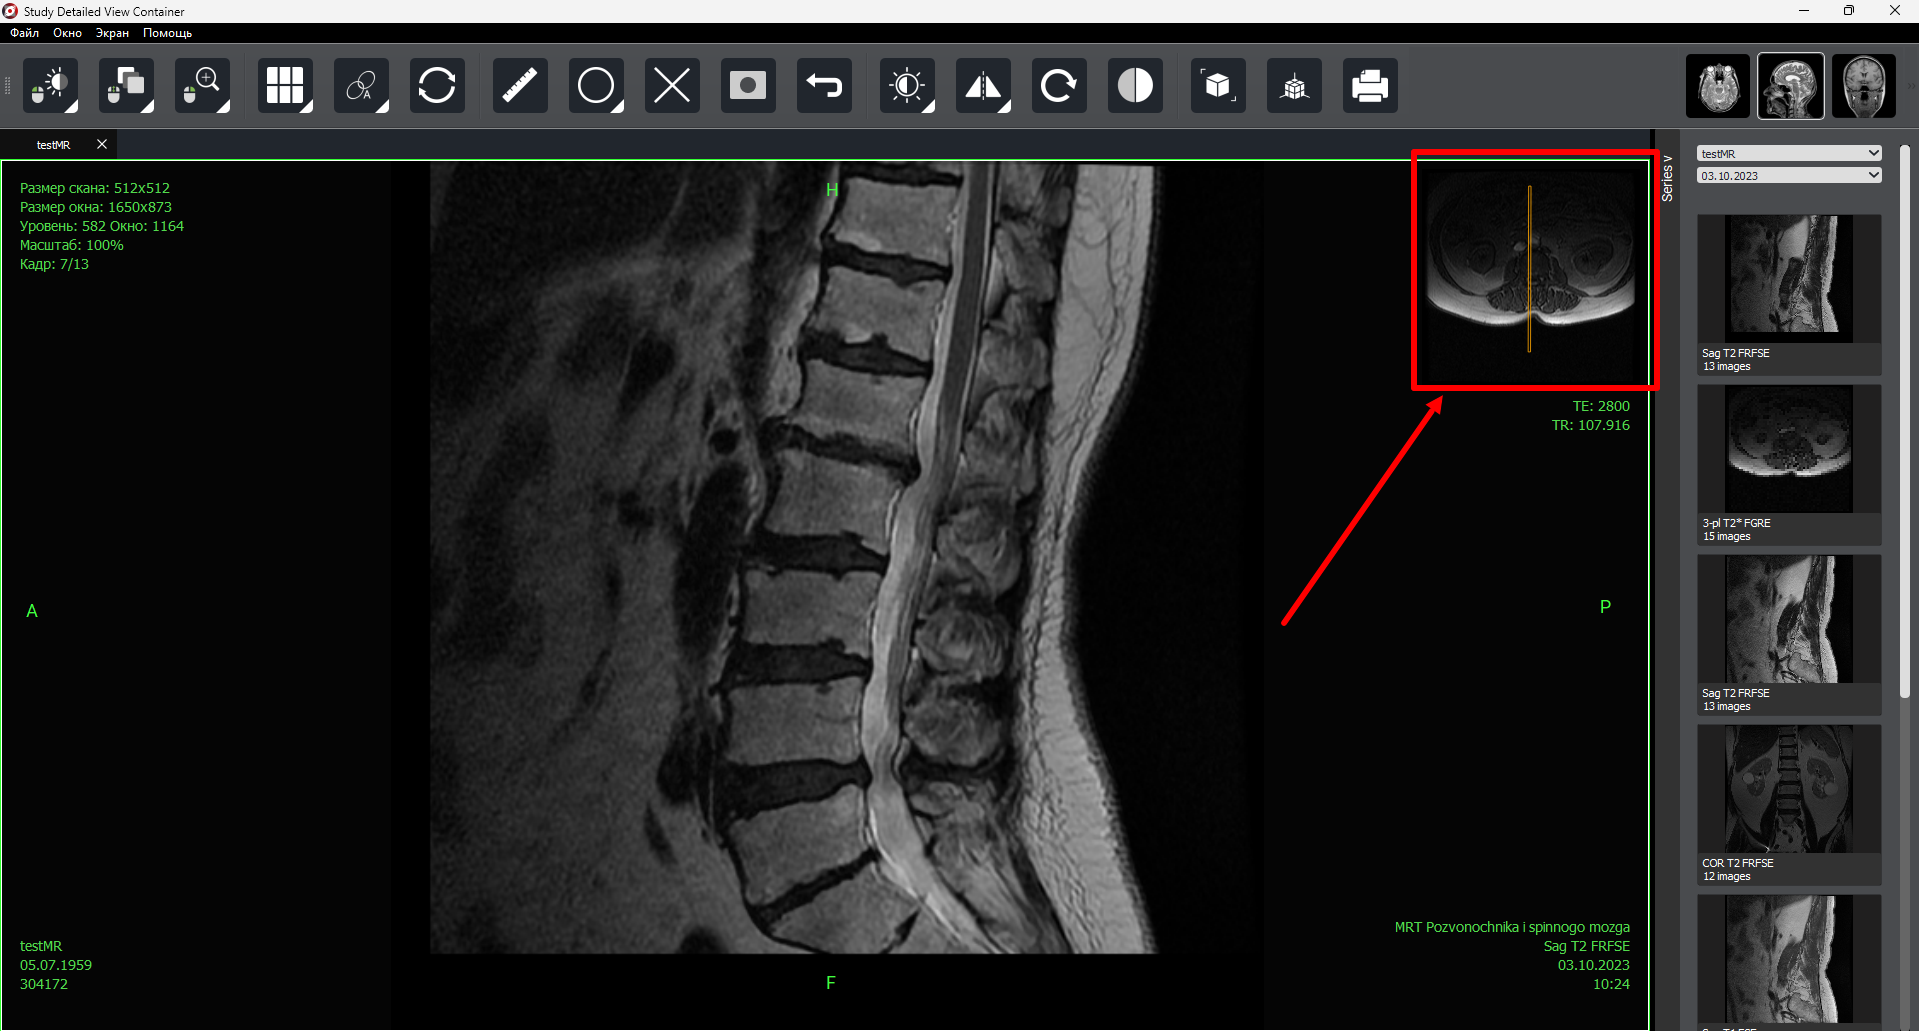
Fixed series panel for +10 study series.
Added quick tool removal (instead of toolbar).

Synchronization of actions across different windows (e.g., when viewing MG on 3 displays).
Added quick scrolling with the mouse for MPR.
Fixed import with file copying.
Fixed window attachment to the screen.
3D now generates a segment separately at the user’s discretion.
3D generation should no longer freeze the interface.
v1.2.0
Significant redesign for large displays.
Fullscreen option.
Added support for multi-frame CT studies.
Increased performance for multi-frame studies (US/CT/MG/RF, etc.).
DicomList columns can now be shown/hidden (configurable).

The study list (patient names) is now transliterated into Russian.
Search by last name/first name/patronymic is now performed separately.
Fix for potential crash during anonymization.
Tools now work in all windows if enabled.
Added font size setting for text attached to tools for the Dicom Printer window (when sending an image to the printer).
Tool text can no longer leave the screen.
Changed the speed of window/level change with the mouse.
Right-click for DicomList (apply actions to a study in the table via right-click).

Image zoom percentage.
Hotkeys for MPR.
Redesign of MPR mechanisms/interface, fewer errors.
Added TE/TR tags for DicomViewer as default values (only for MR).
Fixes for tools in StudyDetailedView.
Added print button through the button in Study Detailed View.
Increased hitbox of GripItem/DirectionGripItem (tool points such as rectangle/line), making them easier to grab.
Tools are now highlighted in black. They should be more visible in the StudyDetailedViewer window.
v1.1.1
Cancellation of receiving a request.
Removal of studies loaded from Query upon cancellation.
Ability to cancel receiving albums.
Ability to cancel sending.
Thread tasks stop when closing the Viewer application.
Anonymization - DB fixes.
Fixed inability to configure annotations in express view.
Fixed incorrect PACS display in default settings.
Fixed potential system freeze in logging.
Mode buttons replaced with a single button that switches modes when clicked.
Study selection in DicomList can also be done via the keyboard.
v1.1.0
In the detailed view window, active modes now switch (image scrolling, window/level, zooming, panning, and 3D cursor).
Added a switch to toggle Axial/Coronal/Sagittal images of a single series.
Added cross-reference lines for CT/SC/MR studies.
Added 3D cursor for CT/SC/MR studies (still working incorrectly).
DicomList (study table) can now be configured for display.
DicomList now supports AccessionNumber fields
Query supports search by AccessionNumber
Validator fix. Responses from PACS with “wrong” characters (ae title) should now be accepted rather than rejected.
Experimental stop loading (extracting) from Query
Added additional film settings for DICOM printer (blank image density, resolution, etc.)
Added custom film settings
Minor changes in export. Export PatientName/StudyDescription/SeriesDescription/
Edited annotation text color and font size are now applied after saving settings, not waiting for a viewer restart
Interpolation settings for images.
Experimental feature: Width cropping of MG scans, removes empty space of MG scans by width, making only breasts visible.
Sending to PACS now uses the transfer syntax from the settings when sending.
Added scan progress display for sending to PACS.
Minor design fixes.
Other possible minor fixes.
Sciberia lib: The database will no longer grow significantly in size when adding a study
Sciberia lib: scans with a NumberOfFrames tag, but it is zero, should now be handled correctly
v1.0.0
Full-featured 3D:
Sciberia Lungs/Head algorithms for 3D model segmentation.
Tools.
Presets.
Undo action (CTRL + Z).
Masks:
Use special SR studies along with CT studies to view masked segments.
Mini-PACS:
Receive studies sent via C-SEND from other DICOM viewers.
Viewer Standard capabilities:
C-MOVE function for query.
MG fixes and player for multi-frame MG study.
Series panel redesign.
Configuration paths redesigned.
Sources.
Other features and bug/localization fixes.














 .The exported study is saved locally on the doctor’s workstation.